Do you want to add a wishlist to your Woocommerce store to help customers save their favorite products quickly? Don’t ignore our blog, in this article, we will give you a detailed guideline to help you effortlessly add wishlist in Woocommerce without difficulties. Let’s check them out.
Why should you add Wishlist to your Woocommerce store?
Sometimes, your customers tend to want to buy products in your Woocommerce store. However, for some reason, they are not ready to buy them. For example, they may be waiting for a discount on their products or they will make a purchase in the future.
But most customers will forget the place where they saw those products. Hence, to help your customers easily save their favorite products on a list, adding a wishlist to your Woocommerce store is a perfect choice for your website.
Additionally, this function will assist your customers to locate which products they want to purchase in the future quickly instead of finding them on your entire Woocommerce store
Moreover, it also allows your customers to share their wishlists with their friends and family. As a result, you will have more opportunities to boost sales and increase traffic for your online store.
How to Add a Wishlist to Your Woocommerce store
In the market, there are countless tools that will help you easily add a wishlist to your Woocommerce store. But in today’s tutorial, we highly recommend using the Yith Woocommerce Wishlist plugin. Since it is one of the most high-quality Woocommerce wishlist plugins that allow your visitors to save their favorite products to a wishlist and share them with their friends.
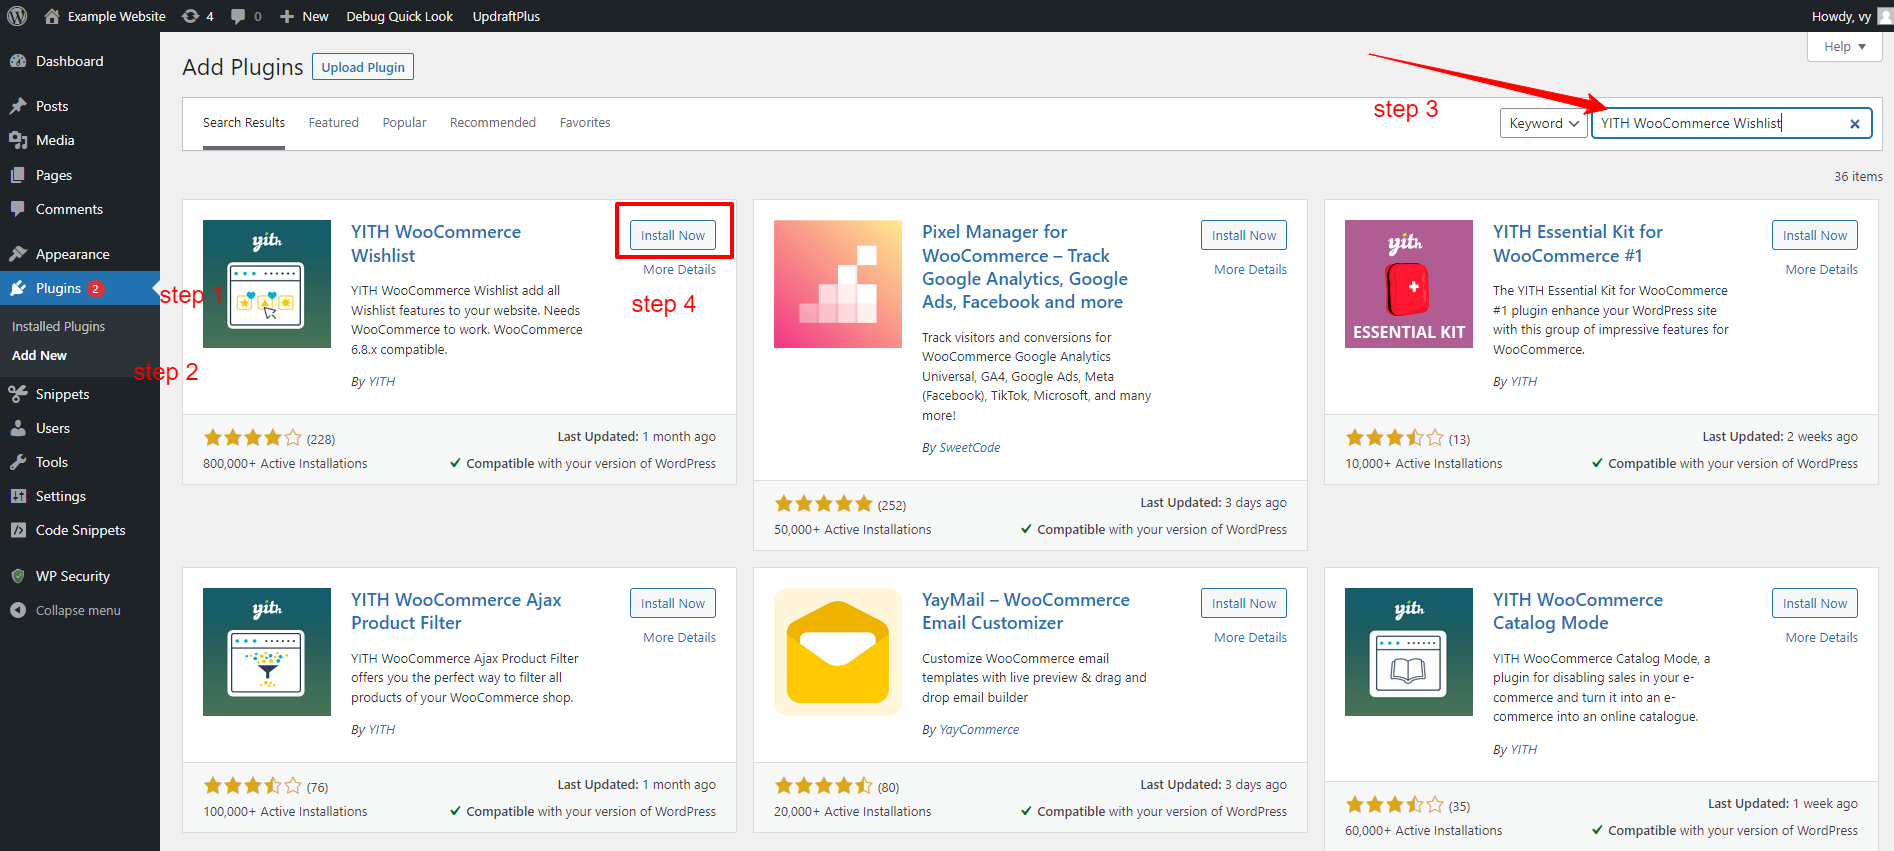
To use this plugin, first of all, you need to install and activate it by going to Plugins > Add New from your WordPress admin panel. Then, type the plugin’s name on the search bar to find the plugin. After that, click on the Install Now button and Activate it.
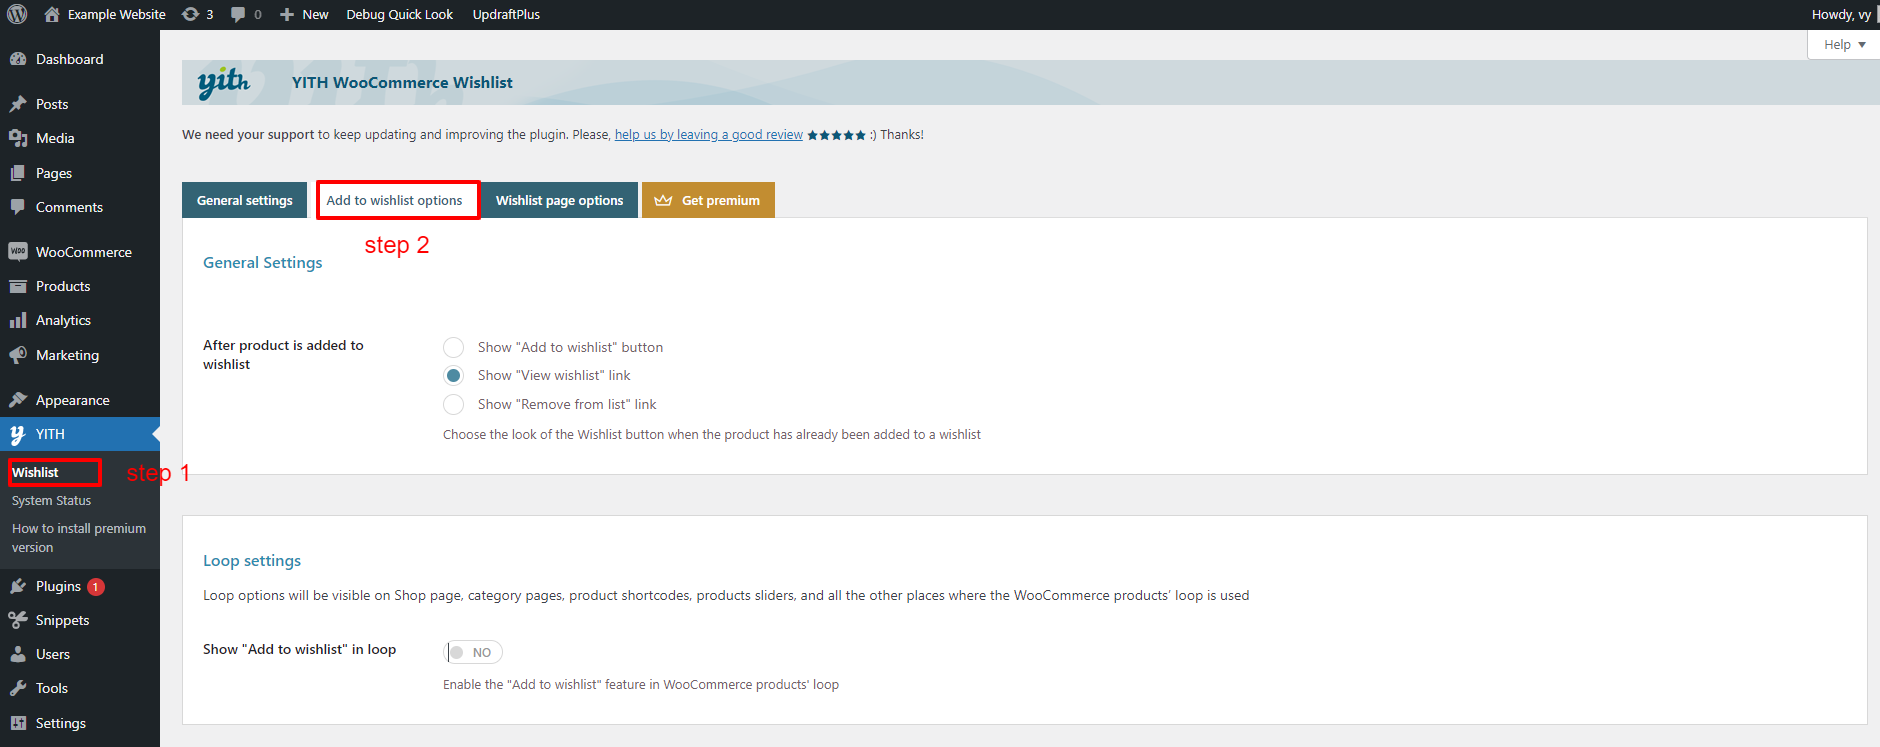
Once the plugin is activated, let’s navigate to YITH > Wishlist from your WordPress dashboard and choose the “Add to wishlist options” tab to configure the plugin.
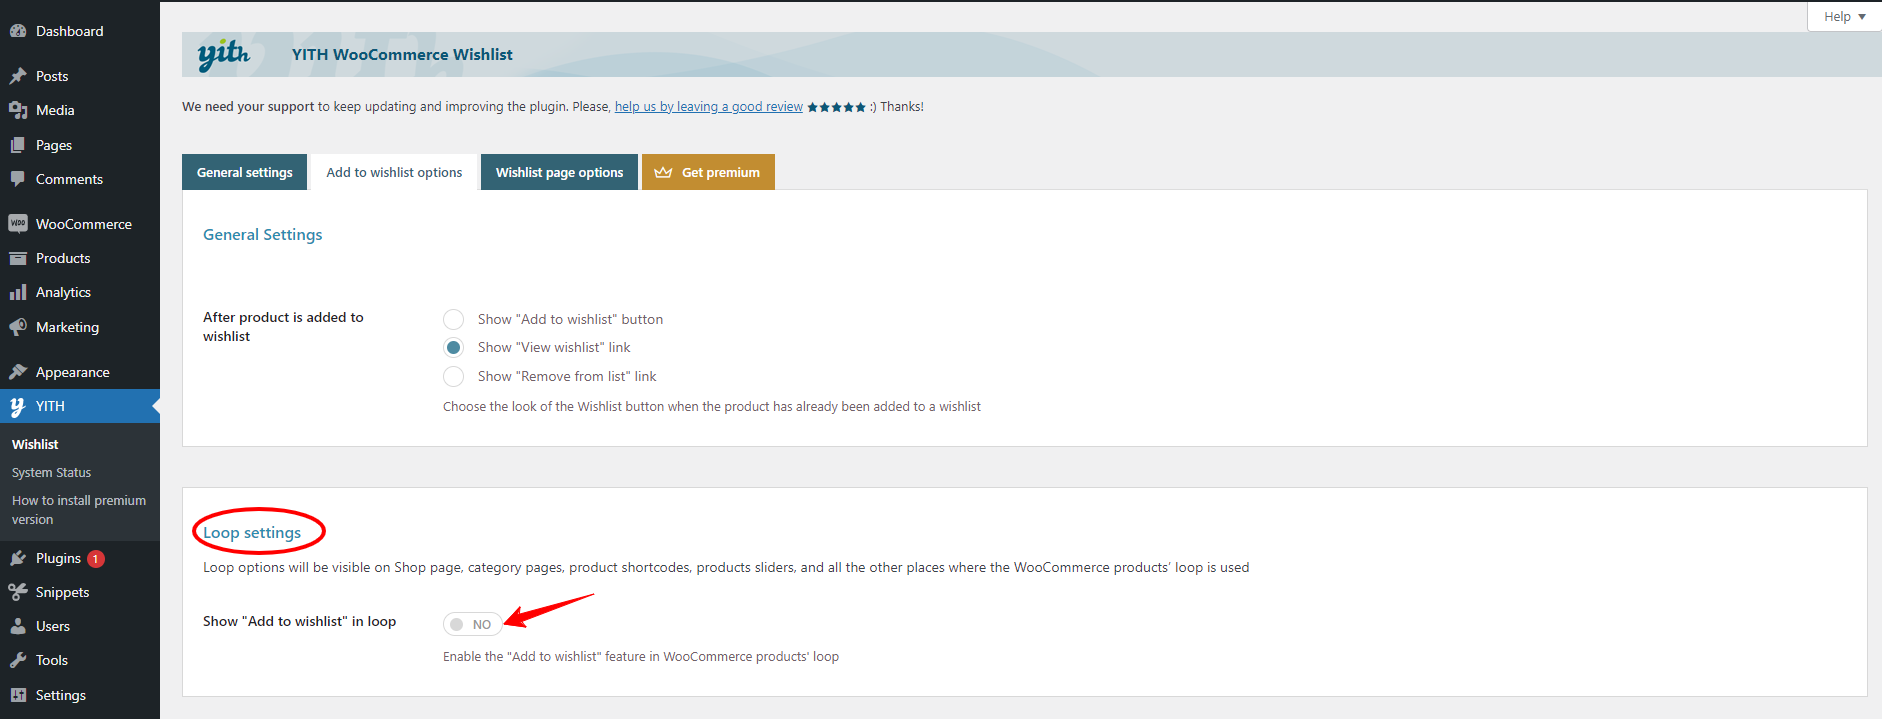
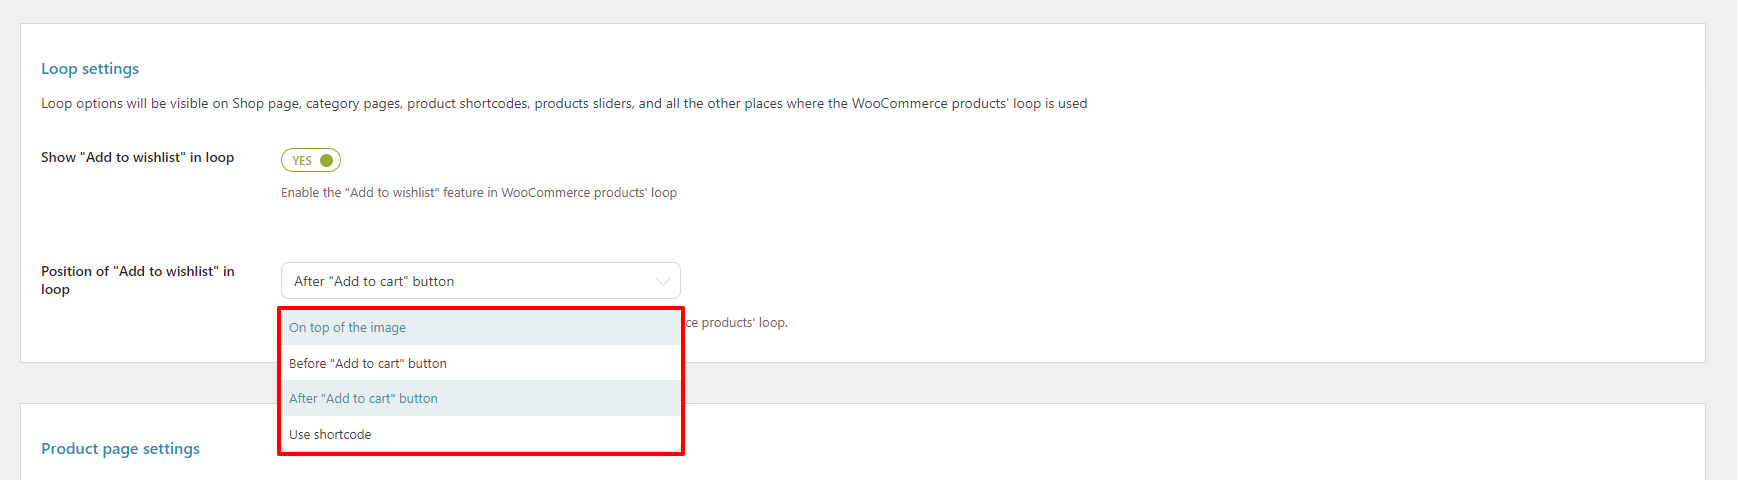
Under the Loop Settings section, let’s enable the Show “Add to wishlist” in the loop option.
After enabling this option, the plugin will display an additional option that allows you to choose the position of “Add to wishlist” in the catalog pages.
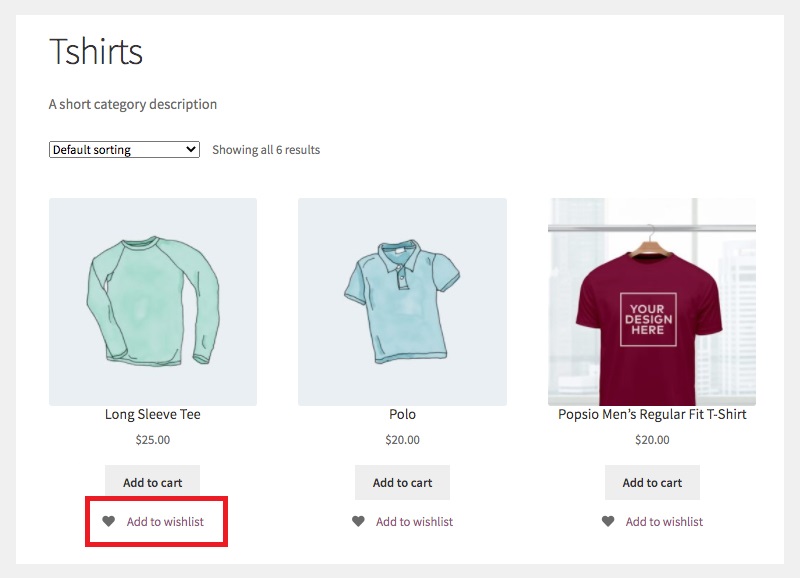
Currently, the default option is After “Add to cart” button. If you maintain this option, then your “Add to wishlist” button will be displayed after the”Add to cart” button as screenshot below.
You can change it to another position by choosing from the drop-down menu.
If you select the “On top of the image” option, then your “Add to wishlist” button will be displayed on the top of the product image on the catalog page.
Now, it’s time to customize the text for your wishlist and edit the color and style of your “Add to wishlist button”.
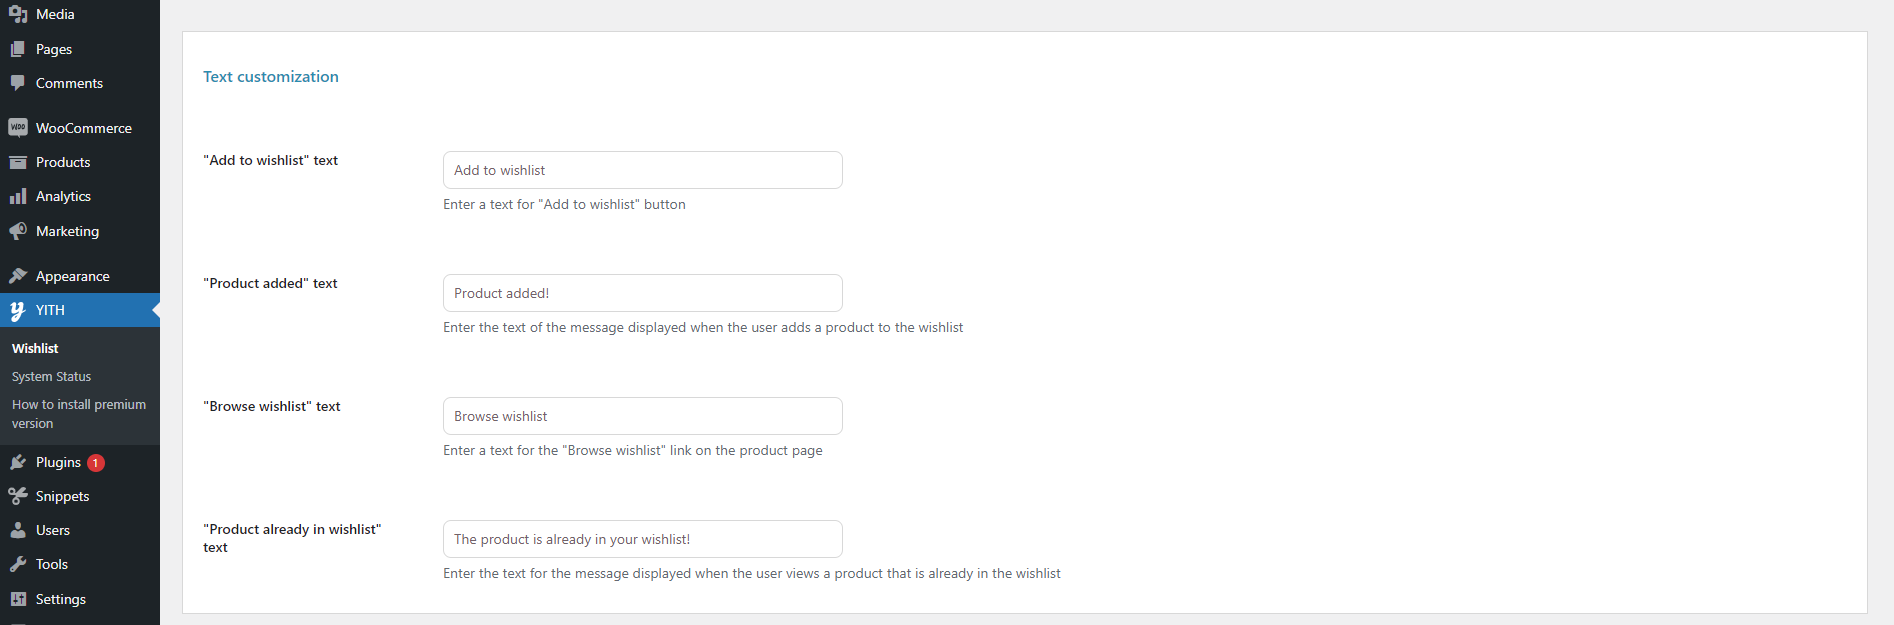
Let’s scroll down to the Text Customization section to edit the various text strings related to the wishlist function.
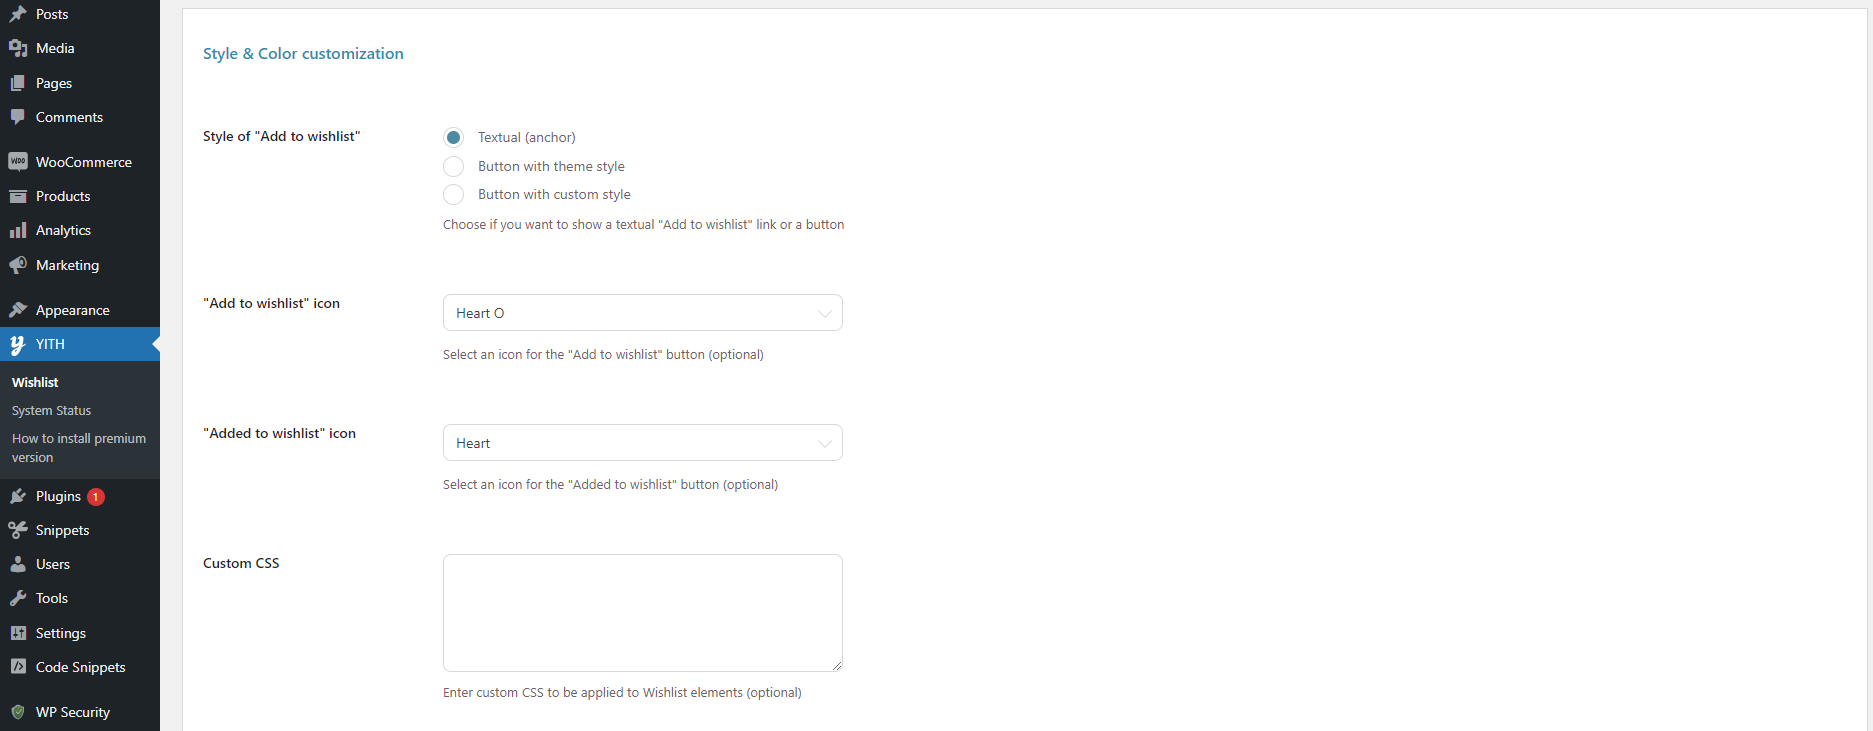
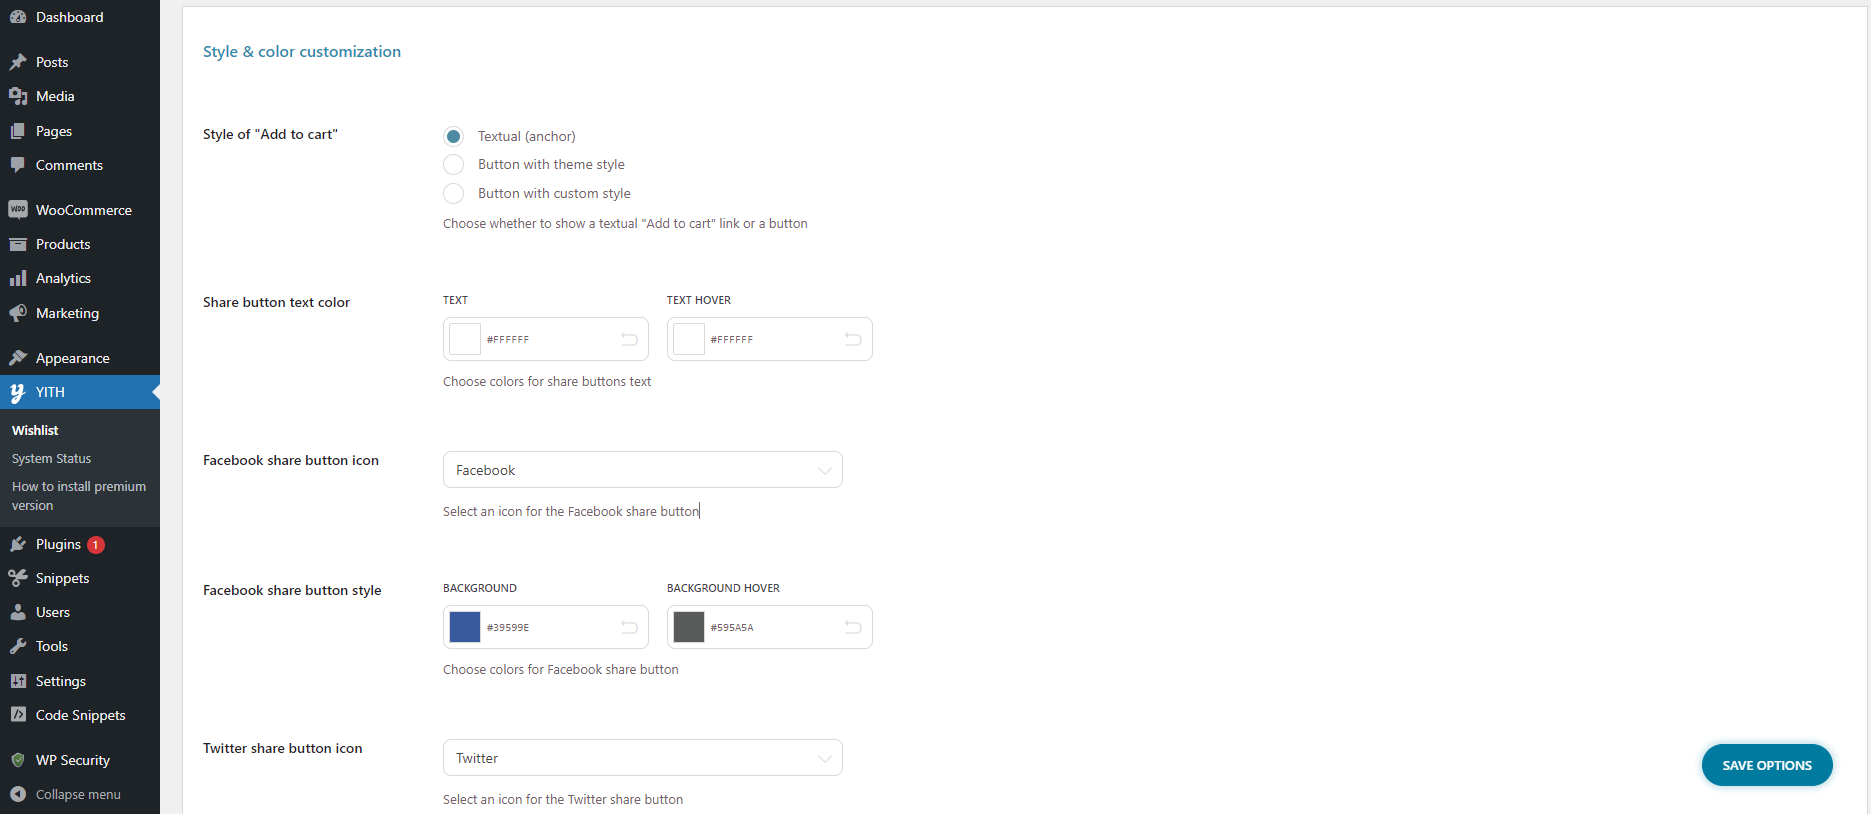
Next, you can change the appearance of your “Add to wishlist button” to suit your preference under the “Style and Color Customization” section.
By default, the style of “Add to wishlist” button is set to the “Textual” option. If you want to change it to the “button with theme style” option, then this will use the default theme style for your “Add to wishlist” button.
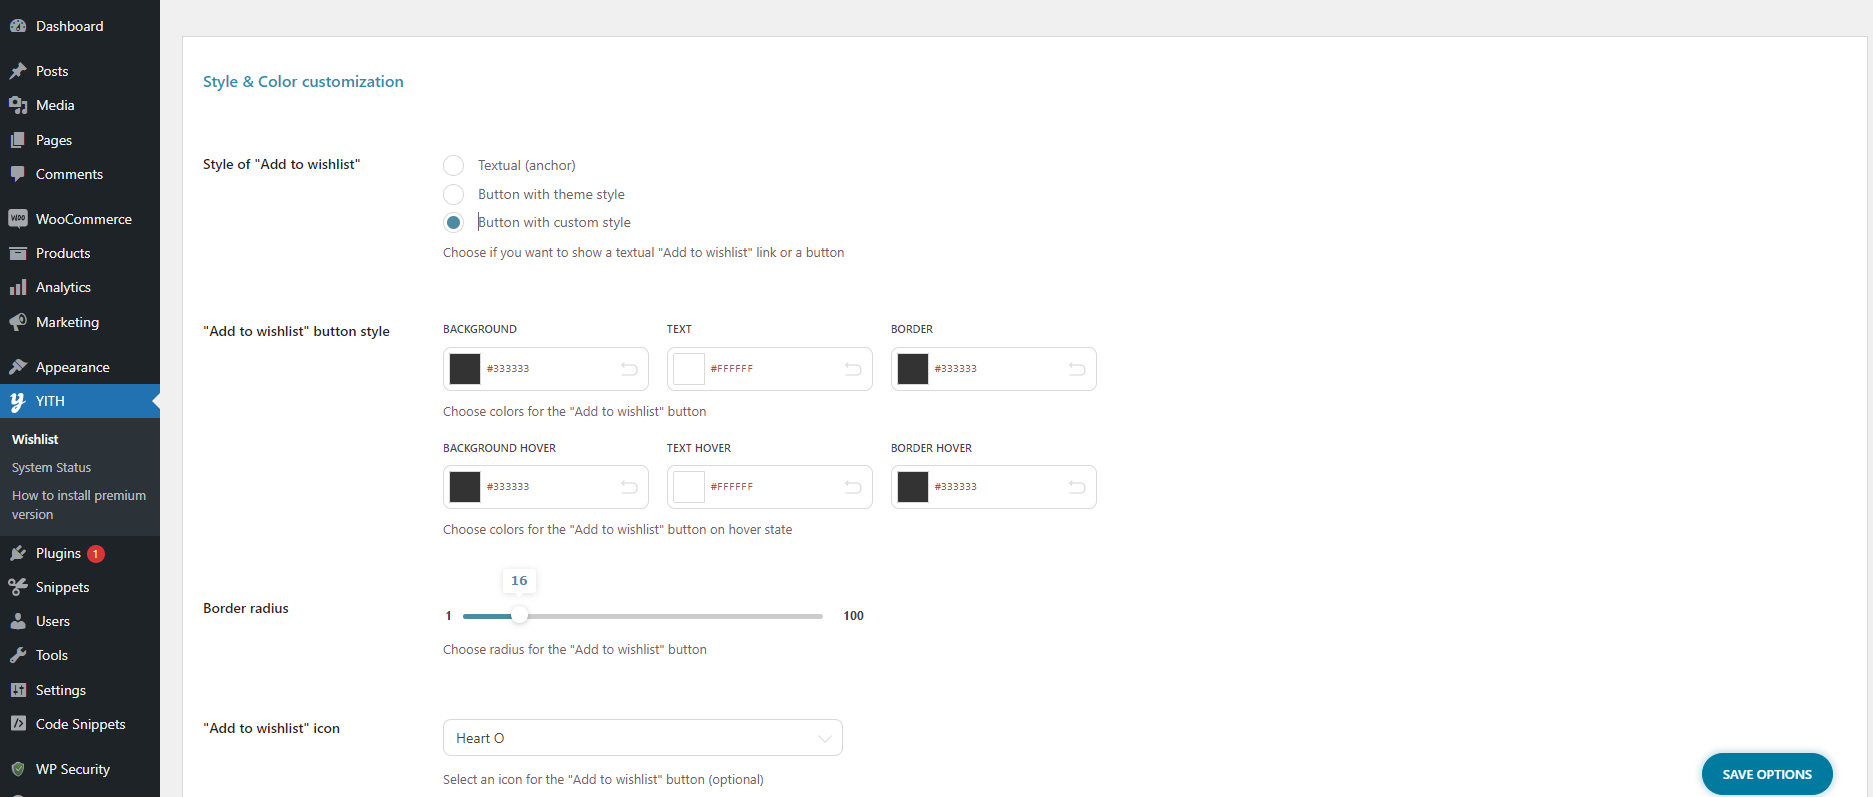
In contrast, if you choose the “button with custom style” option, then the plugin will show more options that allow you to customize the style of the button as you desire.
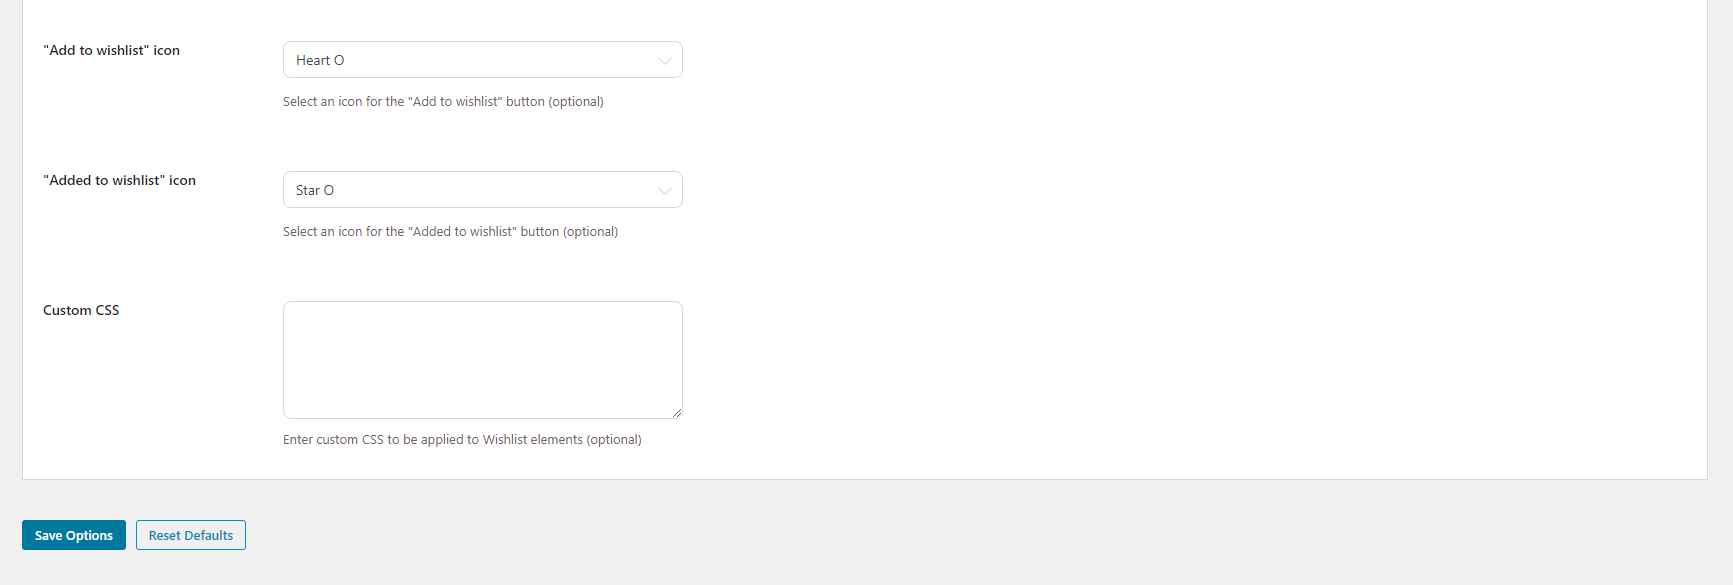
In addition, you can change the icon for your wishlist button from the drop-down menu or customize the style of your “Add to wishlist” button by adding custom CSS.
Once you are pleased with your settings, don’t forget to click on the “Save options” button to save your changes.
Next, let’s move to the “Wishlist page options” tab.
Under this tab, you can select a different page for wishlists on your Woocommerce store from the drop-down menu. Additionally, you are able to display wishlists on any page by using the following shortcode [yith_wcwl_wishlist].
Moreover, you can choose more information that will be displayed on the wishlist detail page such as product price, product stock, product variations, and much more.
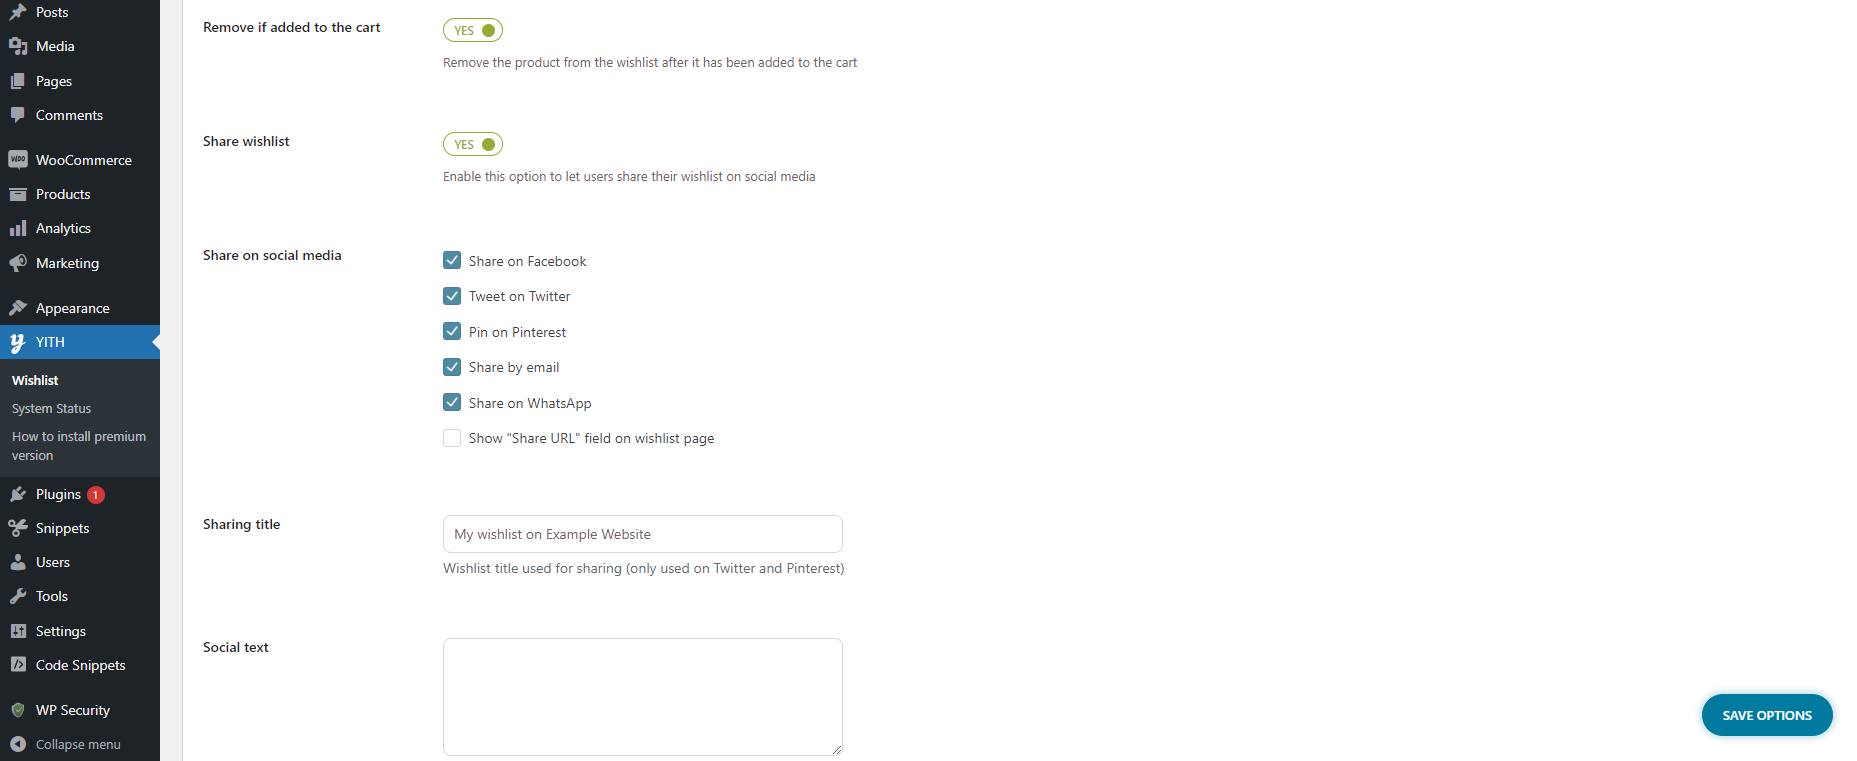
Further, the plugin also allows you to choose social media channels where your customers can share their wishlist, and add custom text once the wishlist is shared on social media platforms.
Plus, if you want to change the text and customize the style and color of the sharing button and social media channel buttons, this plugin provides a lot of useful options to do that.
Similarly, don’t forget to click on the “Save options” button after completing your selections.
Now, you can visit your Woocommerce store and view your “Add to wishlist” button on the product page. Once your customers click on the “Add to wishlist” button, then they will be taken to their wishlist page where they can see all their favorite items.
The bottom line
To sum up, a wishlist is a useful feature for your Woocommerce store. However, by default Woocommerce doesn’t provide you with this feature. Hopefully, through our blog, you can add a wishlist to your Woocommerce store easily. If you have questions or queries, don’t hesitate to mention them in the comment below.
Moreover, if you change a new appearance for your eCommerce store, don’t miss a list of beautiful free Woocommerce WordPress Themes on our website.
We're a Digital Team from EngineTemplate with 5 content experts. Our team has 5 years exp in open source Joomla and WordPress, we make daily blogs and build useful resources for everyone who is having issues with open source while using it.