Are you going to display your product on the carousel? Don’t miss our blog. In this article, we will provide you with a detailed tutorial to help you create Elementor product carousel with a free Elementor Carousel plugin that will boost the performance of your product pages effectively. Now, let’s dive into our blog.
Why should you display Woo products on the carousel?
It can not be denied that using a carousel is a great solution to showcase your high-quality products in an attractive way. Because it allows you to display your product from different perspectives, provide additional information, as well as make many main features stand out. In addition, you are able to customize the appearance of your product carousel with plenty of options. Thanks to that, you can easily catch the attention of your website’s visitors compared to using simple content.
How to create an Elementor Product Carousel?
There are plenty of plugins allowing you to create a beautiful product carousel in Elementor. However, in today’s guide, we will introduce to you an outstanding Elementor addon-Essential addons for Elementor that will help you design your Woocomerce product carousel with plenty of styling options. In addition, it is packed with various layouts to make your products eye-catching. Now, let’s check our step-by-step tutorial to create Elementor Product carousel.
Step 1: Install and activate the plugin
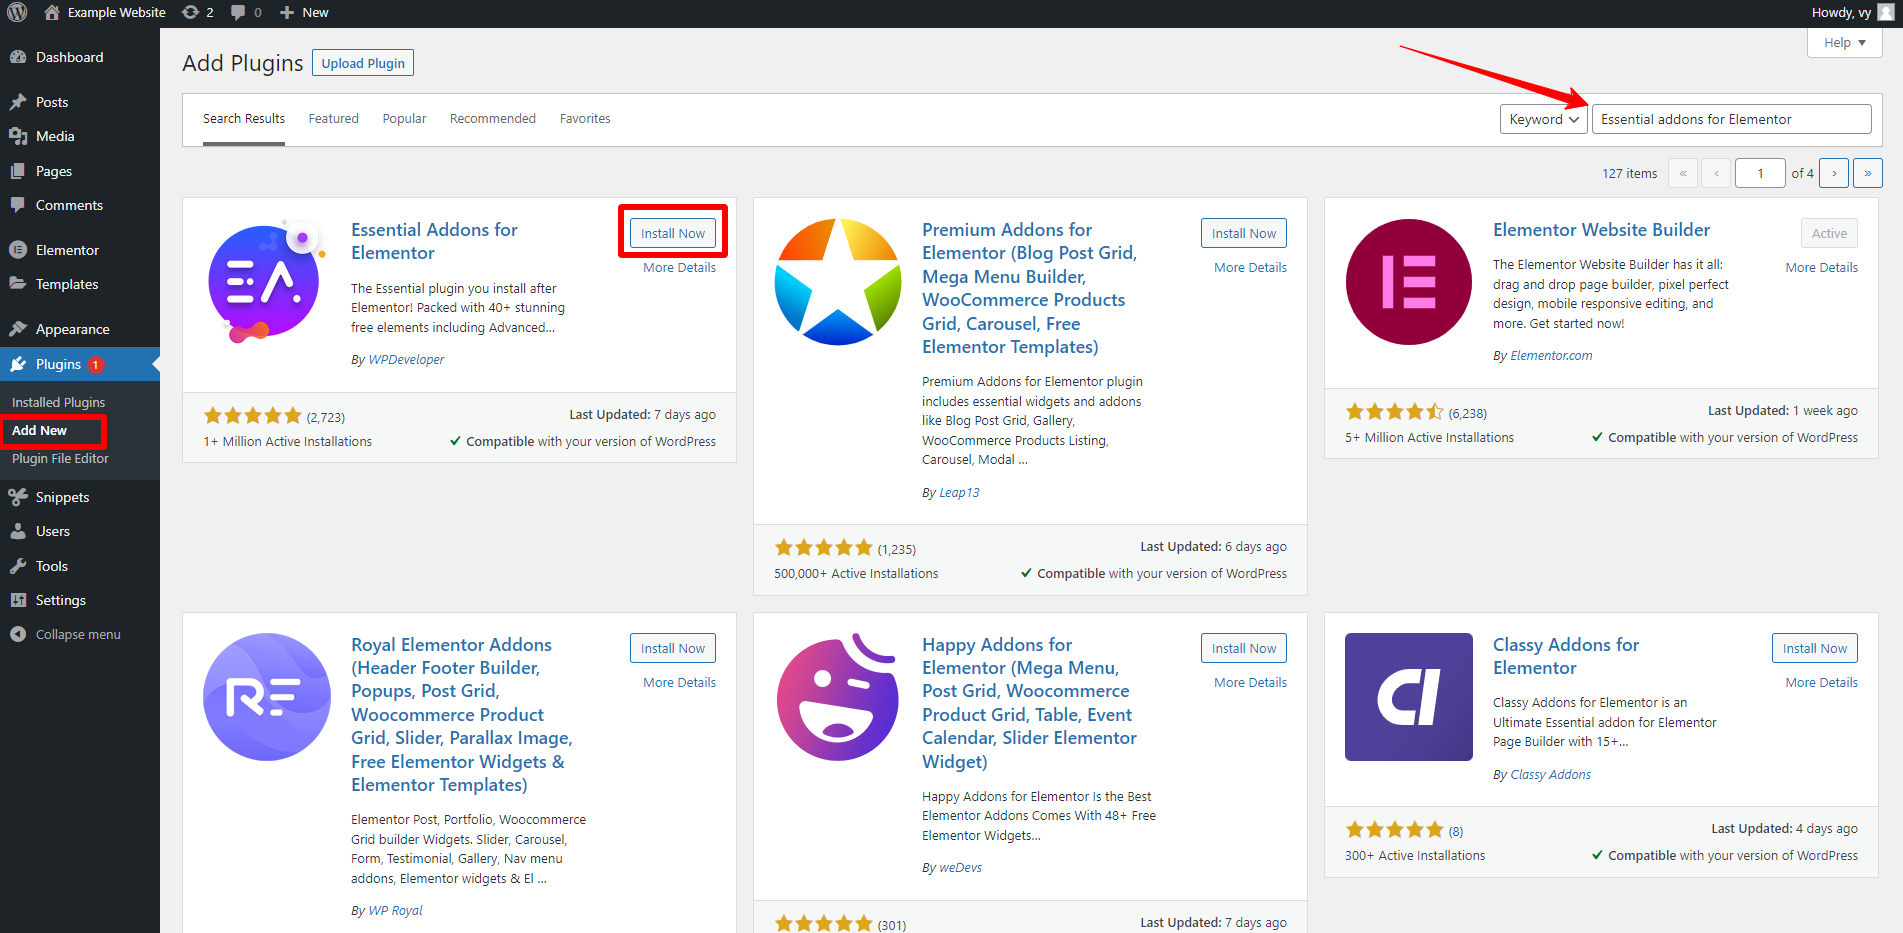
First of all, to create Elementor product carousel, you need to go to Plugins > Add New and then type the plugin’s name on the search bar to find the plugin. After that, click on the Install Now button and Activate the plugin.
Step 2: Add the Woo Product Carousel Widget to your content
Before you get started, make sure that the Woocommerce plugin has been activated on your website.
Now, you can open any page that you want to create a carousel to display your high-quality products.
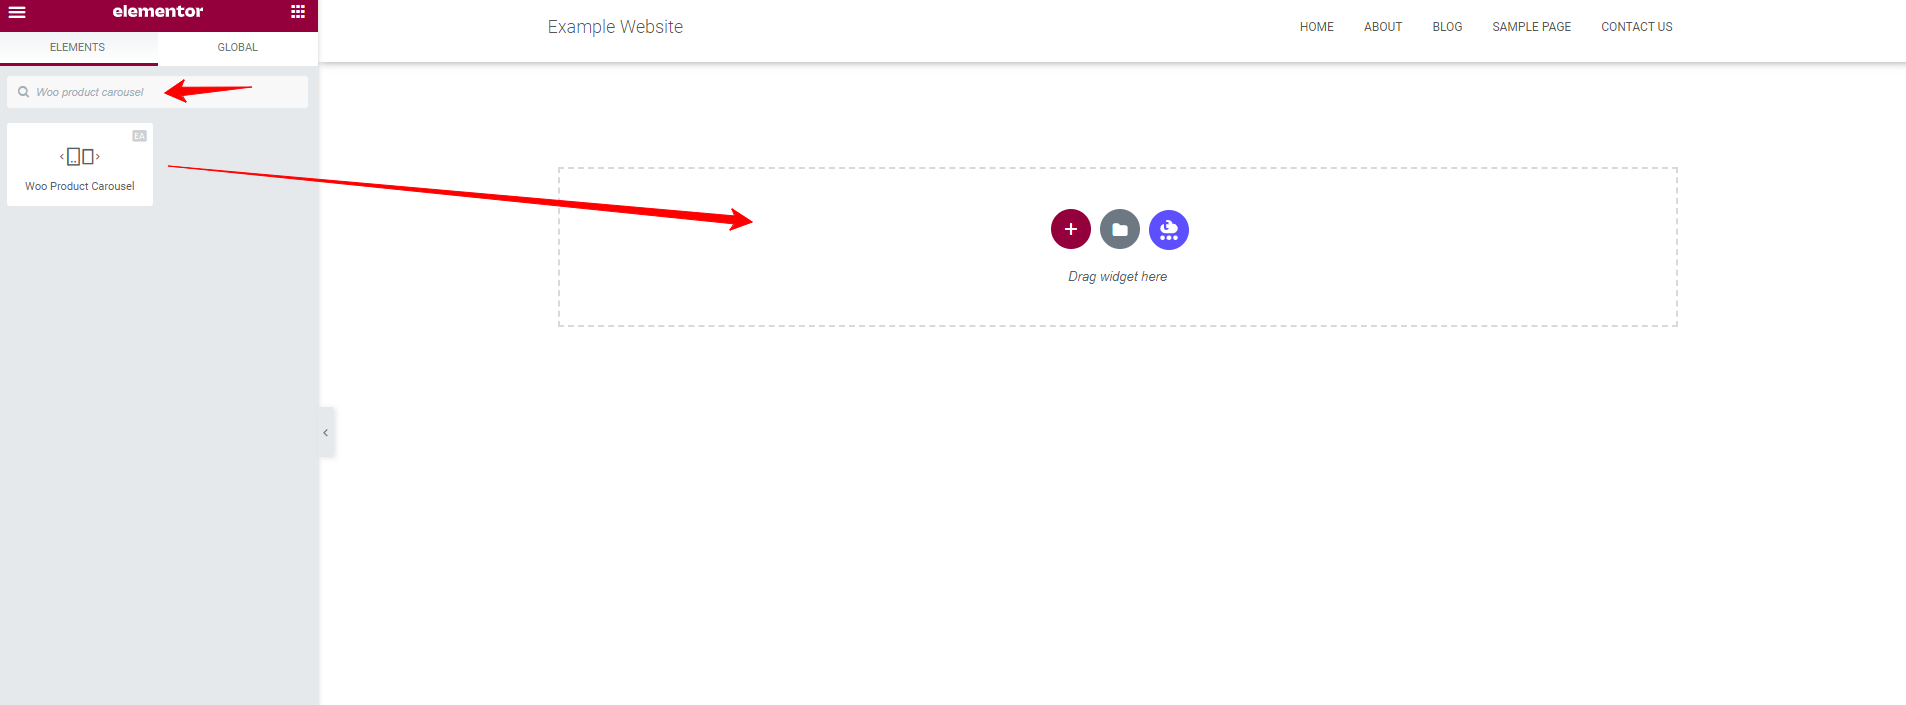
Then, let’s find the “Woo Product Carousel” widget from a list of ones under the “Elements” tab and drag & drop this widget into the “Drag widget here” area.
Step 3: Configure the content settings
After the widget has been added to your Elementor editor. Now, it’s time to configure the “Content‘ tab to create Elementor Product Carousel. From here, you will notice that there are four main sections including “Layouts settings“, “Carousel“, “Query“, and “Sale/ Stock Out Badge“.
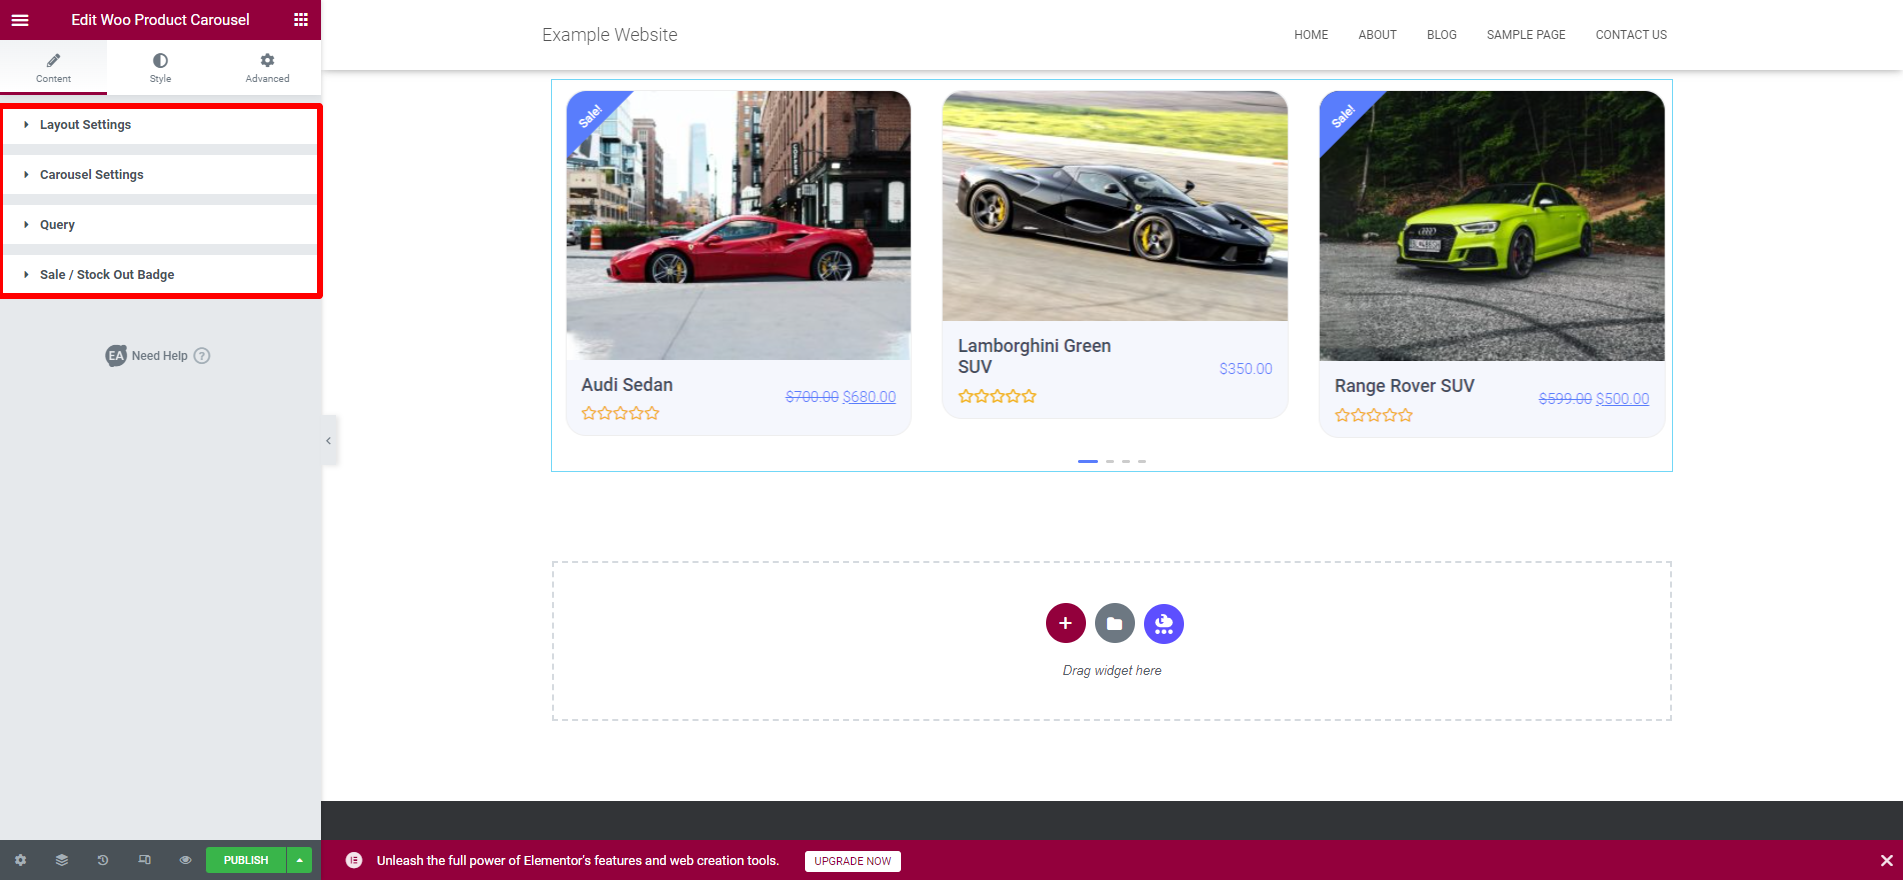
Initially, we will configure the “Layout settings” section.
- Layout settings
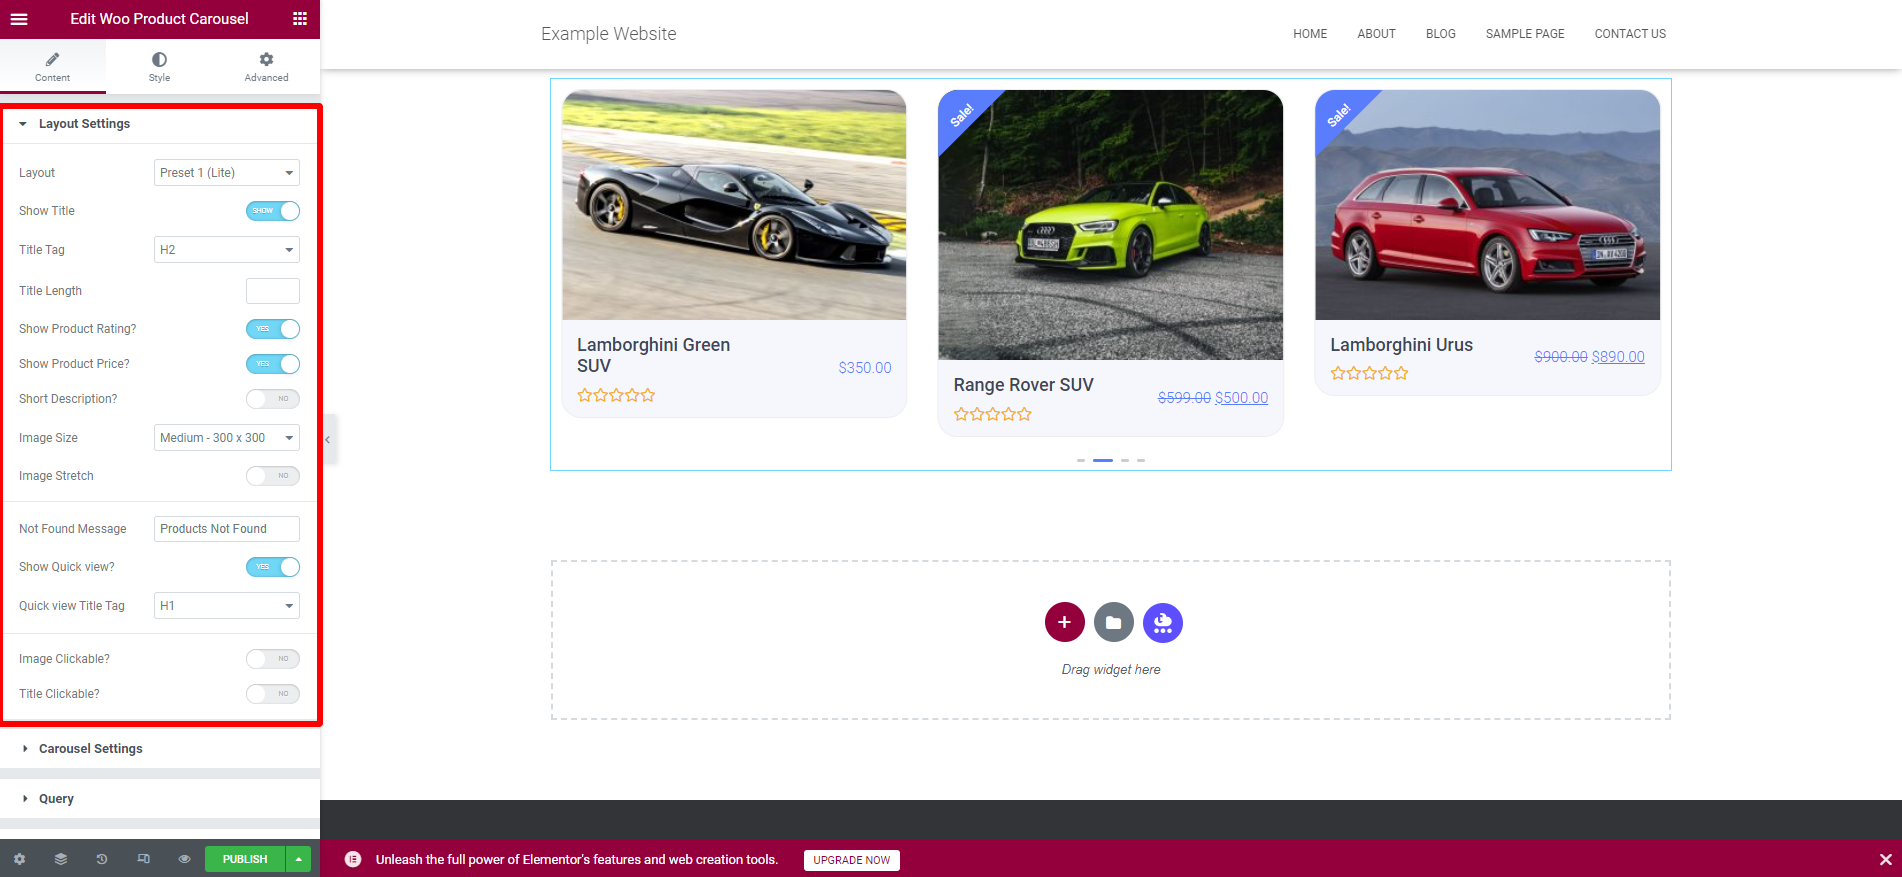
From the “Layouts Settings‘ section, you can choose your favorite layout for your product carousel. The plugin provides you with 4 preset layouts. Besides that, it also allows you to show product titles, add various title tags and adjust the title length.
Moreover, you can completely showcase your product rating, price, and a short description to provide your customers with more information about your product.
Further, if you want to configure the image size of your product, or stretch it a bit, this plugin totally allows you to do that. You can also enable the “Show quick view” button so that your customers can view your product quickly or even add it to their cart.
- Carousel settings
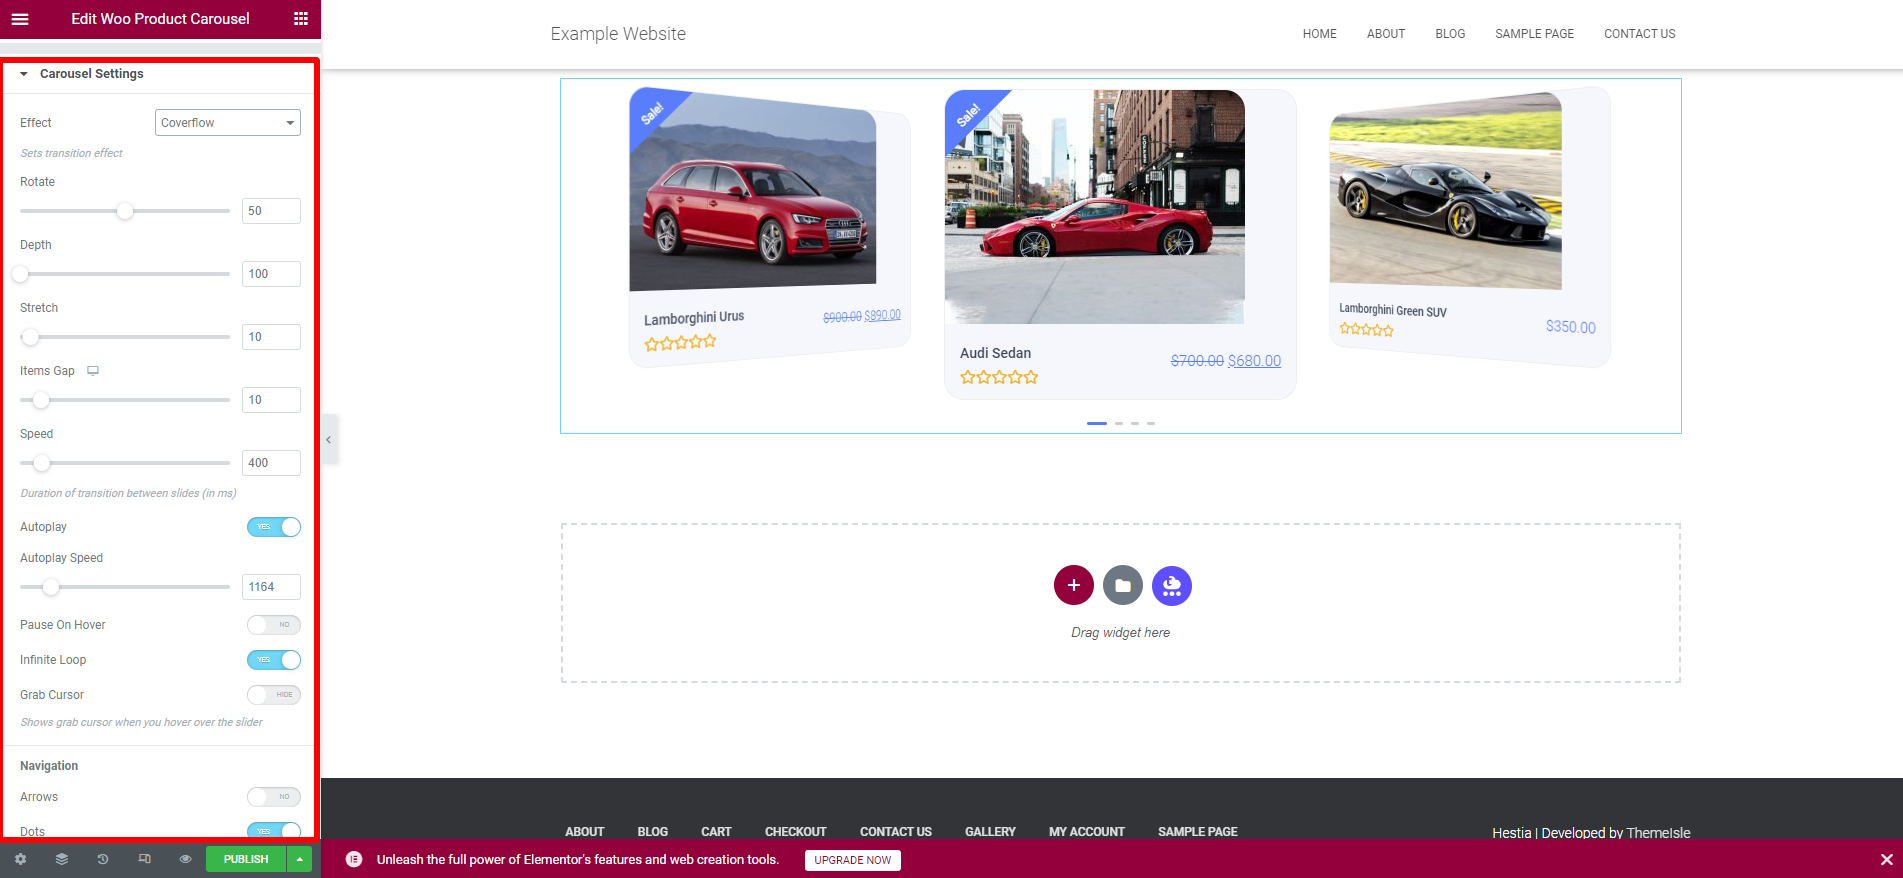
Next, you need to configure the carousel settings section with various options. First of all, you can change the effect to make your carousel more attractive. There are two options for you to choose from including “Slide” and “Coverflow“.
Secondly, you can make changes to your visible product section by adjusting the item’s gap, rotating, depth, and speed too.
Additionally, there are options allowing you to enable the pause on hover, infinite loop, and grab cursor.
Finally, you can display arrows, dots, and image dots and choose the direction for your carousel as you want.
- Query
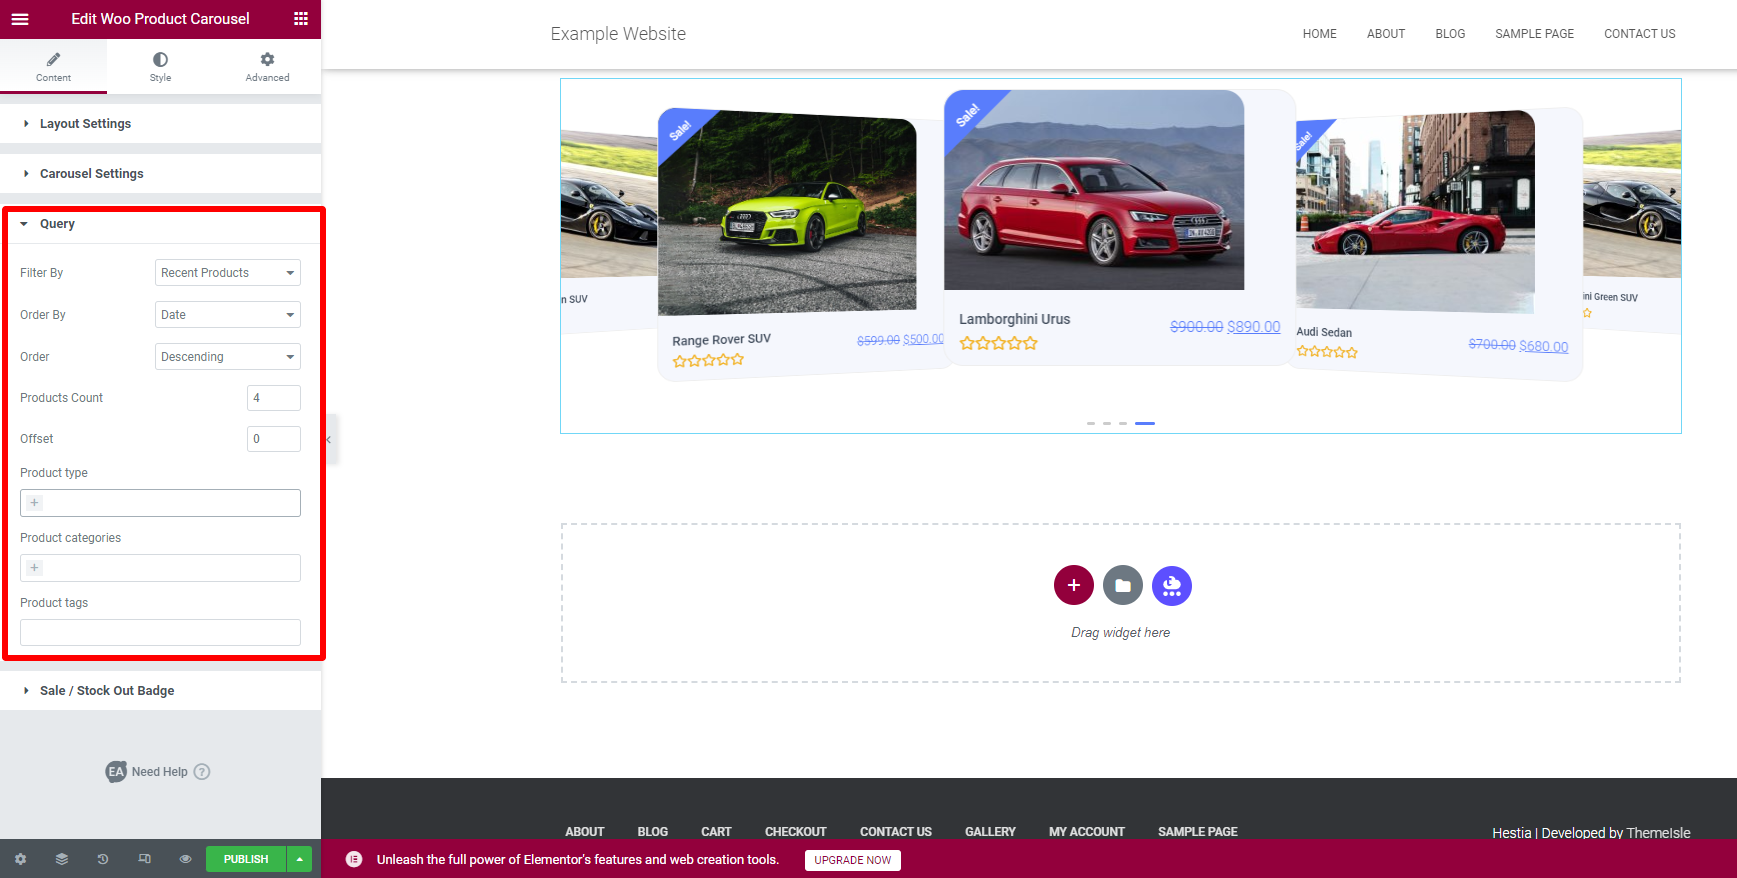
This section allows you to filter products, change the order and arrange it to ascending or descending according to your requirements.
Moreover, you can adjust the number of products displayed and set the offset.
Especially, you are able to display your product with types, categories, and tags to organize your products as you want.
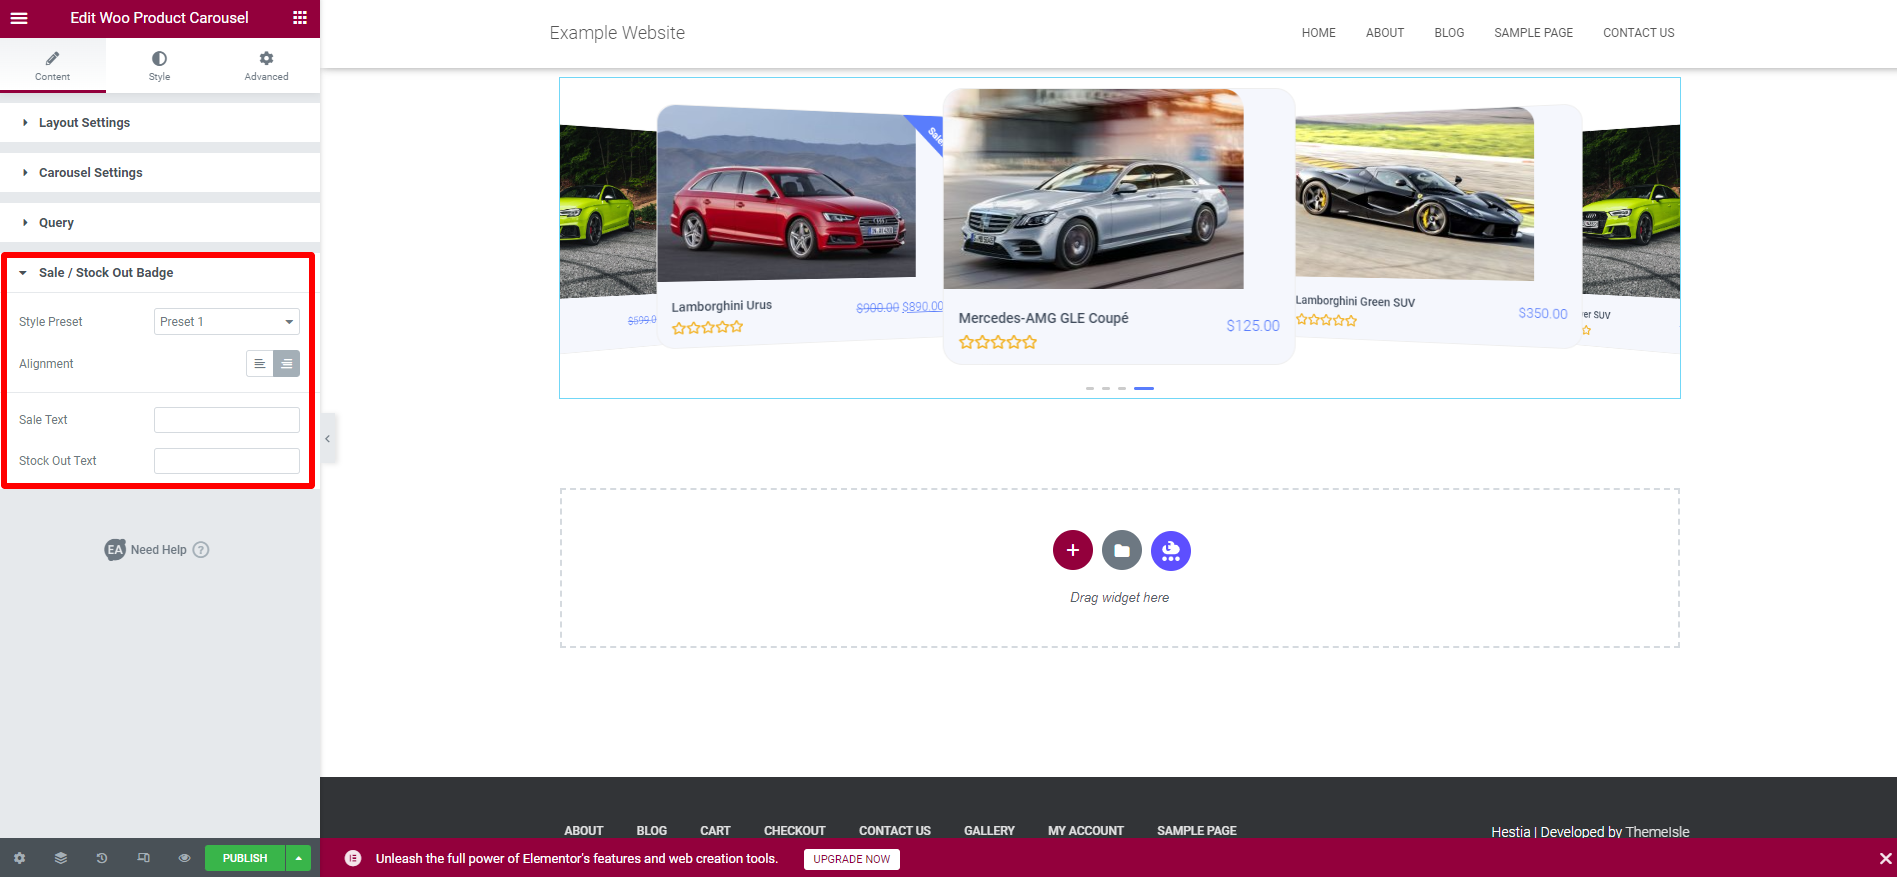
- Sale/Stock out badge
In this section, you can choose the “Style Preset” from 5 available options. In addition, you are able to adjust alignment, add sale text, and stock out text.
Step 4: Style your product carousel
You will see that there are 5 sections displayed in the “Style” tab including:
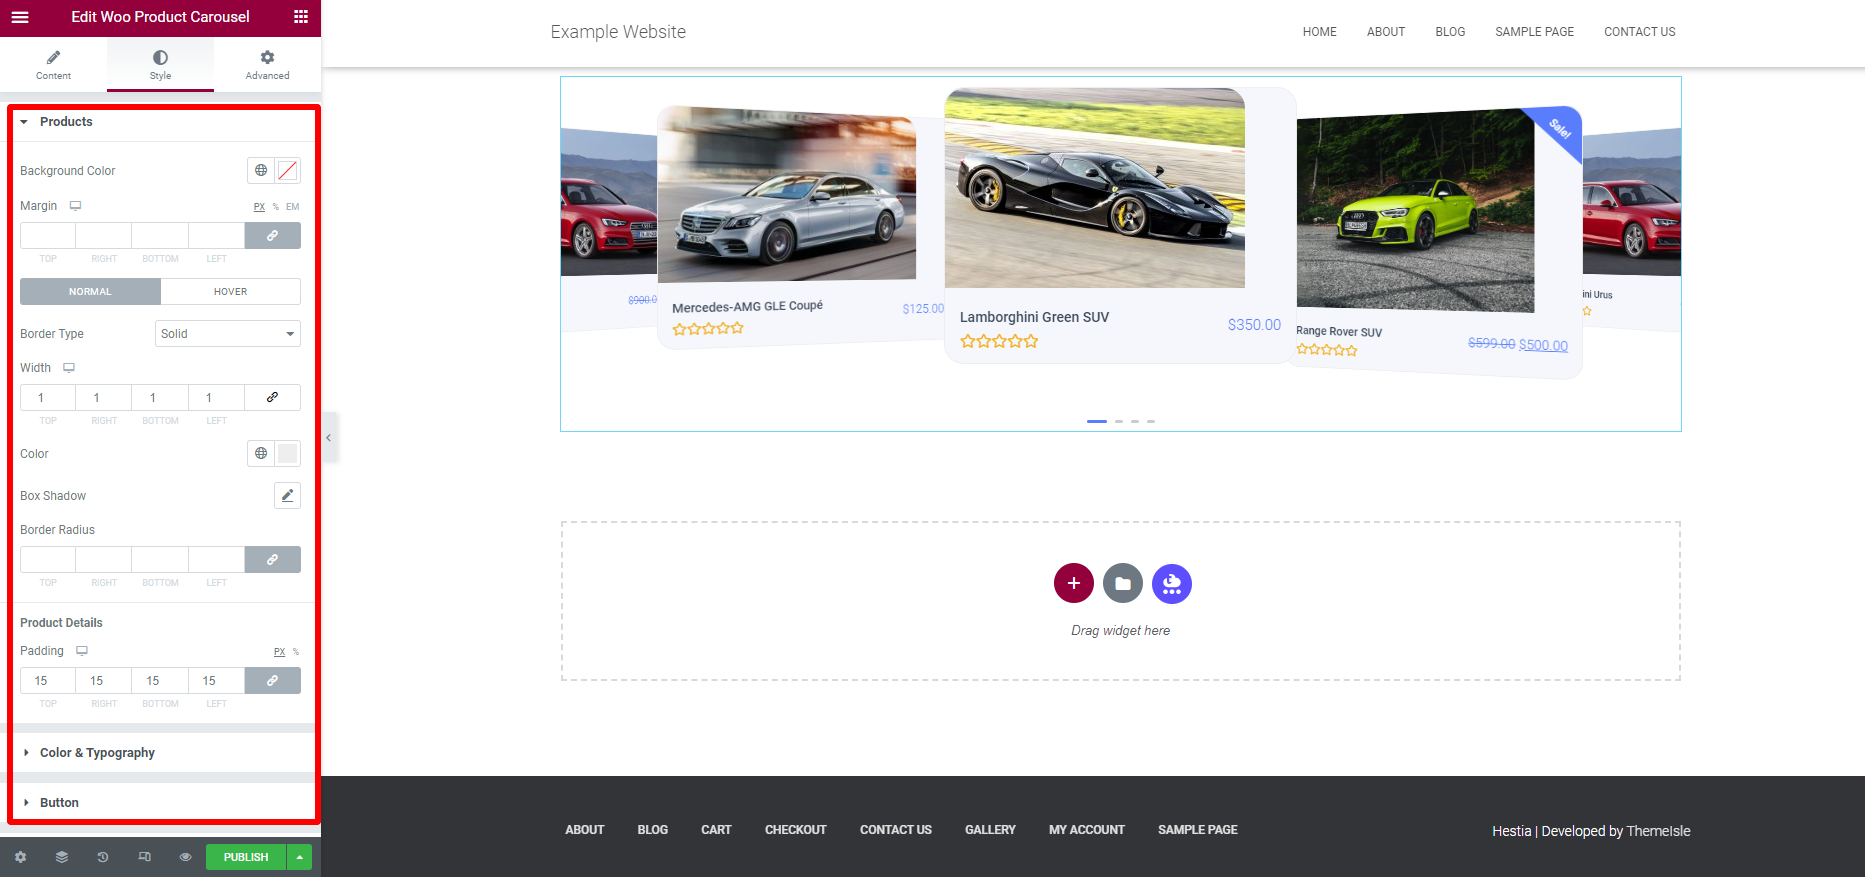
- Products
In the first section, you can choose the background color for your product carousel, set the margin, border, type, width, and color, and add box shadow to make your product carousel more eye-catching.
In addition, this plugin allows you to add border radius for both the “Normal” & “Hover” portion, and adjust the product detail with padding to create an attractive look for your carousel.
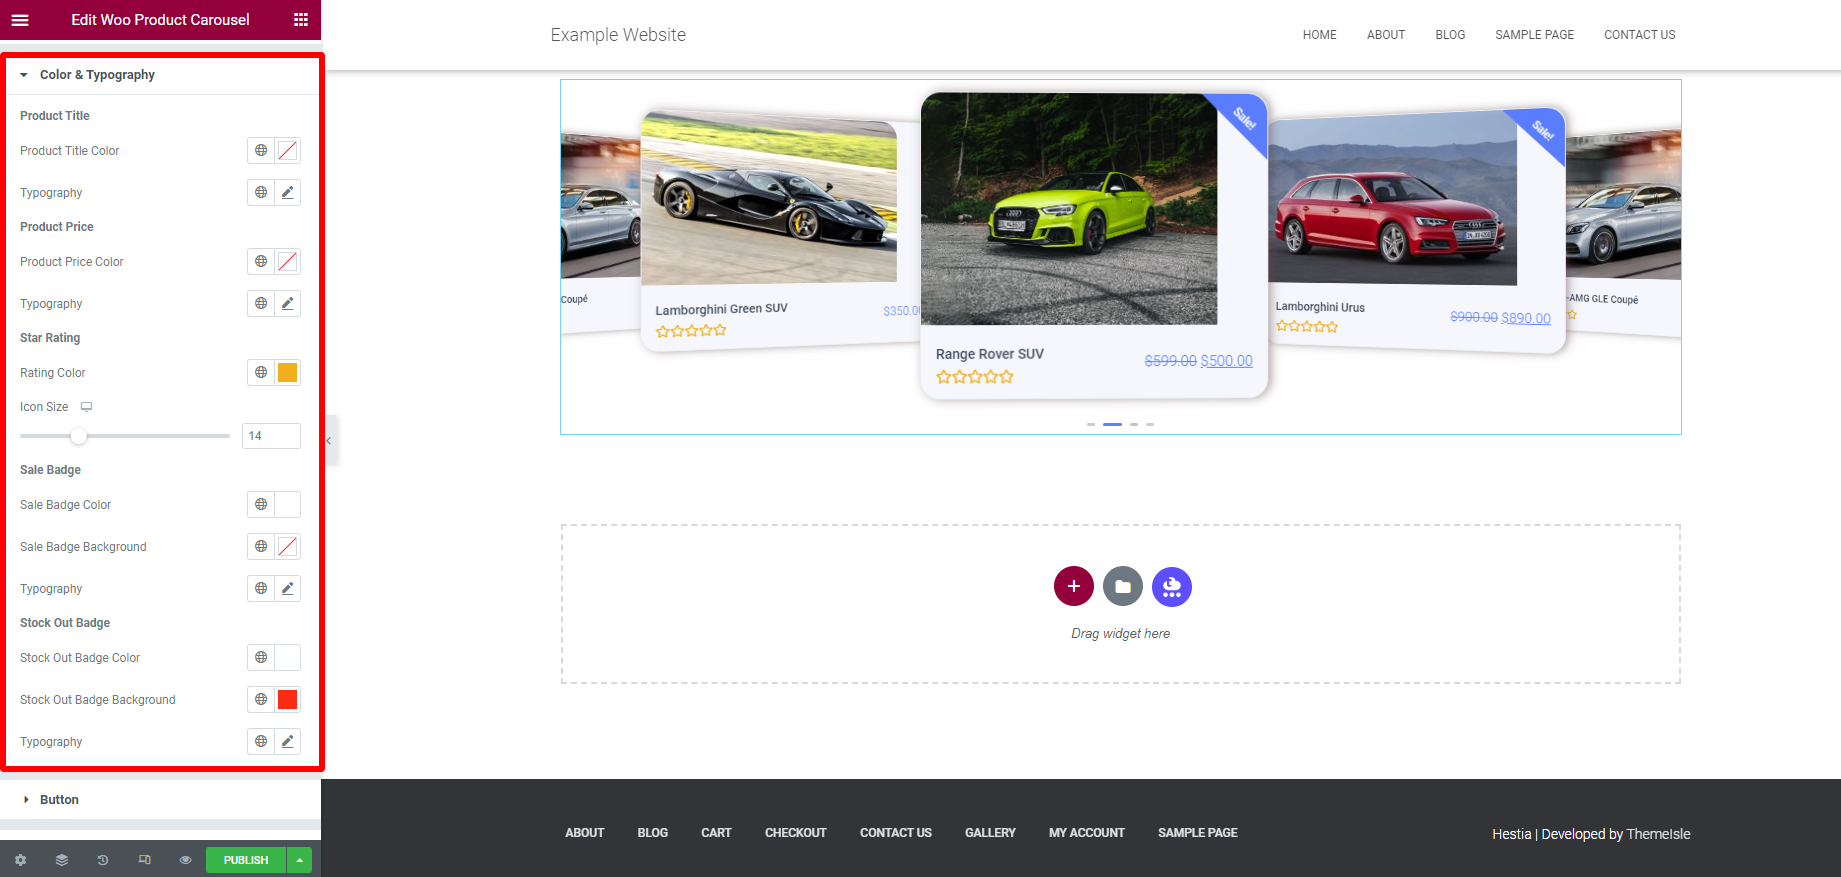
- Color & Typography
This section provides you with plenty of options that allow you to change the design (color & typography of product title, price, and ratings). Additionally, you can set the background color and typography for Star rating and Stock Out Badges.
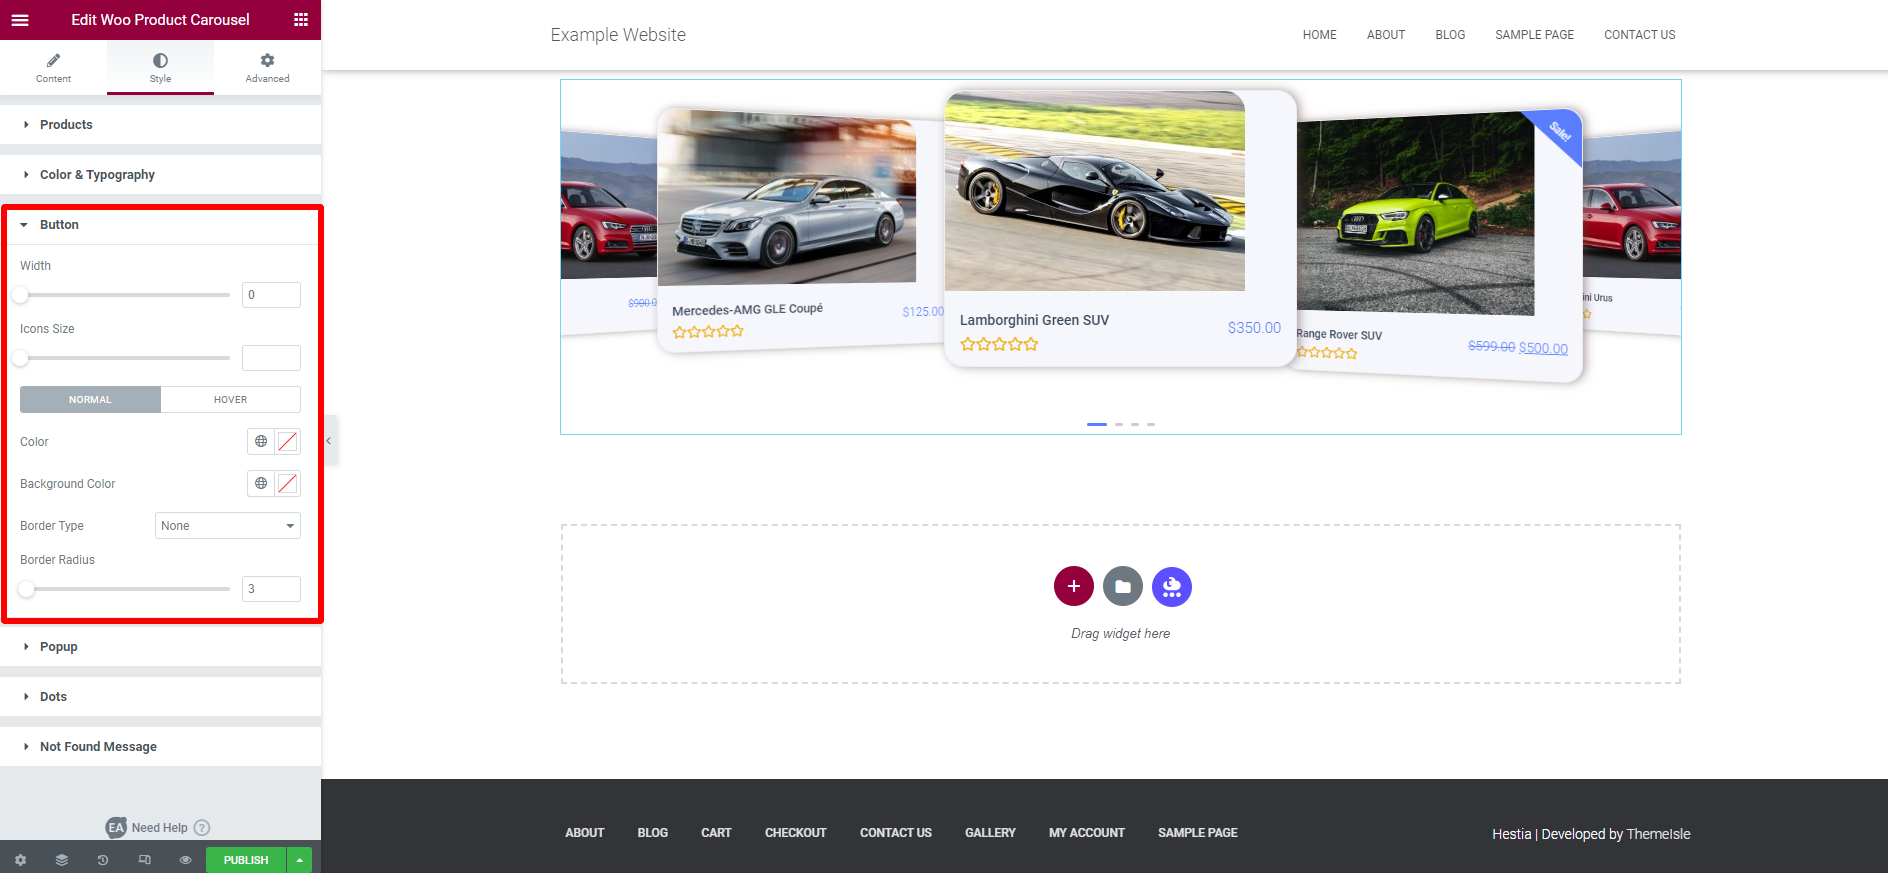
- Button
In addition, the Elements addons for Elementor plugin also allows you to style the “Button” by editing plenty of its aspects including width, icon, color, and background color. What’s more, if you want to change the border type, border-radius, then you can completely make changes with this plugin.
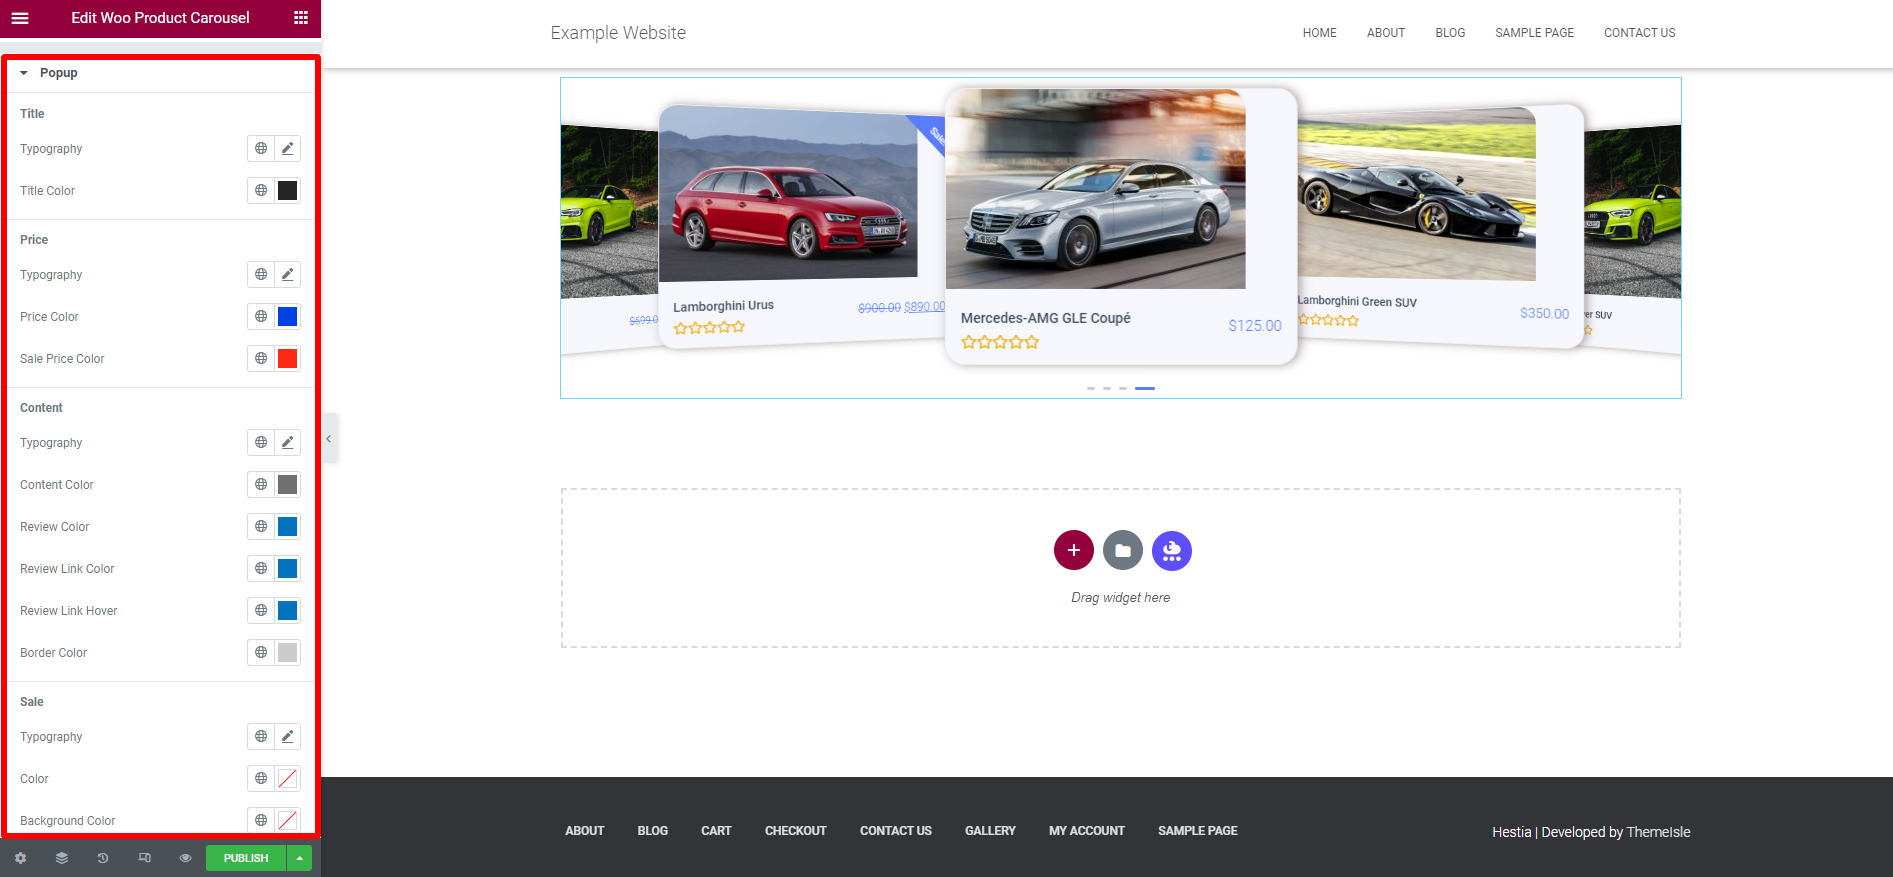
- Popup
You can edit the design of your product title, price, content, sale part, quantity, cart button, SKU, and close button as well.
- Dot
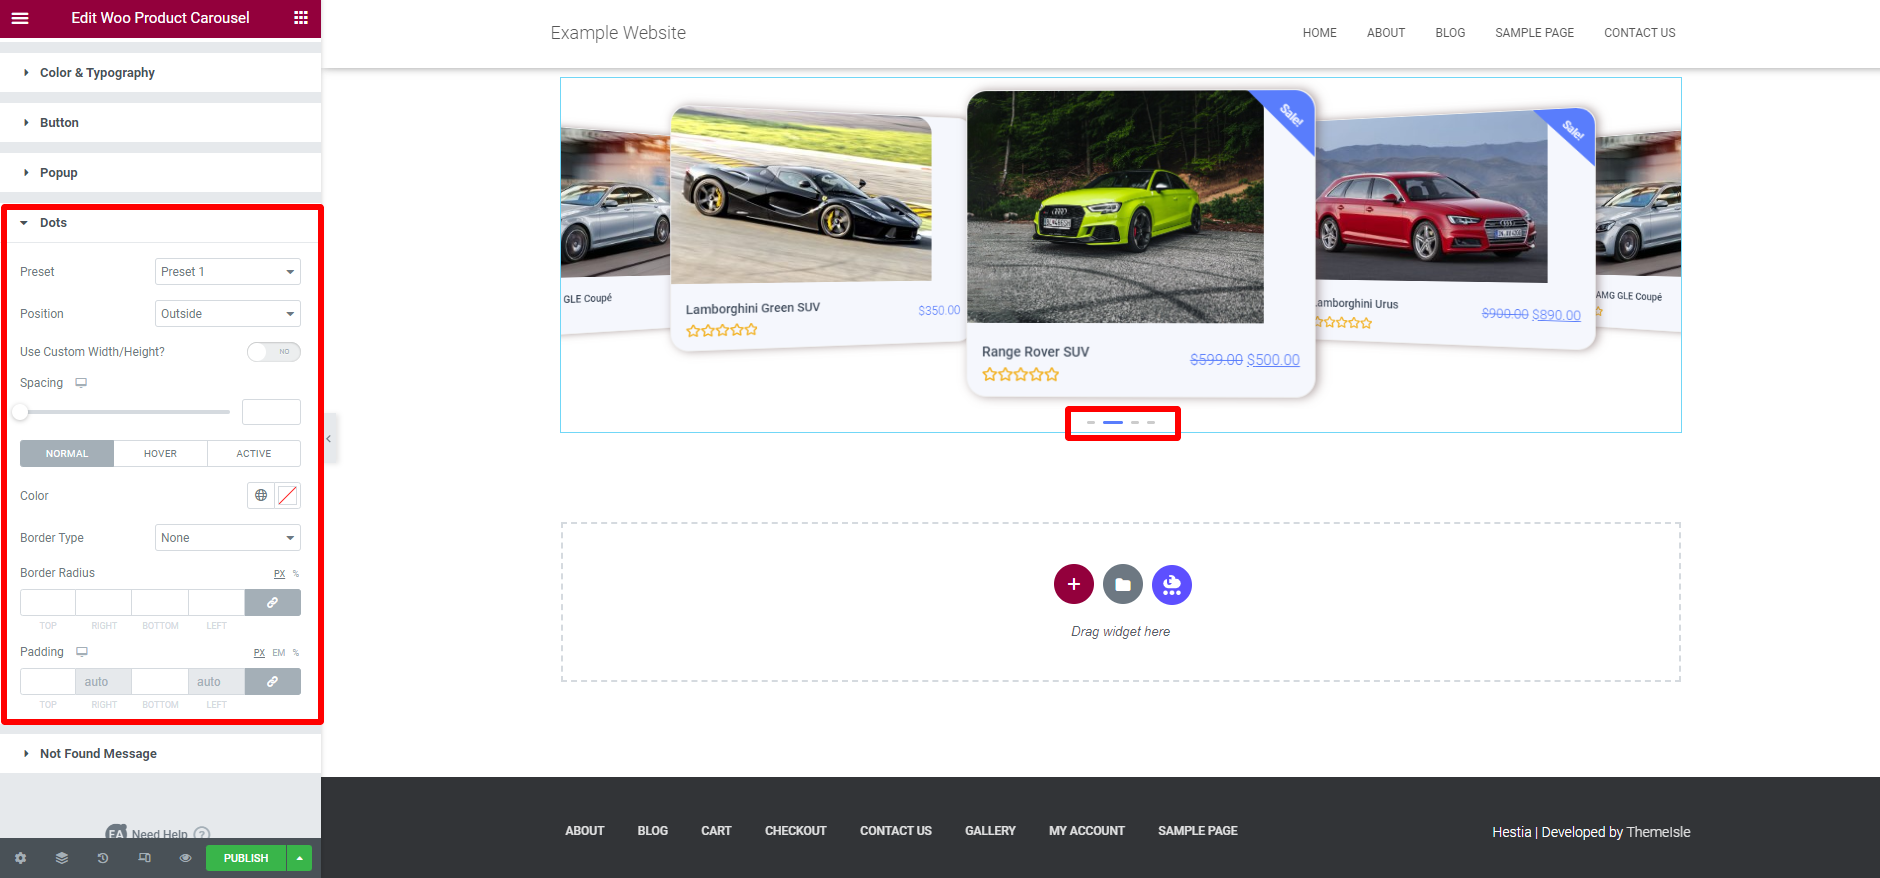
The dot section comes with many options that allow you to choose your preferred preset from 4 available designs, change the position, and enable the use of custom width/height.
Moreover, you can adjust the spacing, set color, border type, border radius, and padding as you want.
- Not found message
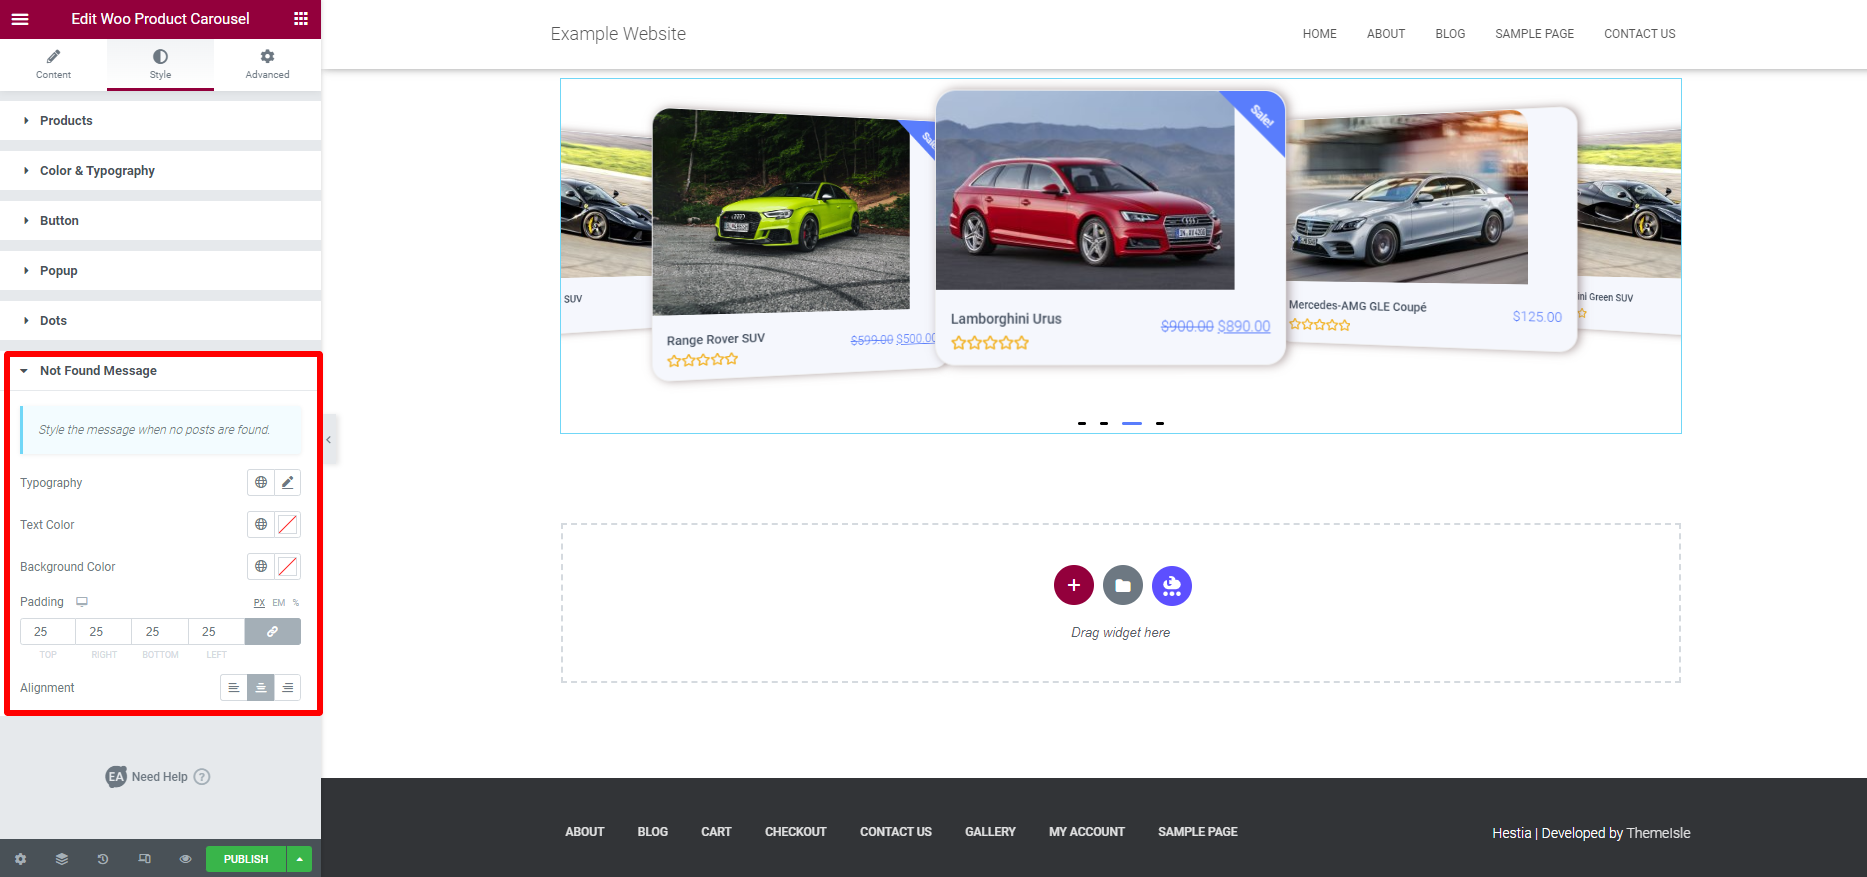
This last section allows you to change the design of the message once no posts are found. You can customize the typography, text color, background color, add padding, change alignment, and much more.
Now, if you are pleased with your product carousel, you can hit the Publish button and give it a look.
Summary
We have just demonstrated a step-by-step guideline to create Elementor Product Carousel for Elementor users. Hopefully, our blog can help you simplify the process of creating a beautiful product carousel on your website. If you get into any trouble, don’t hesitate to let us know by leaving a comment below.
By the way, you can refer to plenty of gorgeous free Elementor WordPress Themes on our website, they will help you easily make a stunning website without difficulties.

