Do you want to create conditional logic form in Elementor? Luckily, you have landed in the right place. This blog will give you an effective solution to help you take this task without trouble. Let’s give it a look.
Why do you need to create conditional logic form in Elementor?
Conditional logic is an effective feature of any form because you can easily collect personalized information regarding the submitter. This feature allows people to only answer the questions that are relevant to their submission by displaying or hiding specific fields based on a previously chosen answer.
Thanks to that, it can make your form clean and well-structured, and less confounding to the submitters by hiding irrelevant fields. Moreover, conditional logic also helps lessen the length of your form by hiding fields until they are needed. Therefore, your forms will appears as short as possible.
Although this functionality is very necessary, it is not included feature of the Elementor form widget. Therefore, in today’s blog, we will introduce to you an easy method with a free plugin that is one of the most useful WordPress Form Builder Plugins. Now, let’s check it out.
How to Create Conditional Logic Form in Elementor?
The free plugin that we would like to recommend is Fluent Form. This tool provides you with more than 30 custom fields, conditional logic, 3rd party integration, and built-in entry management system, etc. This will help you easily create any type of form. Especially, with WP Fluent Form’s Conditional Logic feature, you can bring a better experience to your users. Conditional logic is a powerful feature of WP Fluent Form whereas other plugins only provide this feature in their premium version.
Now, to create conditional logic form in Elementor with the Fluent Form plugin, you can follow the steps below.
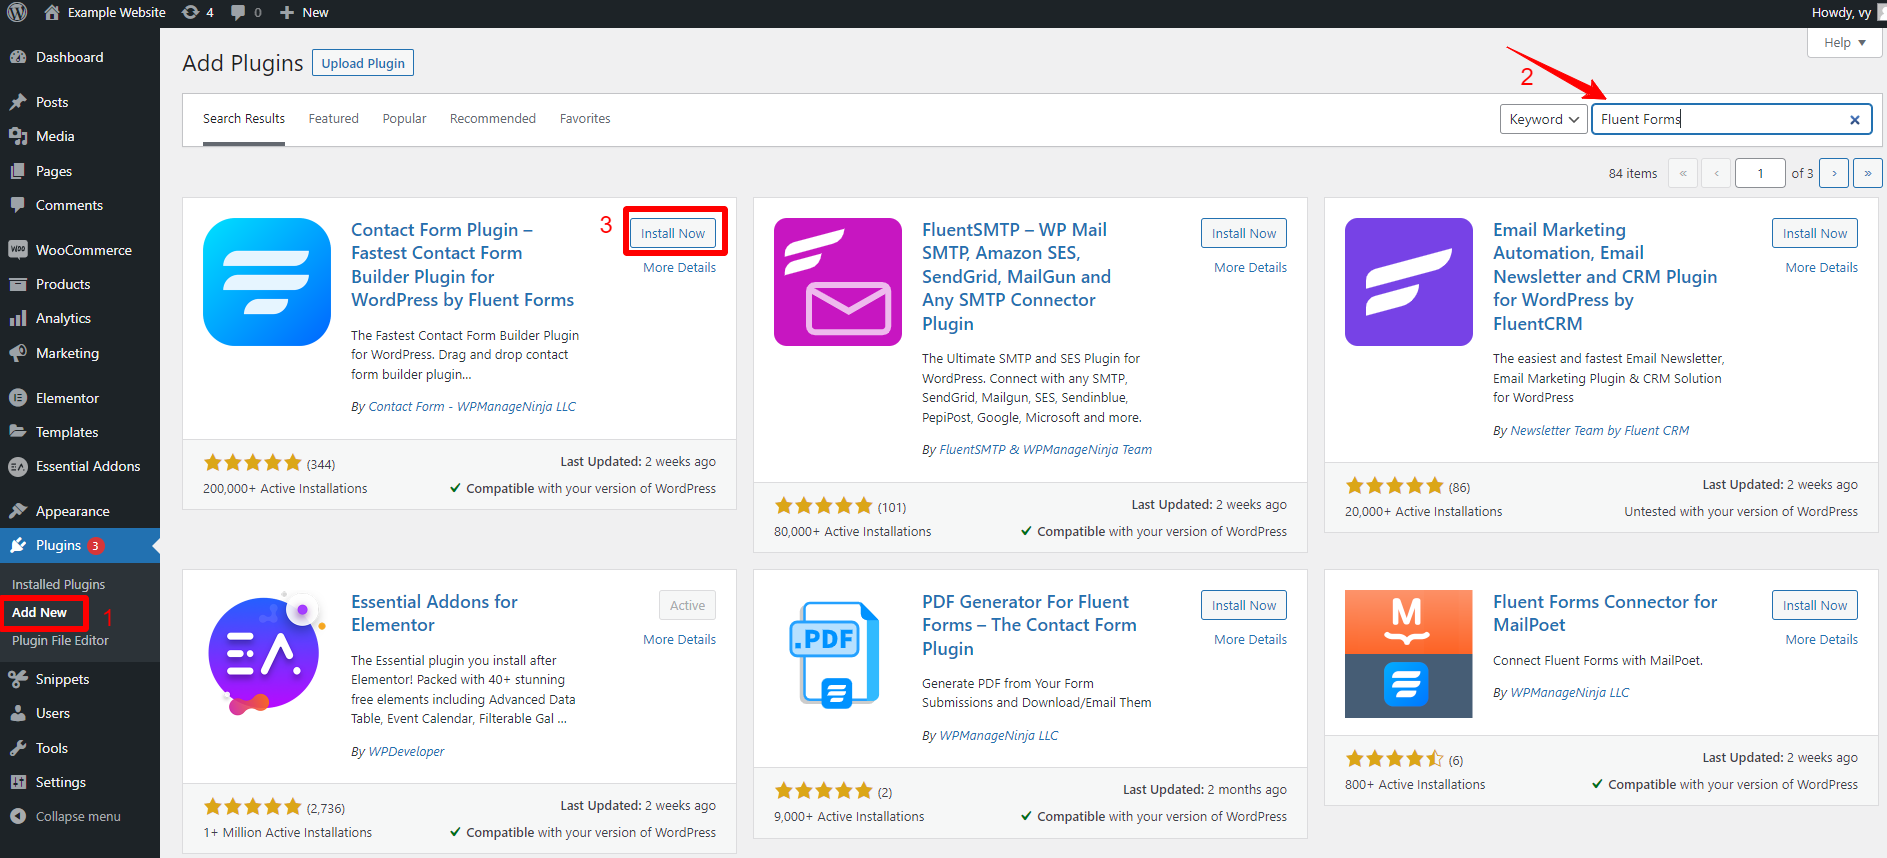
Step 1: Install and Activate the plugin
Just go to Plugins > Add news from the WordPress dashboard and then use the search bar to find the plugin. After that, simply click on the Install Now button and Activate the plugin. This process will take you less than 2 minutes.
Step 2: Create a conditional logic form
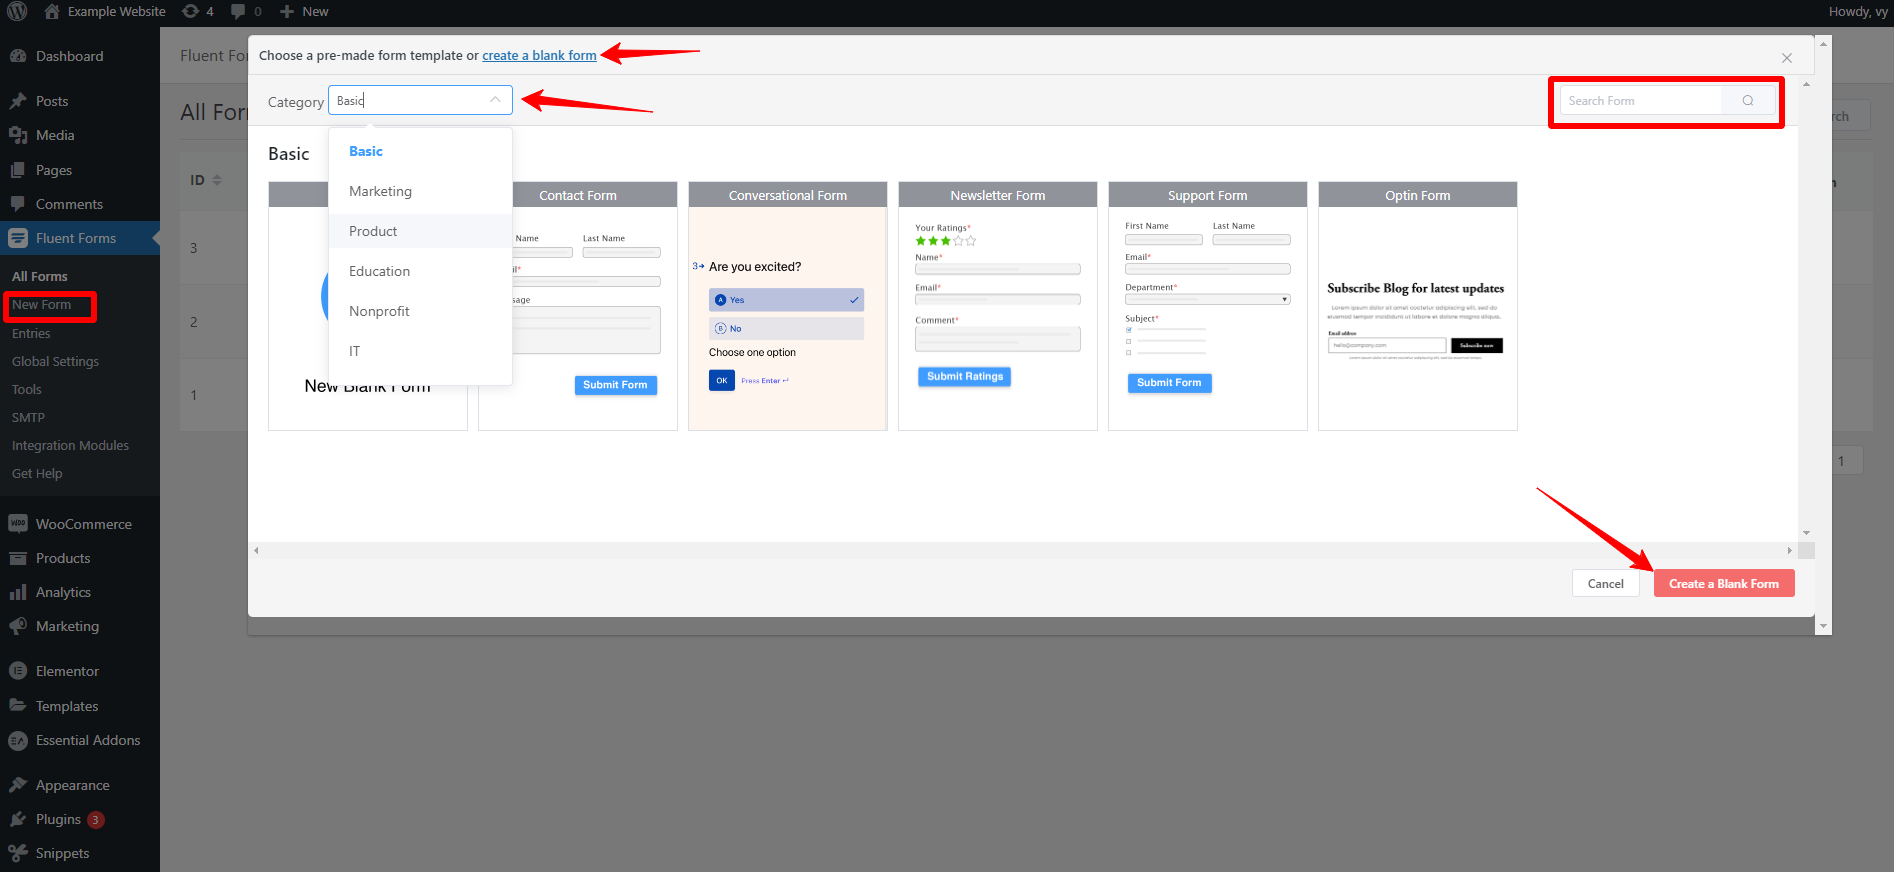
Once the plugin was activated, you can now go to the Fluent Forms menu in your WordPress admin dashboard and click on the New Form option.
Immediately, this will open a popup window that displays a lot of forms sorted by categories for you to choose from.
You can use the search bar to quickly find form types. In addition, you can click on the “Create a blank form” link or the “Create a blank form” button to start creating a new form as you want.
Once you have chosen your favorite form, this will take you to a new screen where you add new fields and customize each field. In our example, we will choose the contact form.
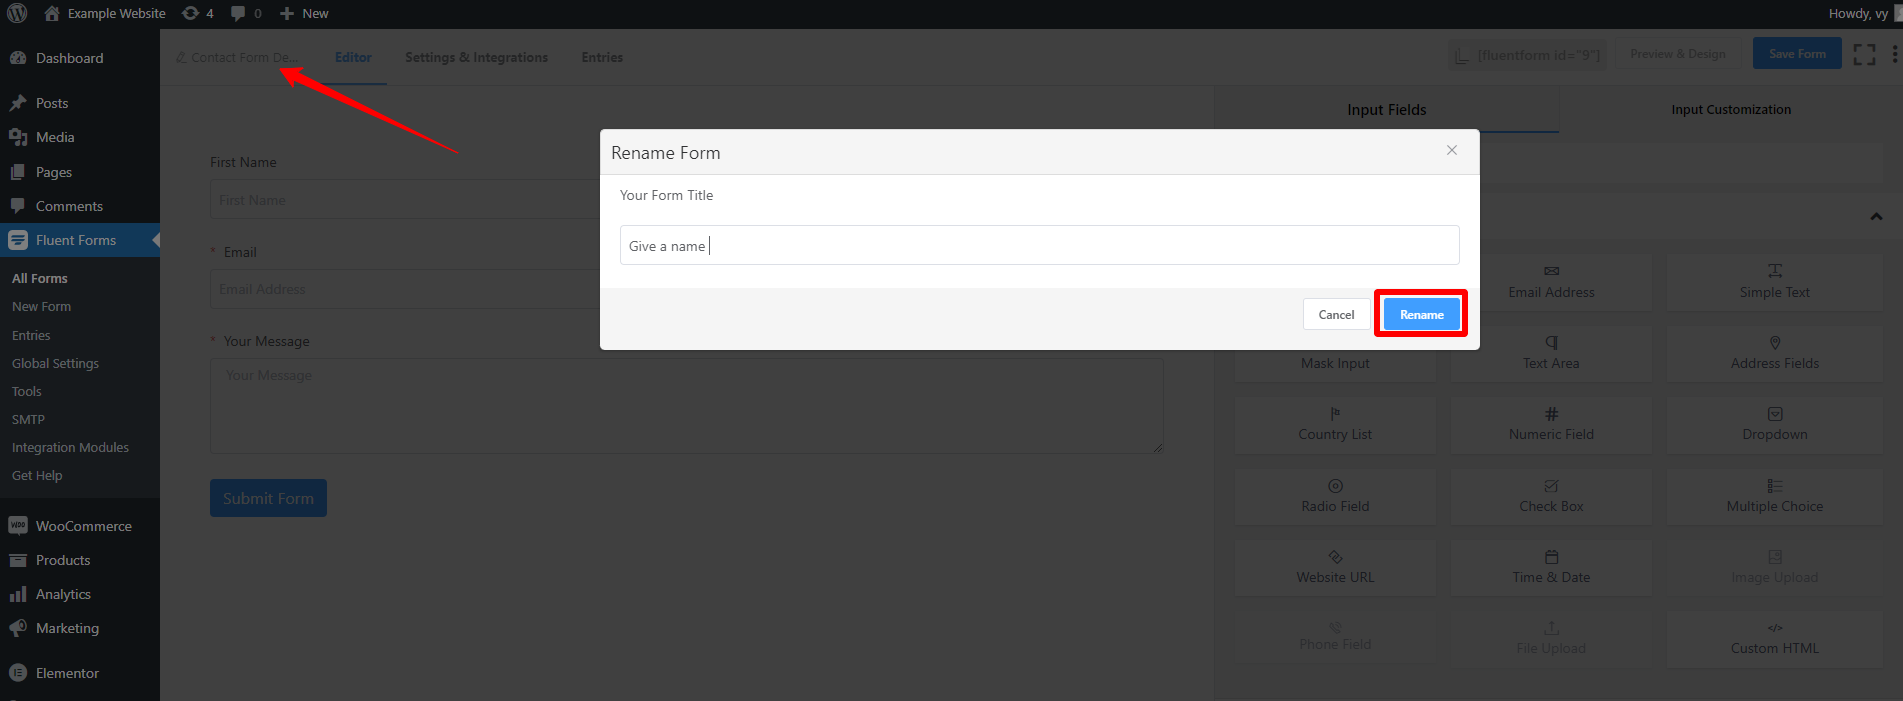
Next, in the editor, you can click on the top corner button on the left side of the screen displaying the current name of your form to give it a new name. Once you are done, click on the Rename button.
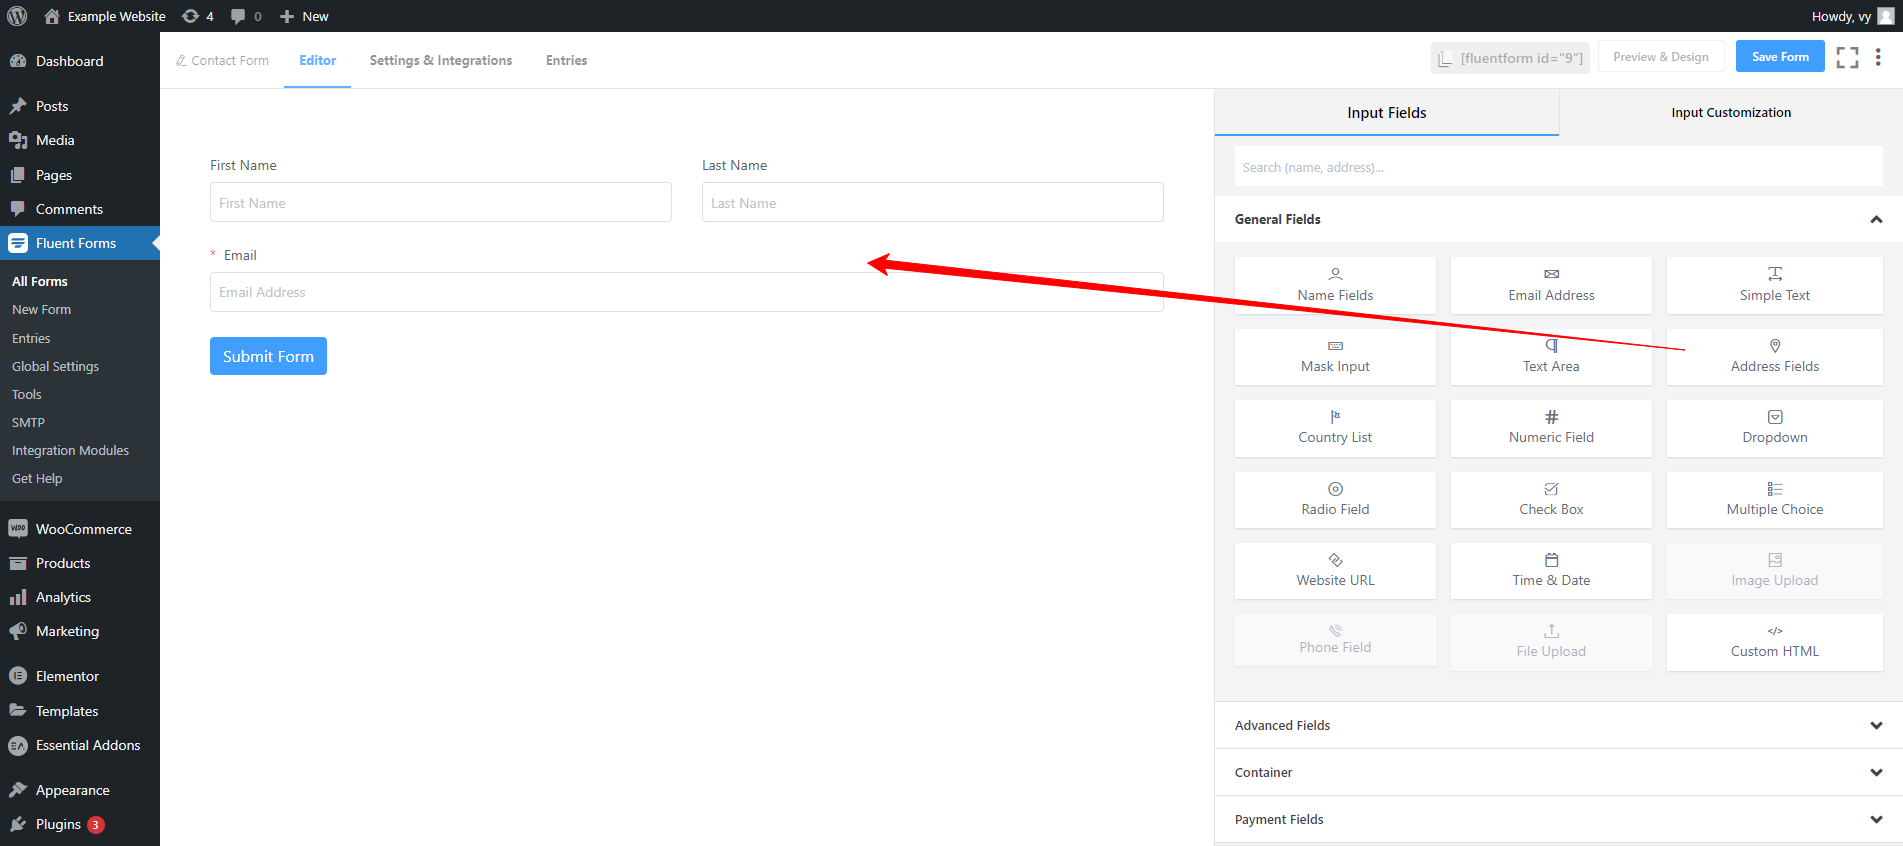
In the editor, you can add any fields according to your demands by clicking on that field or dragging and dropping that field into the Editor.
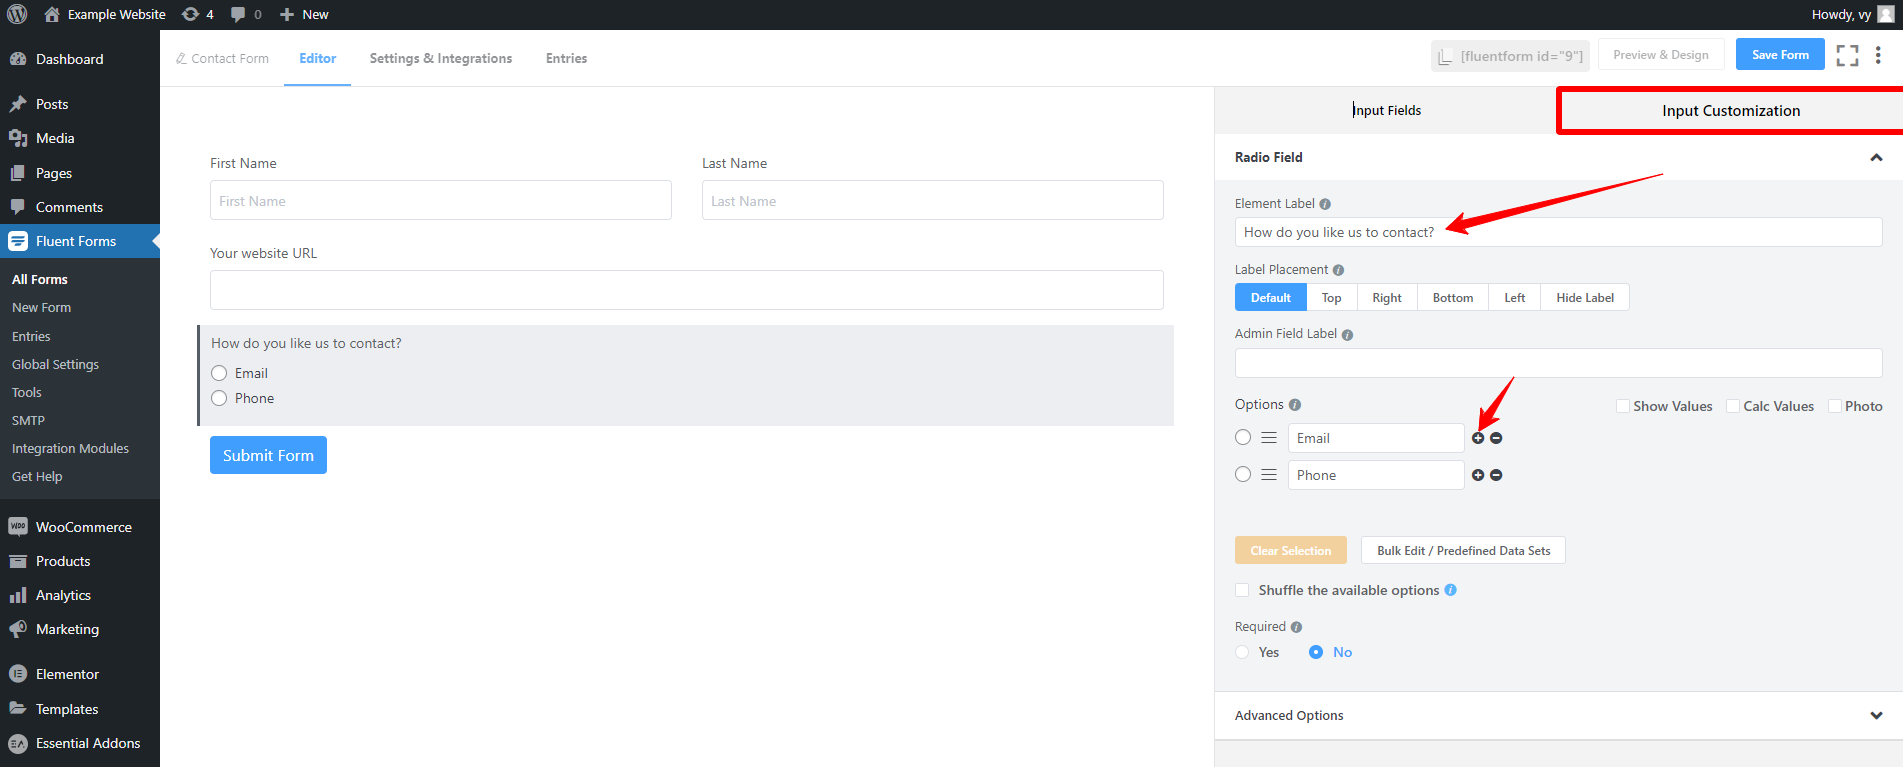
Now, in order to create a conditional logic form in Elementor , you need to add the input fields (Radio buttons, Multiple choice, Checkboxes, etc) which will dictate the conditional input fields. For example, we are going to use the Radio field here.
After adding the input field to the editor, you need to click on the Input Customization tab to edit your chosen field. From there, you can fill the element label and add more options for your questions by clicking on the Plus icon.
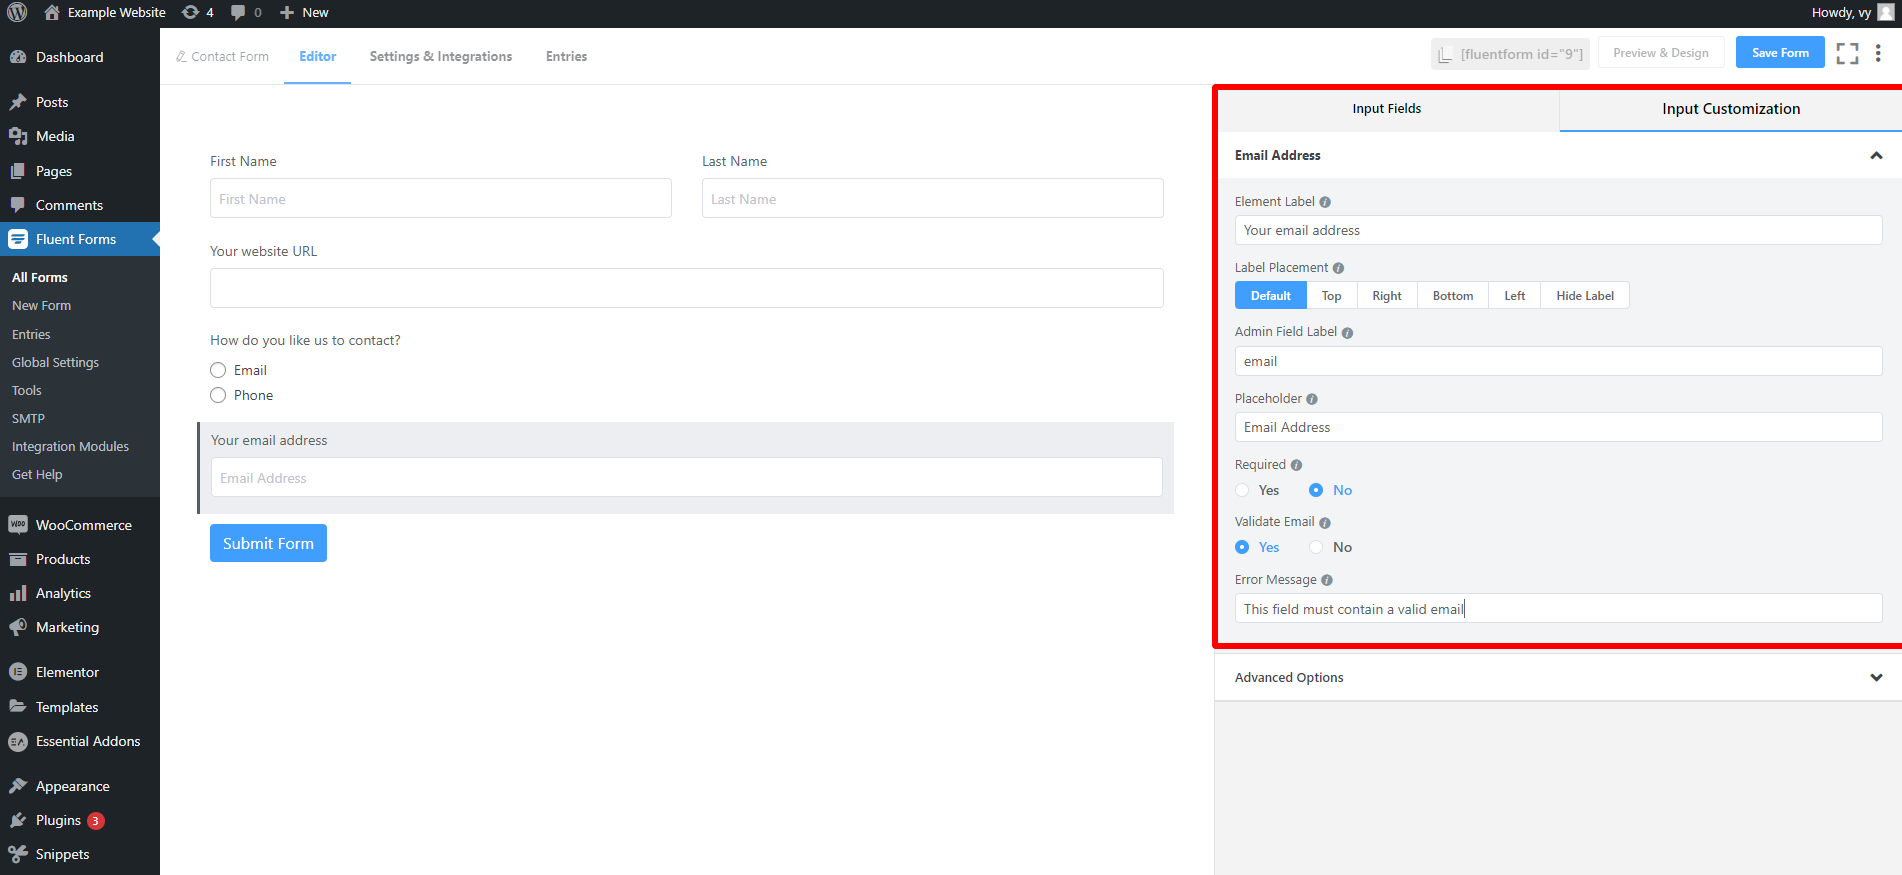
Next, you need to add the input field that will respond to a specific user action.
Similarly, you can hover over this field and click on the Edit icon to edit this field or click on the Input Customization to customize it. In addition, you are able to set the element label, admin field label, place holder, and so on.
Now, let’s go to Advanced options. From here, you can set the default value by choosing from the drop-down menu. In addition, you can provide container class, help message, element class and define the name attribute.
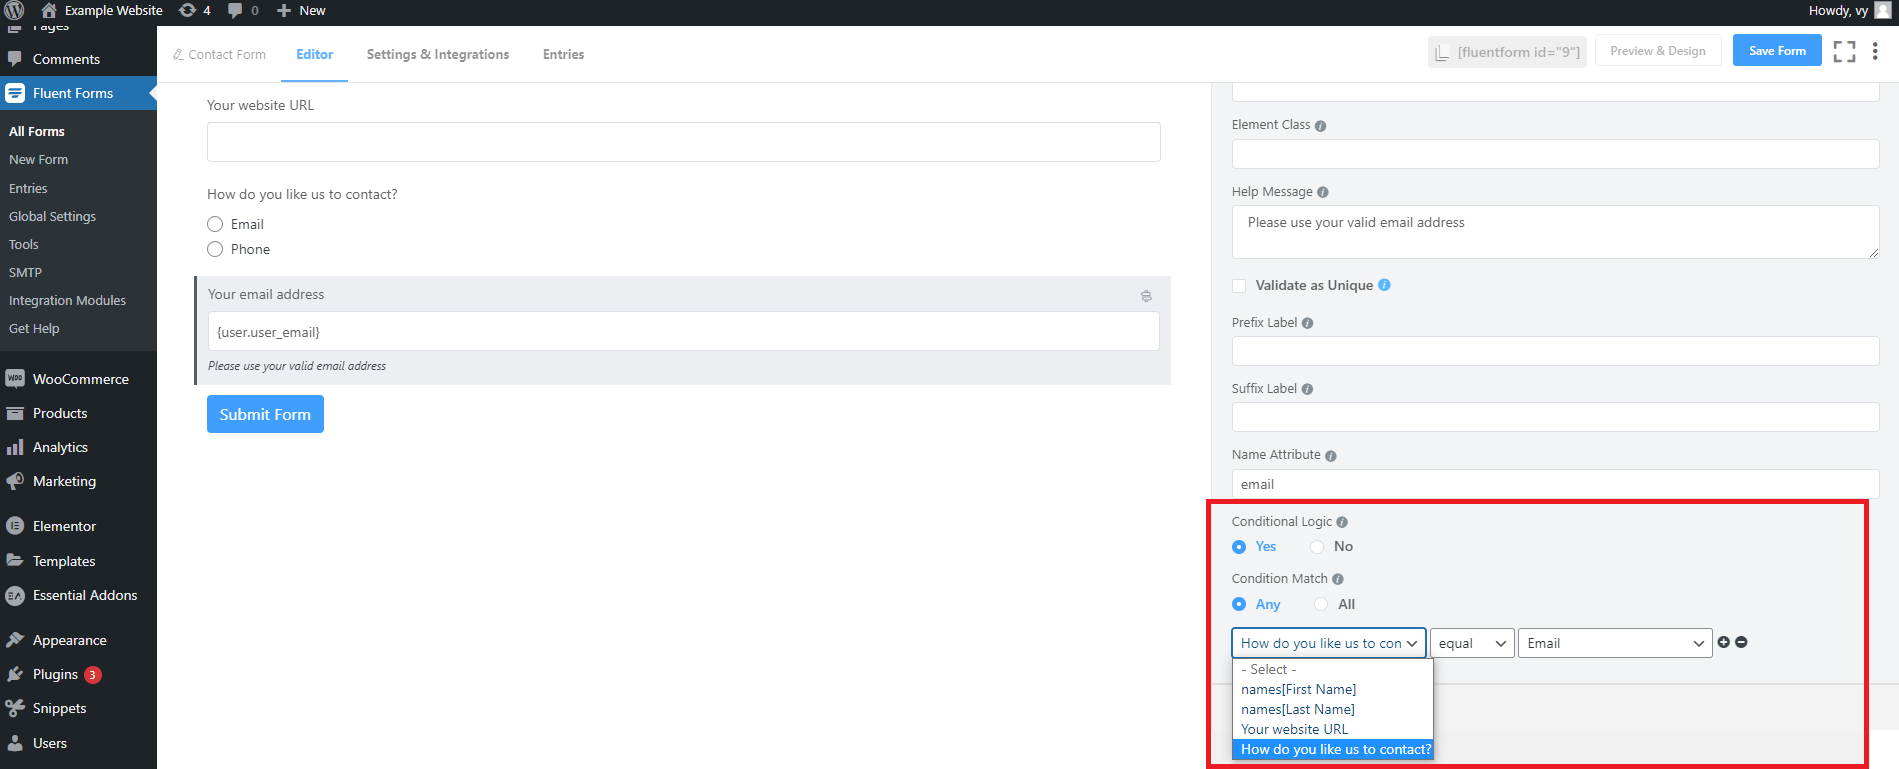
Let’s scroll down the screen, you will see the conditional logic option. You can need to click on “Yes” to activate this.
Then, you will have the condition match option. With this option, you need to click on “Any” if the field needs to respond to a single action and choose “All” if it needs to fulfill multiple conditions.
Next, you need to define the input field of the logic that will reply on from the drop-down menu and set a suitable condition. Finally, let’s define which input field will respond once the condition is met.
Now, you keep adding another field that will respond to other user actions. The process is also similar to all steps that we performed above.
Once you are satisfied with your form, let’s click on the “Save Form” button to save your settings or hit the “Preview & Design” button to preview your form.
Step 3: Adding your conditional logic form to Elementor pages and style it
Now, it’s time to add your form to any page in Elementor.
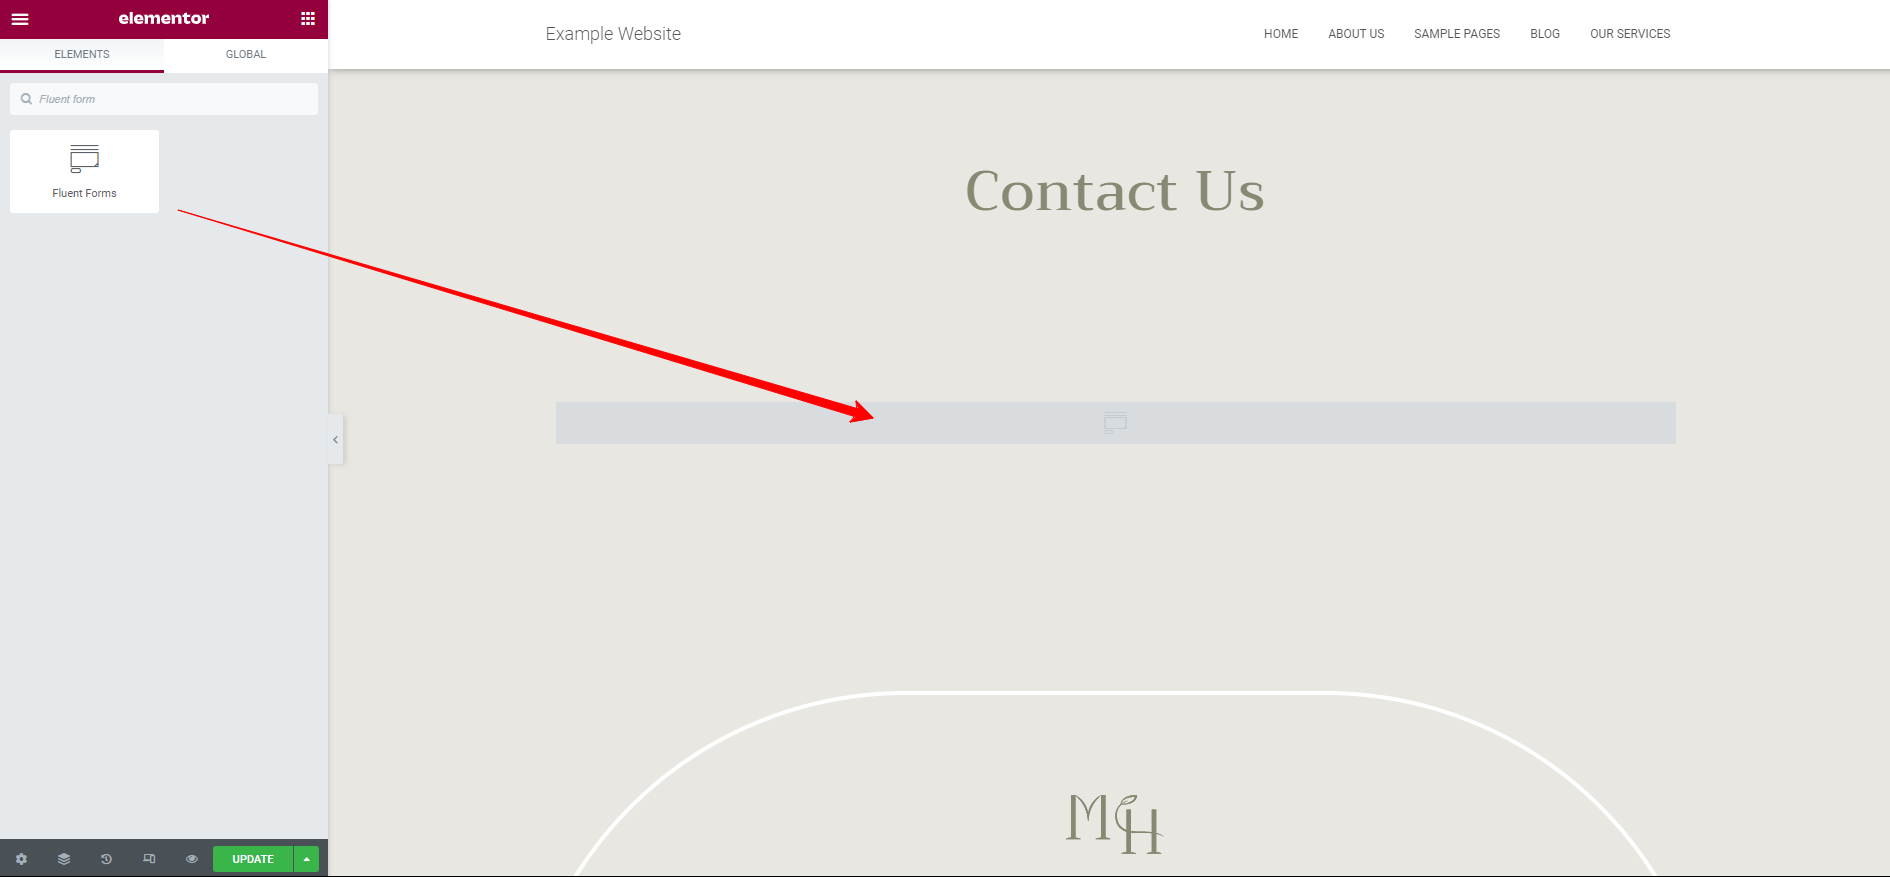
First of all, you need to open any page that you want to display conditional logic form. Then, search for the “Fluent Form” widget from the left column and drag and drop it into your content.
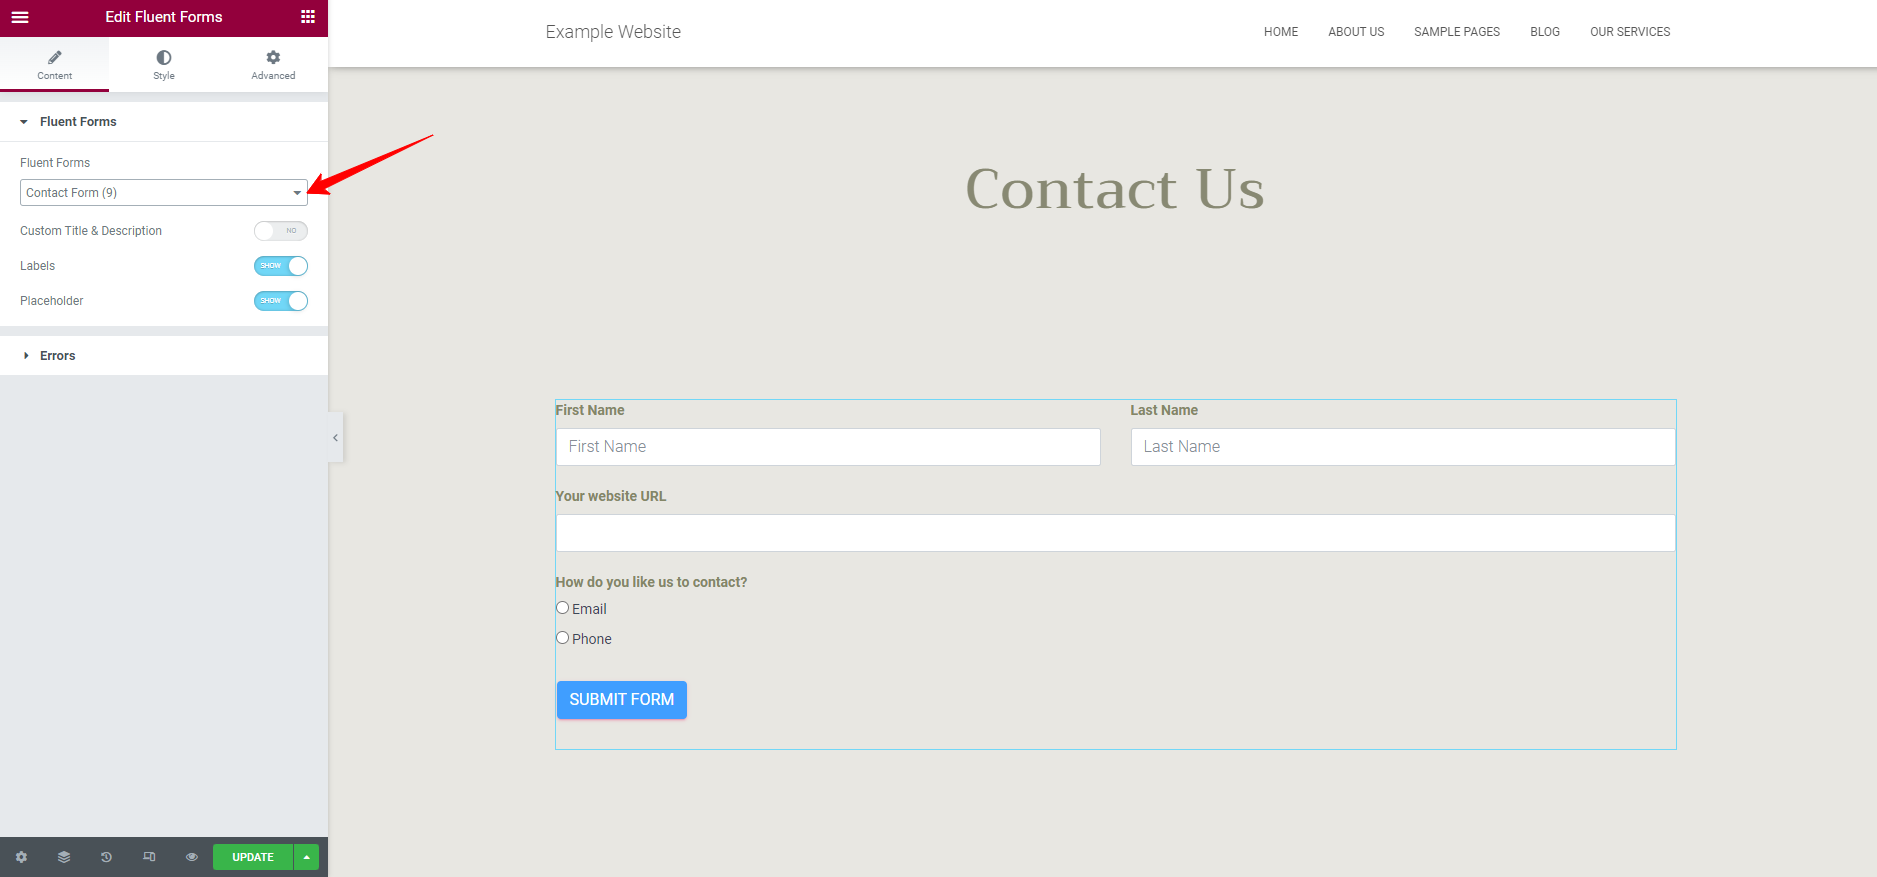
After adding the form widget to your Elementor page, you can now click on the drop-down menu below the Fluent Form section to choose the form that you would like to display.
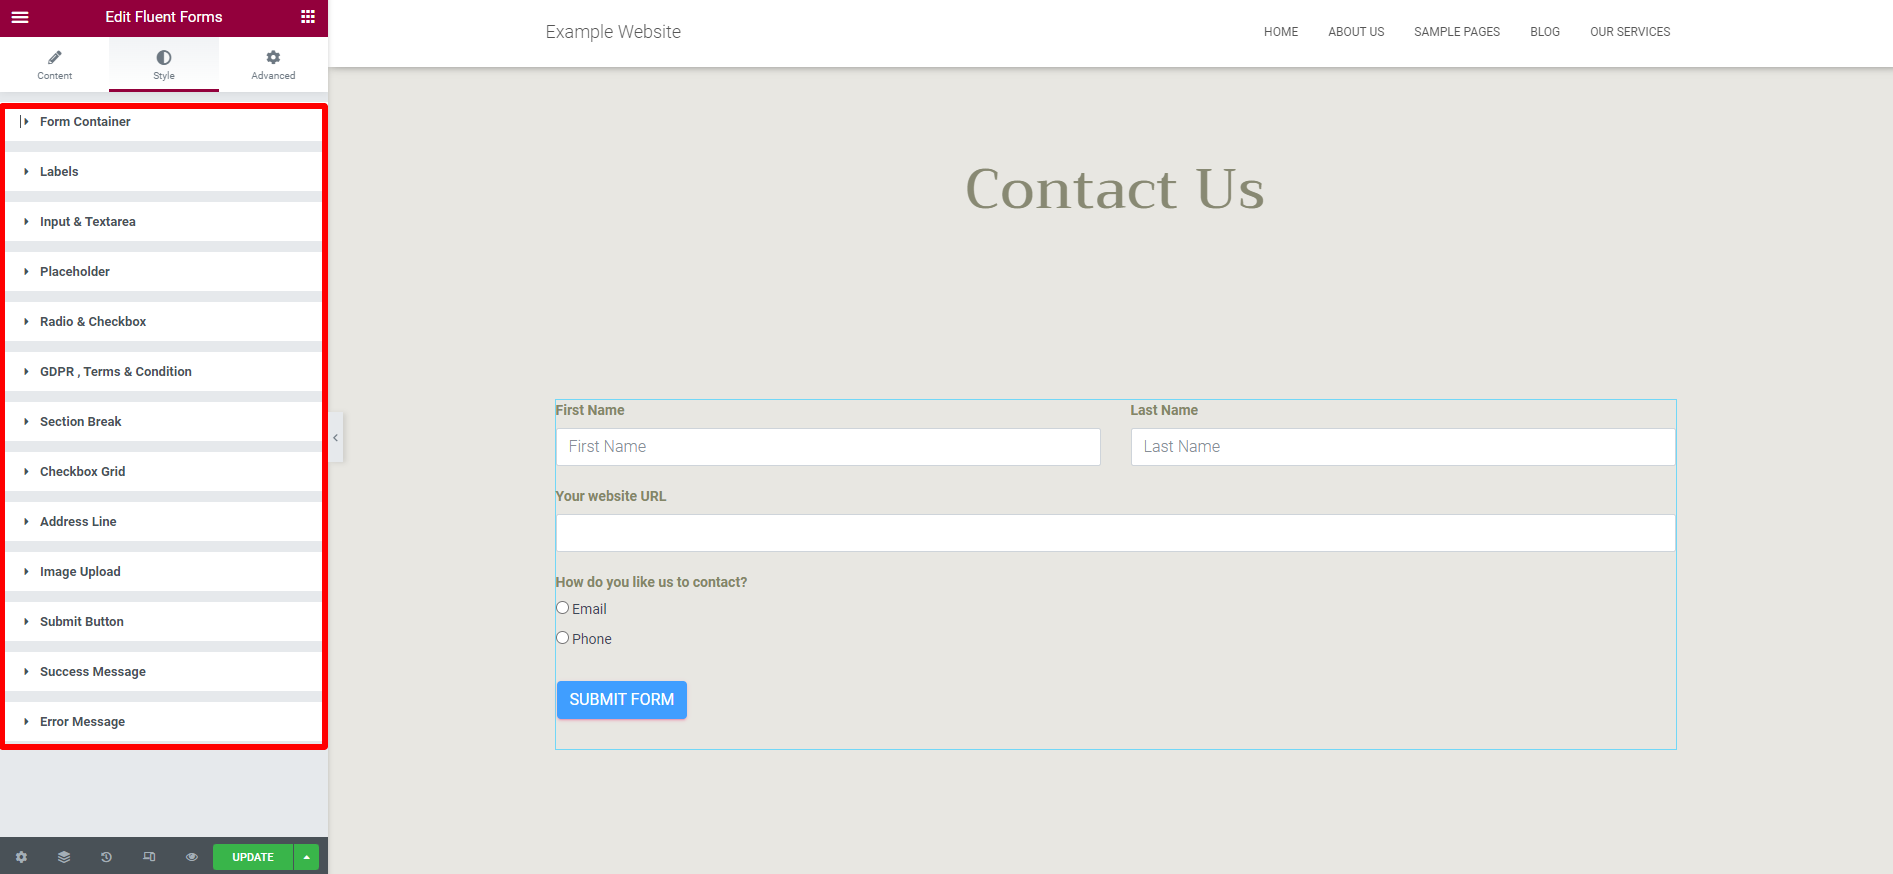
In addition, you can navigate to the “Style” tab to customize the appearance of your form with different background colors, text colors, typography, border, effects, and other styling elements.
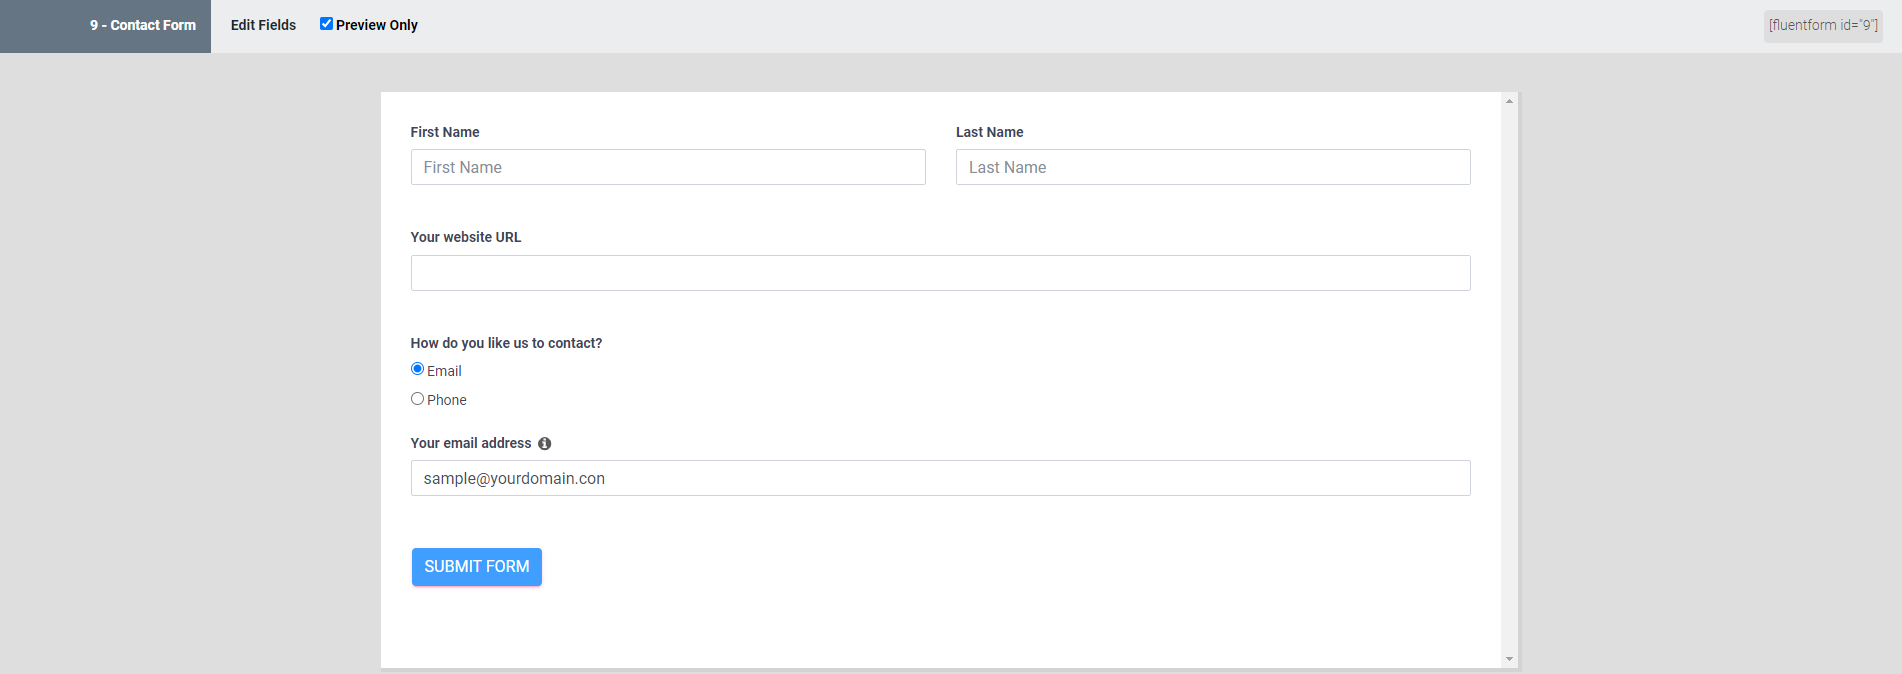
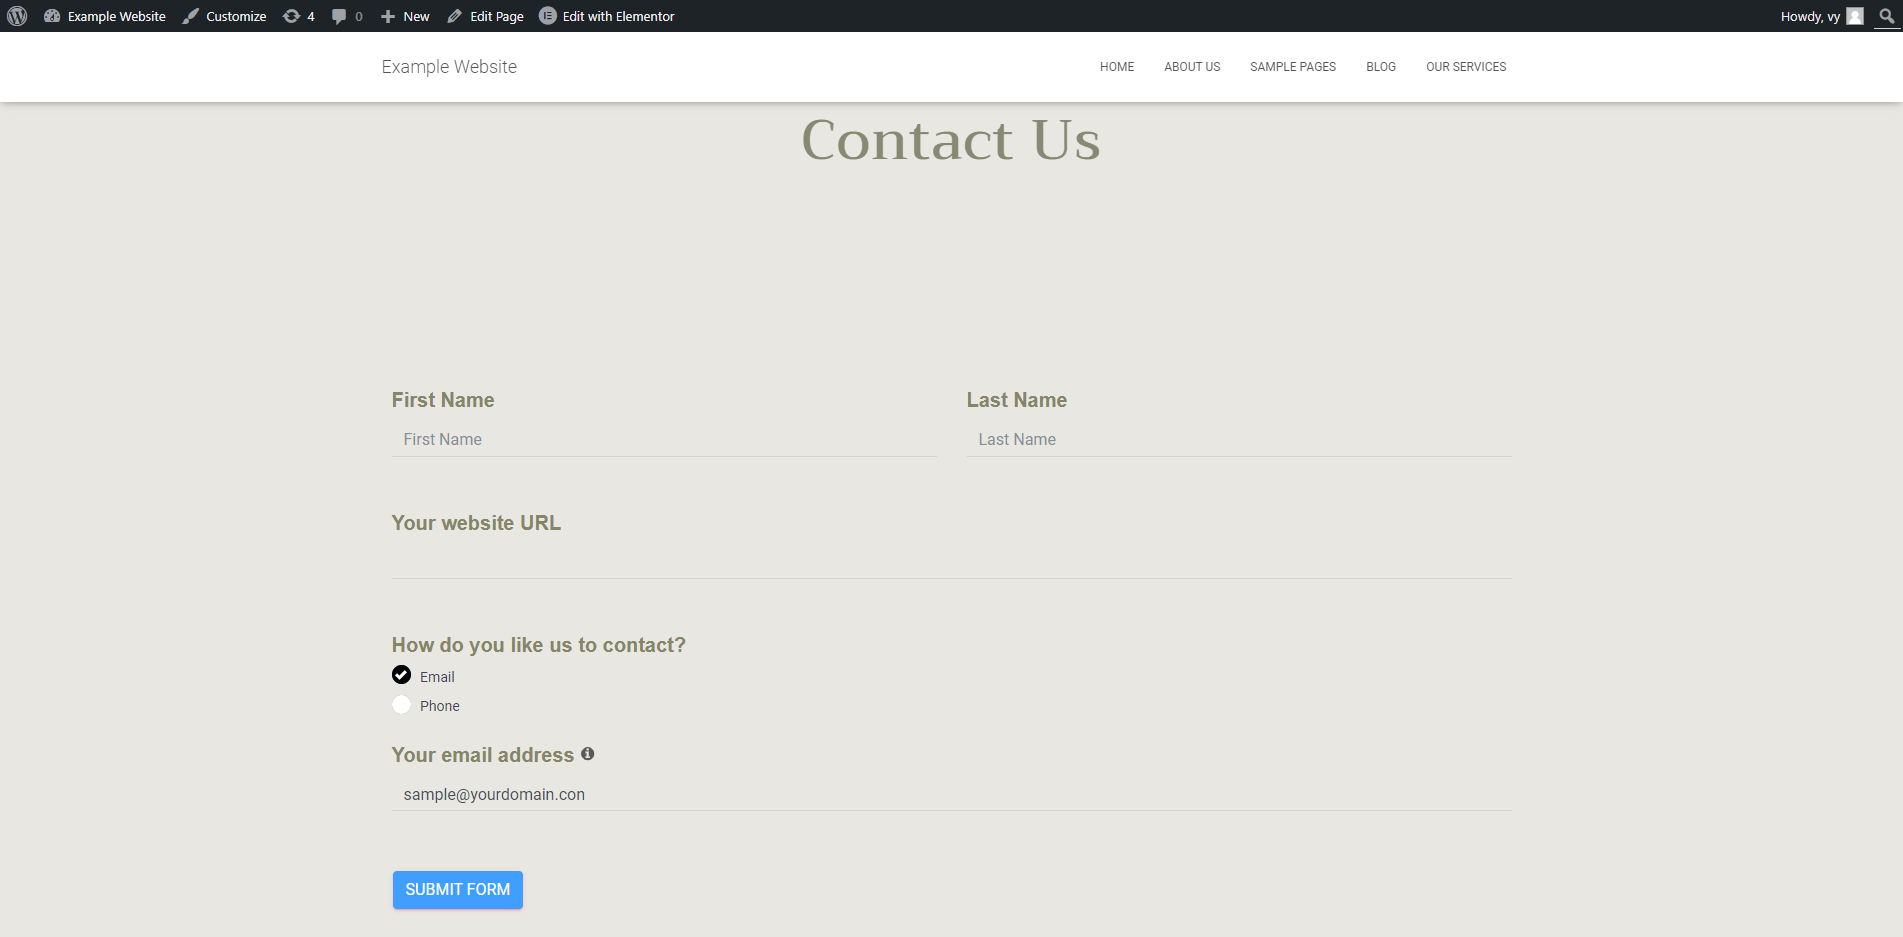
Then, you are able to preview your Elementor conditional logic form before pushing it. As you can see in the screenshot image below, we have set up conditional logic in our form.
Now, if the visitor selects the “Email” option, then the “Your email address” field will be displayed. And in contrast, if the “Phone” option is chosen, the “Phone number” field will be shown.
The bottom line
Is this method useful for your website? Hopefully, our tutorial will help you easily create conditional logic form in Elementor without difficulties. If you have any questions related to this topic, don’t hesitate to mention them by leaving a comment below. We are always willing to support you.
Moreover, we listed a collection of valuable Elementor add-ons that will assist you to expand the functionality of Elementor effectively. Let’s check them out.
By the way, we would like to recommend a gallery of bewitching, free Elementor WordPress themes on our website. They will support you in creating any professional website effortlessly.
We're a Digital Team from EngineTemplate with 5 content experts. Our team has 5 years exp in open source Joomla and WordPress, we make daily blogs and build useful resources for everyone who is having issues with open source while using it.