Do you want to showcase a collection of beautiful images in a professional layout? Using a Filterable gallery widget is a great idea to display plenty of stunning pictures with separate categories and grid styles. In addition, you are able to customize the overall design to ensure an eye-catching appearance.
Luckily, there are several Elementor plugins supporting this feature, so they make it easy for you to create a filterable gallery in Elementor easily. However, many plugins only support this functionality if you purchase their premium version. Therefore, in today’s article, we would like to introduce to you a free filterable gallery Elementor tool that comes with plenty of powerful features and styling options. It will help you save a lot of money. Now, let’s check it out.
How to Create A Filterable Gallery in Elementor
In order to create a Filterable gallery in Elementor, you need to track the following steps.
Step 1: Installing and activating the plugin
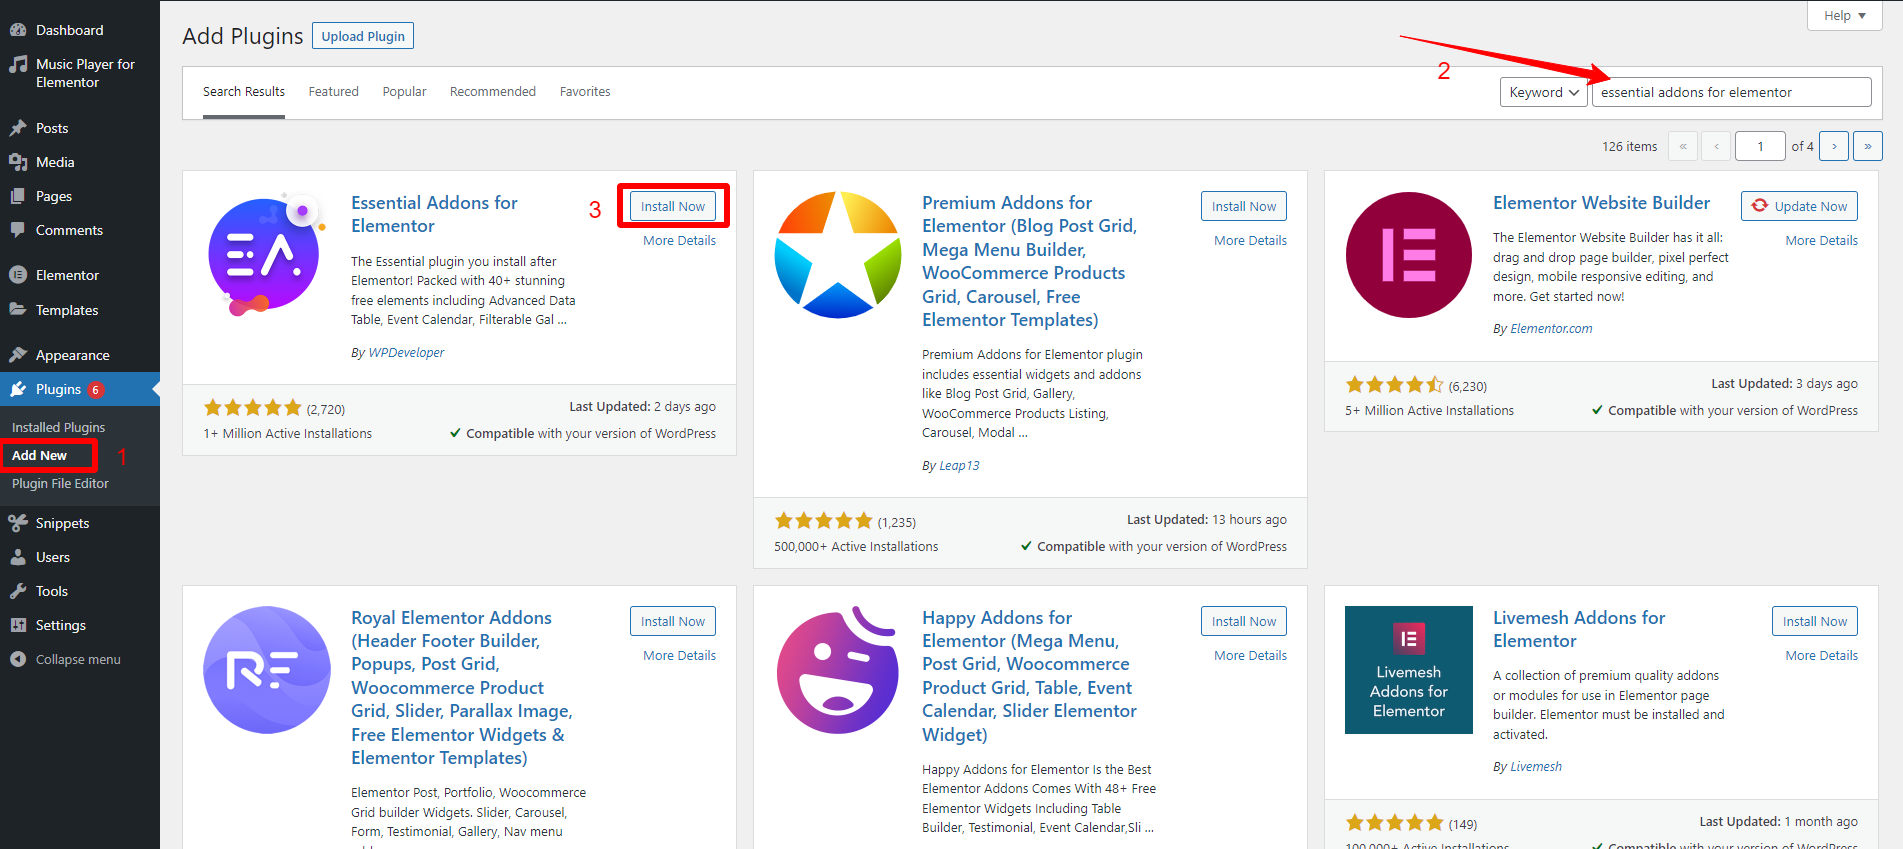
To start, you need to install the Essential Addons for Elementor plugin. This is one of the most useful WordPress Elementor plugins. Now, go to Plugins > Add New from your dashboard and then use the search bar to find the plugin. After that, click on the Install now button and Activate the plugin.
Step 2: Adding the Filterable gallery widget
Once you have activated the plugin, let’s open the page where you want to create the attractive Gallery in the Elementor page builder. Navigate to Pages > open one of the available pages or click on Add New to create a new one. Then click on the “Edit with Elementor” to move to the Elementor editor.
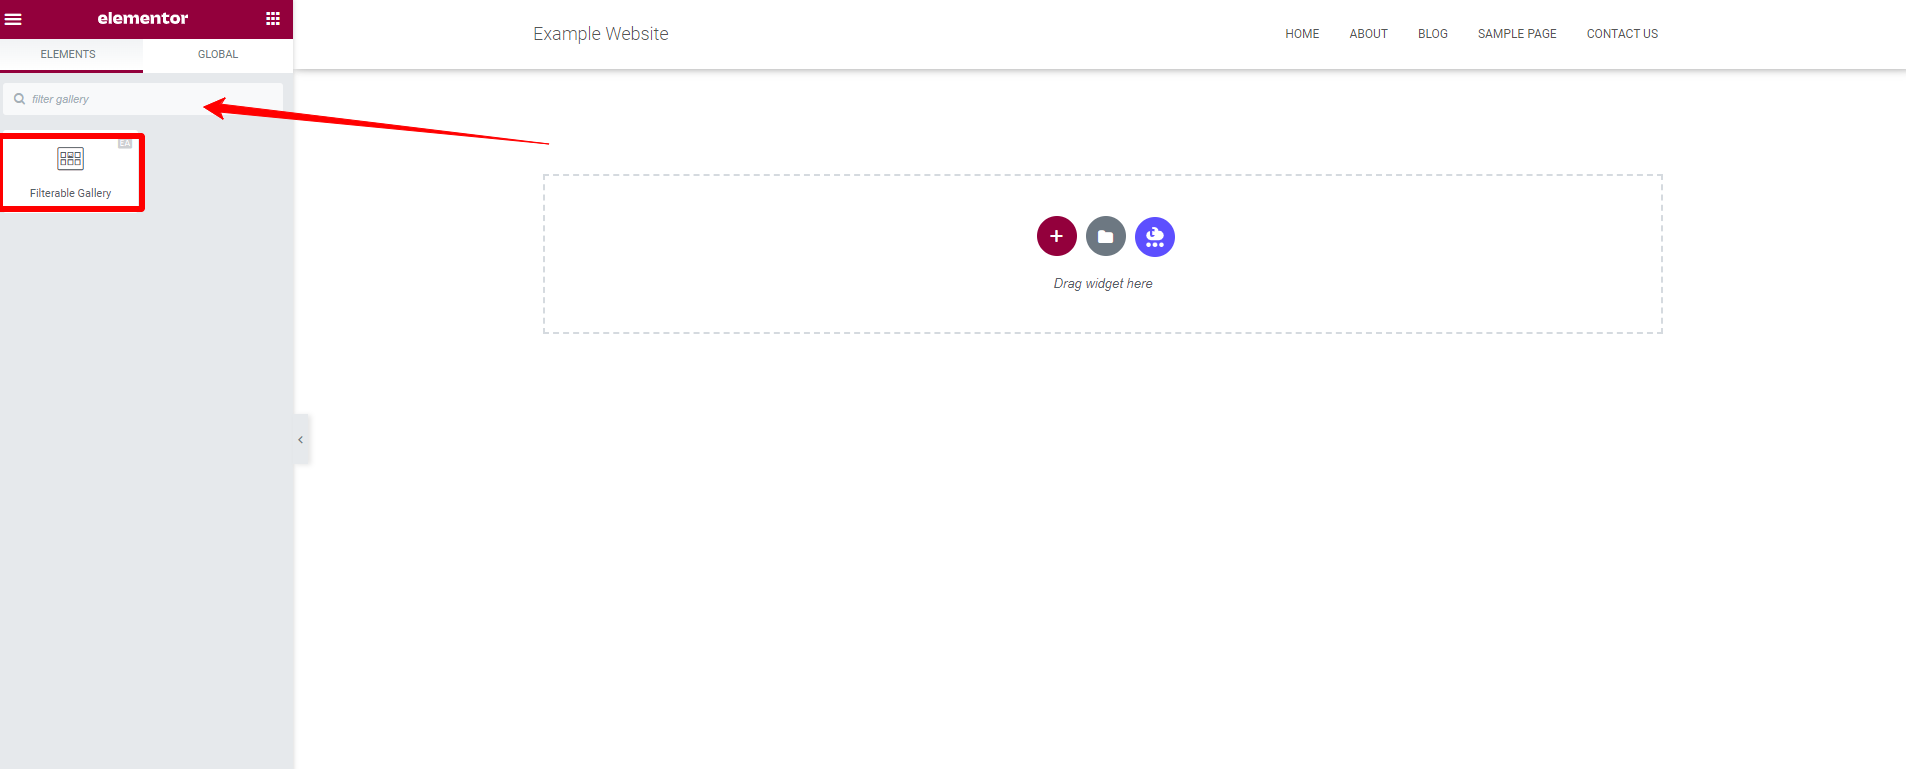
In the Elementor editor, you need to find the Filterable Gallery widget from the sidebar on the left and add it to the page.
Step 3: Adding images to the gallery
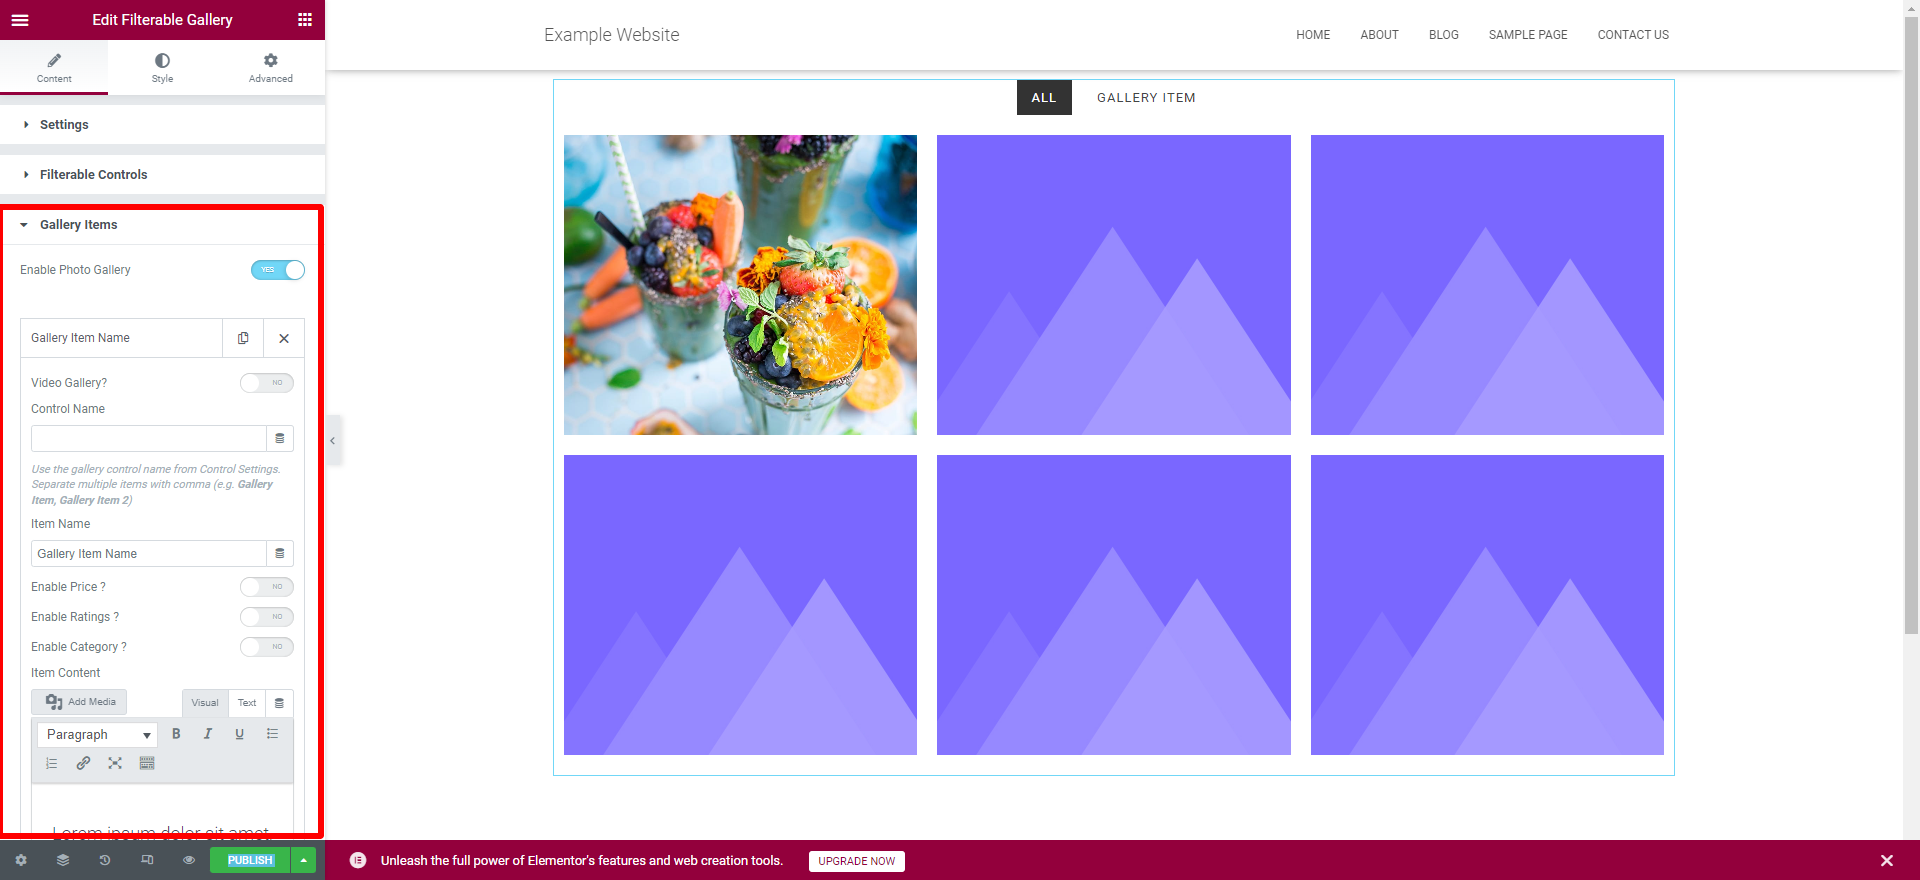
Now, you need to click on the Gallery times section to add images for your gallery. You can adjust all gallery items in your gallery. First of all, you need to provide a keyword in the control name field that will help you separate multiple items in common. Then, you need to scroll down the sidebar and see the image field.
From here, you can choose an image from your media library or upload a new one. You can also change the Item name and Content in the given space.
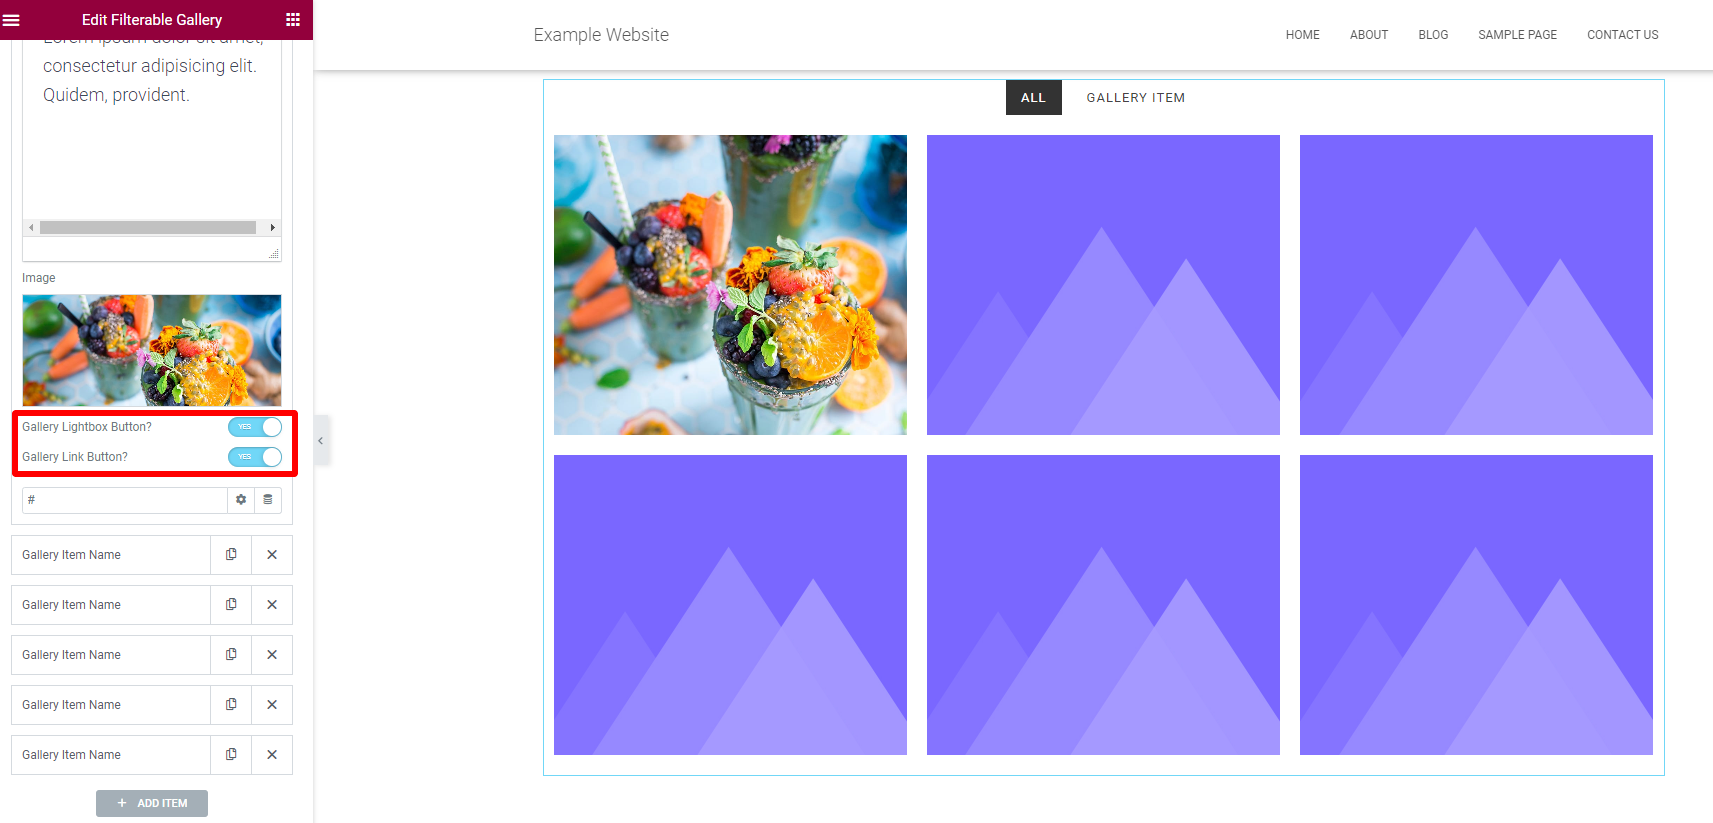
Moreover, it also allows you to Enable or Disable Gallery Lightbox and Gallery Link buttons. If you enable the Gallery link button, you also need to provide a link in the URL box and choose your favorite redirection option.
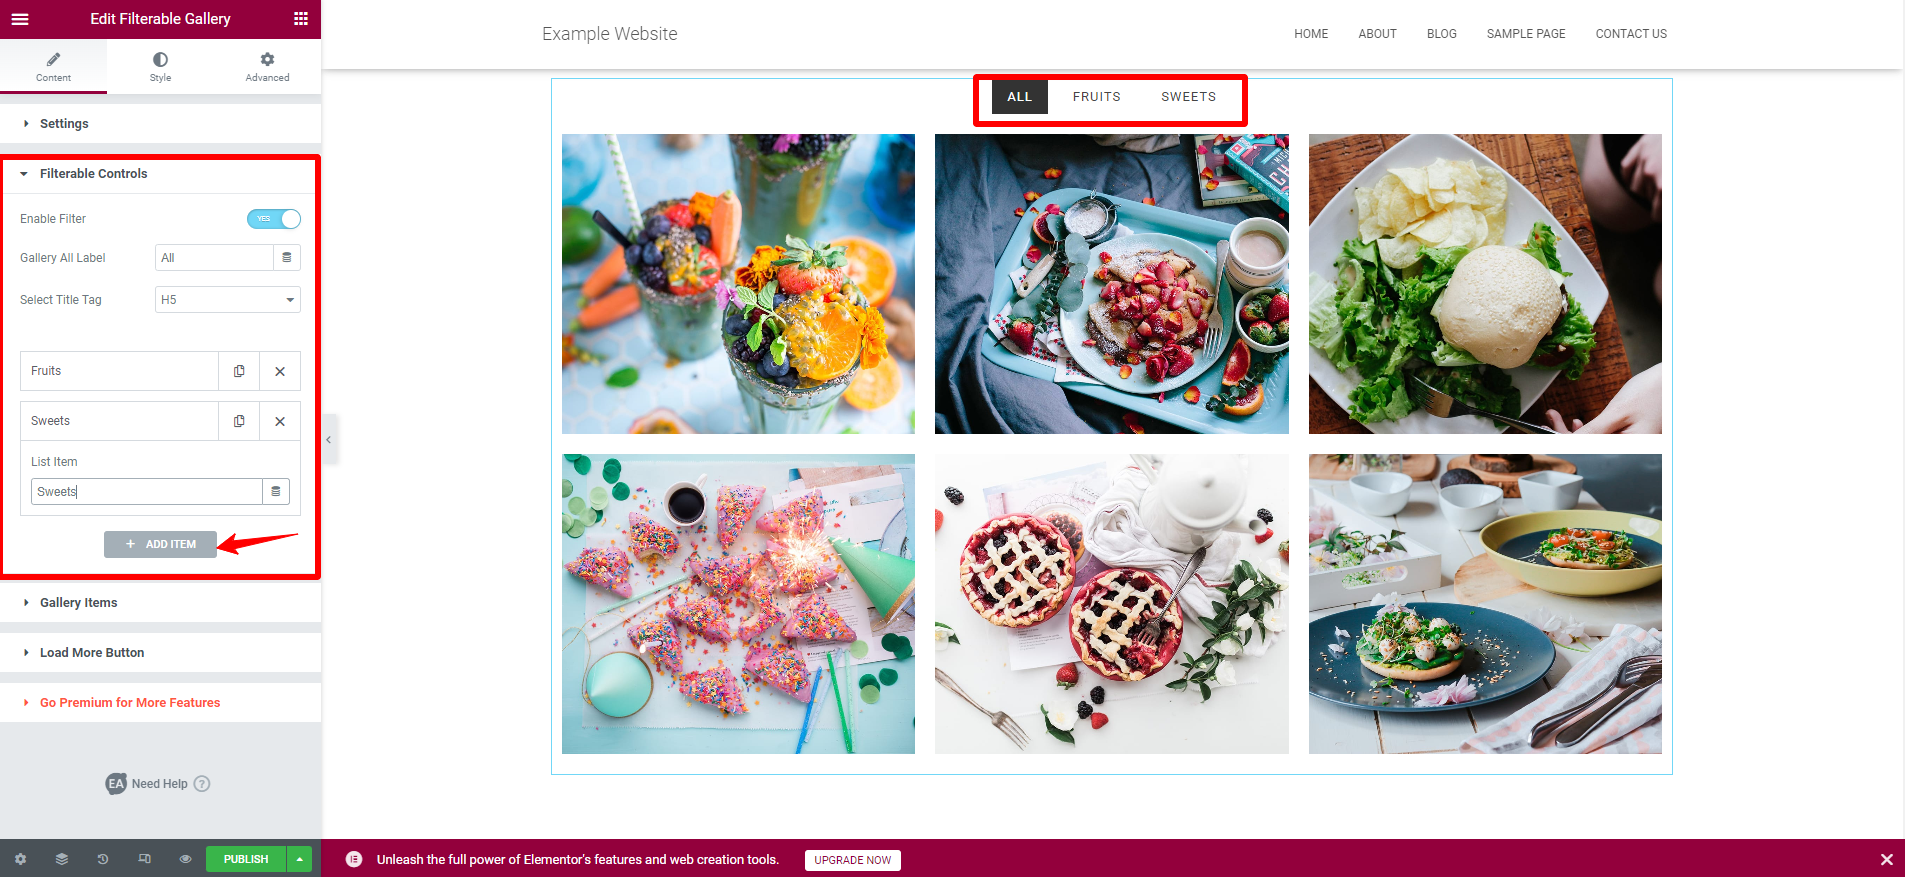
Step 4: Adding filter control
You need to click on the toggle switch under the Filter controls section to enable the filtering option. Then, you can change the Gallery All label and add/edit/copy/delete list items.
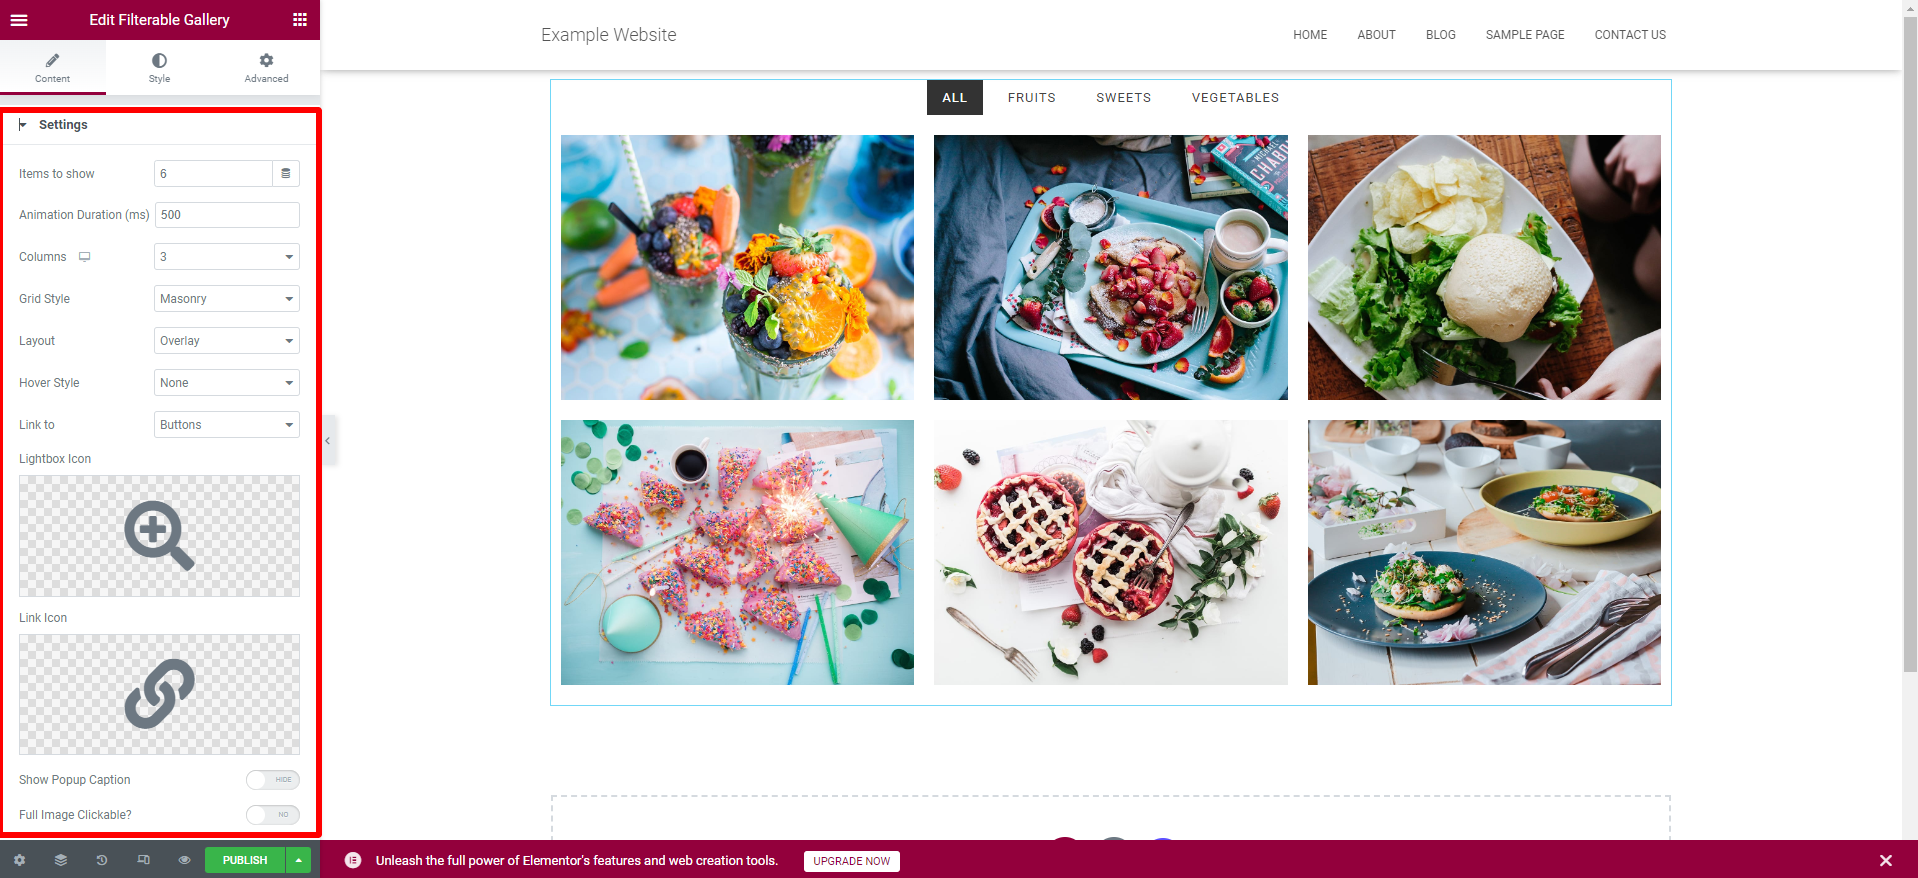
Step 4: Customizing the gallery
Now, navigate to the Settings section and make changes to your gallery. The settings section comes with plenty of useful options. From here, you can change the number of images shown in your gallery.
Additionally, you can also set the “Animation Duration” as well.
Next, let’s choose the number of columns to be shown, and select the option to show your gallery in “Grid Style” or “Masonry Style“.
Moreover, there are three different layouts for you to choose from including: “Overlay“, “Card” and “Search & Filter” layouts. Plus, this plugin also allows you to change the “Hover Style” if you want to showcase your gallery in the Overlay layout.
Finally, you can choose your icons for “Lightbox” and “Link” and click on the toggle switch “Show Popup Caption” and “Full Image Clickable” as you want.
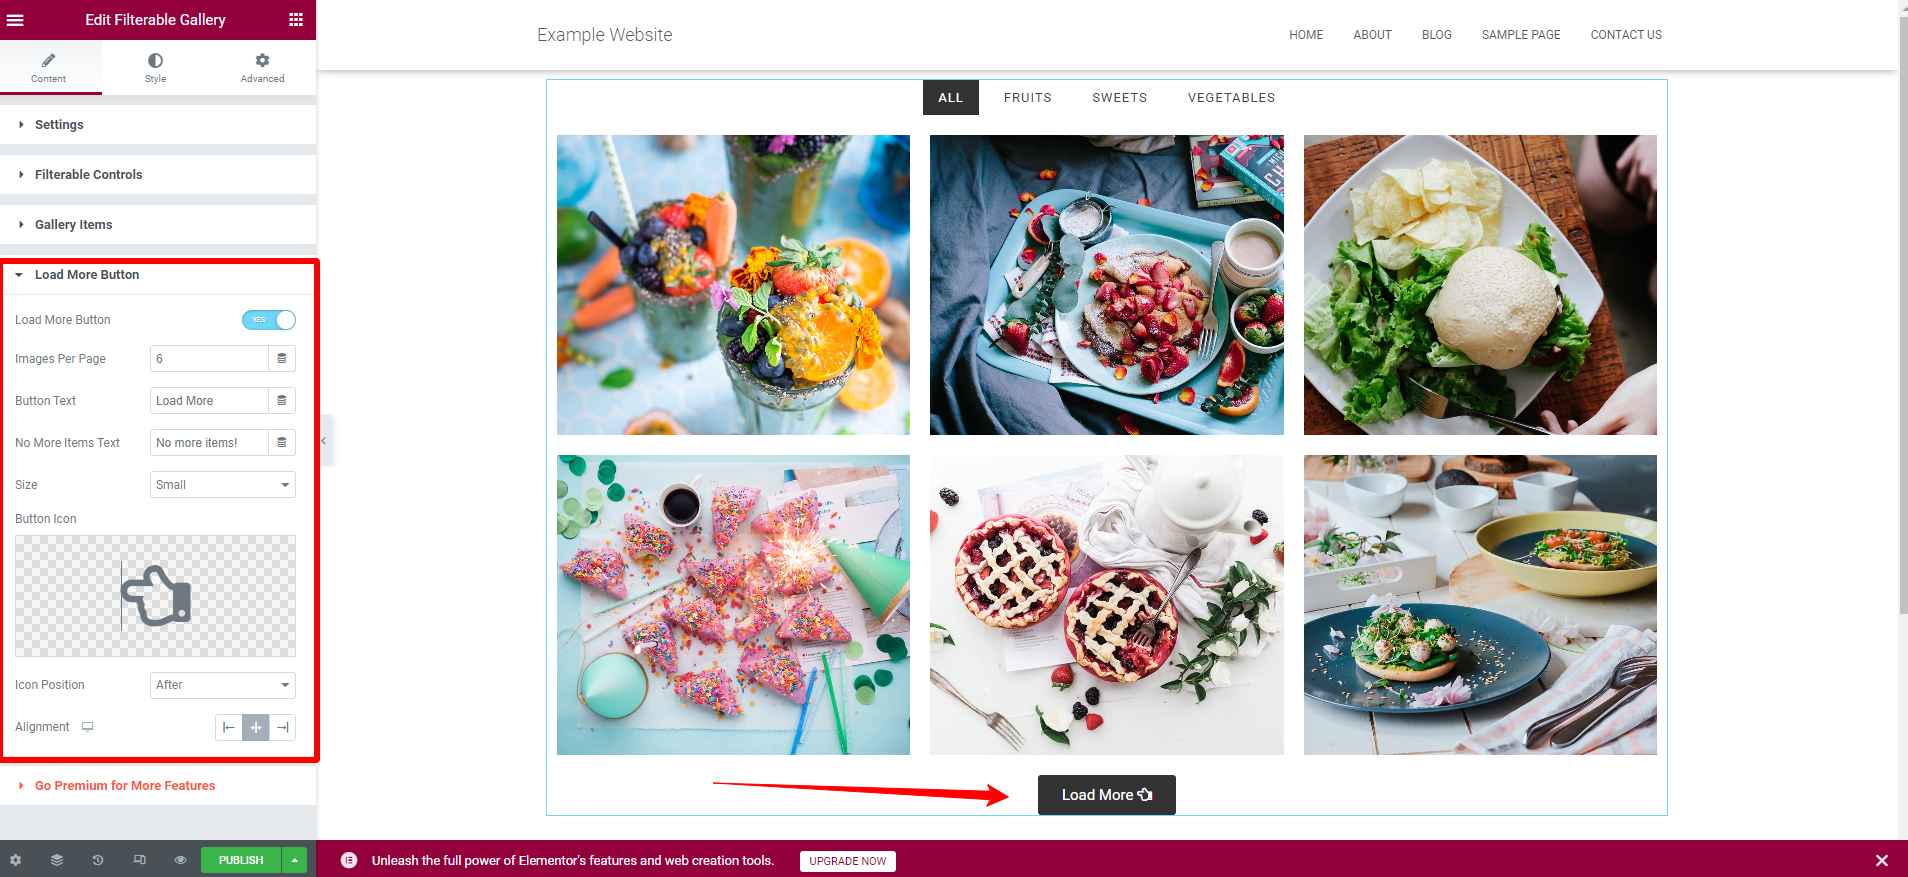
Step 5: Adding load more button
If you want to show plenty of beautiful images, you need to enable the “Load More Button” option. After enabling this option, you can adjust “Images per page“, edit the “Button Texts, Size, Alignment, and choose the “Button icon”.
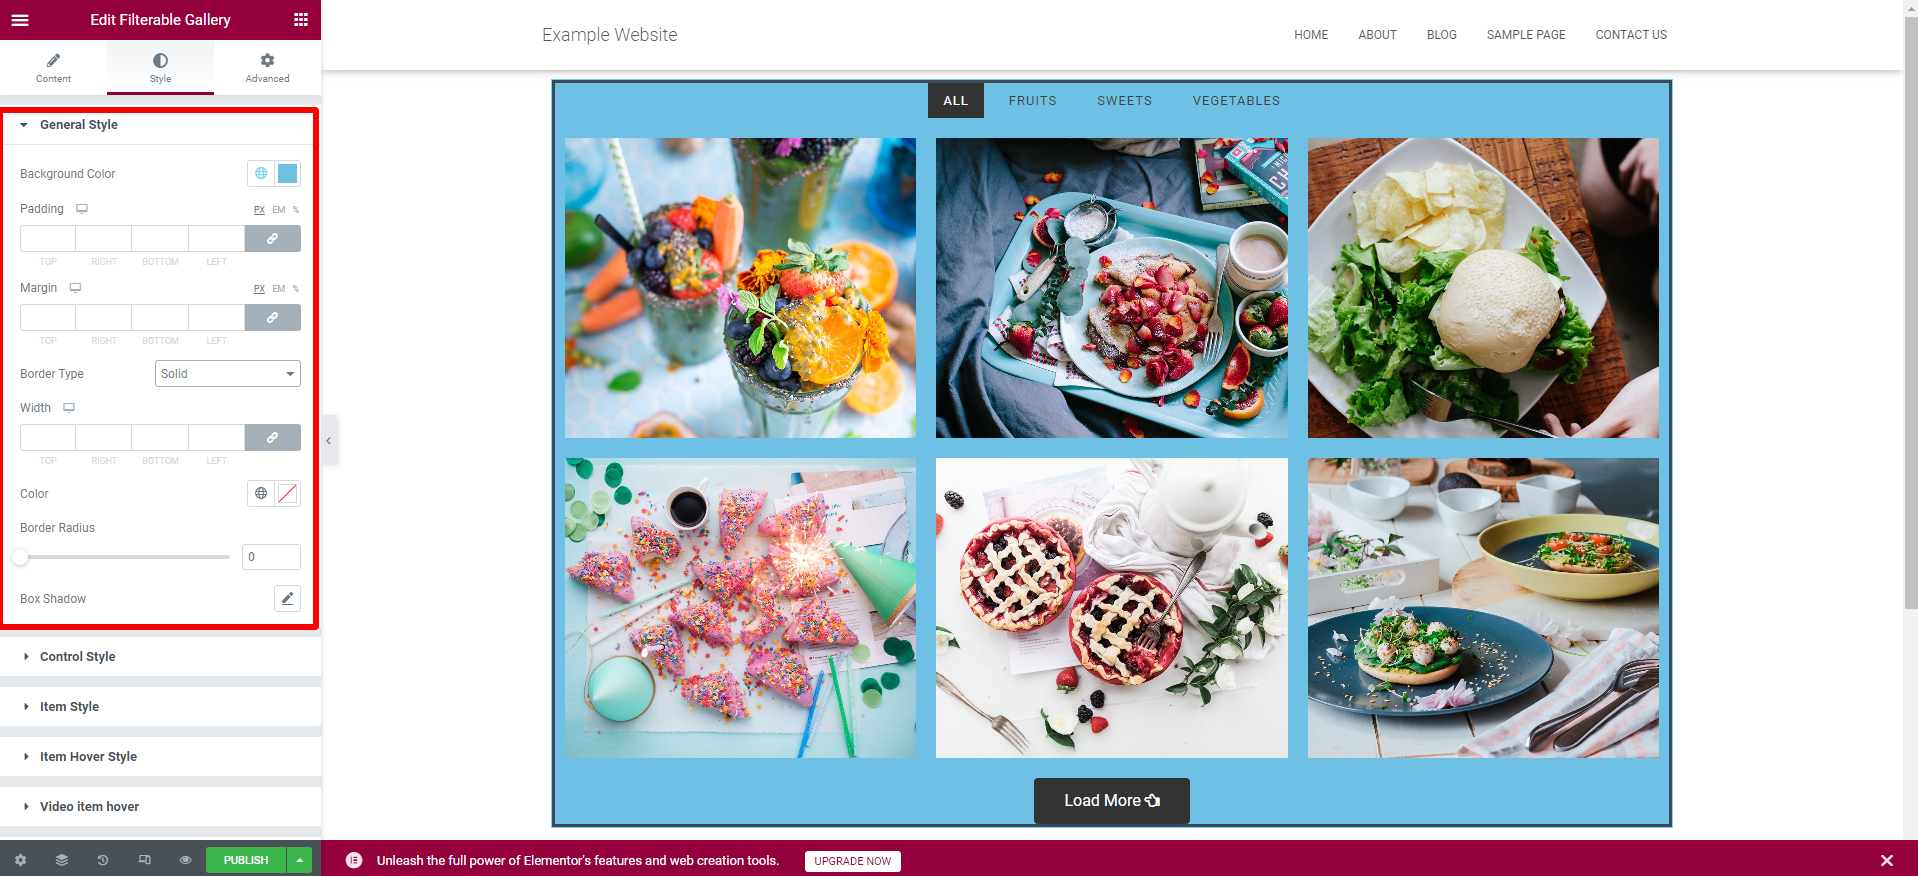
Step 6: Styling filterable gallery
Now, it’s time to move to the “Style” tab to style all aspects of your filterable gallery. Under the Style tab, you will see 7 sections including General style, Control style, item style, Item hover style, Video item hover, Icons style, and Load more button.
From the General style section, you can change “Background color, Padding, Margin, Width, add Border Type, Box Shadow, and much more.
Similarly, you can make changes to the appearance of your gallery by styling the Control, Item, Icon, and Load More Button.
Once you are pleased with your filterable gallery, let’s click on the Publish button and visit your site to how it looks.
Summary
We have just provided you with all steps to create a filterable gallery in Elementor. Hopefully, through our blog, you can create your own beautiful gallery without effort. If you get into trouble with the mentioned method above, please let us know by leaving a comment below. We will support you as soon as possible.
Moreover, if you want to make a stunning appearance on your website, don’t miss a list of appealing, free WordPress Themes on our website. Thanks for your reading.
We're a Digital Team from EngineTemplate with 5 content experts. Our team has 5 years exp in open source Joomla and WordPress, we make daily blogs and build useful resources for everyone who is having issues with open source while using it.