In this tutorial blog today, we will provide an overview of Favicon and How to Add a Favicon to WordPress sites in different methods. Let’s read it carefully and find out the best way to add a favicon to your WordPress sites!
Definition
In a simple way, Favicon stands for “Favorite Icon”, which is a tiny image accompanying your brand or website in browsers. It is used to present in the tab or bookmark bar, search results, mobile apps, and others that you can see easily day-by-day. To help you easier to understand, let’s take a look at examples in the following images.
Is it essential to add a favicon to WordPress sites?
Favicon is a useful way for customers to recognize your brand between thousands of current businesses. In addition, it also helps you increase trust and credibility among customers as well, helping you boost your products and services effectively. Along with the websites’ identity, Favicon also makes it easier for you to improve users’ experience. This is because, when Internet users open a wide range of websites in one browser, the name/title of the pages/sites will be hidden and only the favicon is visible.
Solutions to add a favicon to your WordPress sites
There are 3 basic ways for you to embed a favicon on your WordPress pages or sites. Each of them has its own pros and cons, so you should go through all of them and choose the best one for you.
Don’t forget to create your unique and meaningful favicon via the support of your favorite images edit programmers. It’s a good idea for you to design a favicon with a size of 512 pixels in both width and height. You can make it as many types from PNG to JPG and more.
If you are a beginner, we highly recommend you to use the first and second methods to implement a favicon to your WordPress websites without touching any line of codes.
Solution 1: Using a theme with WordPress core functionality
This is considered the most simple method because it allows you to add a favicon immediately via the assistance of a WordPress core feature.
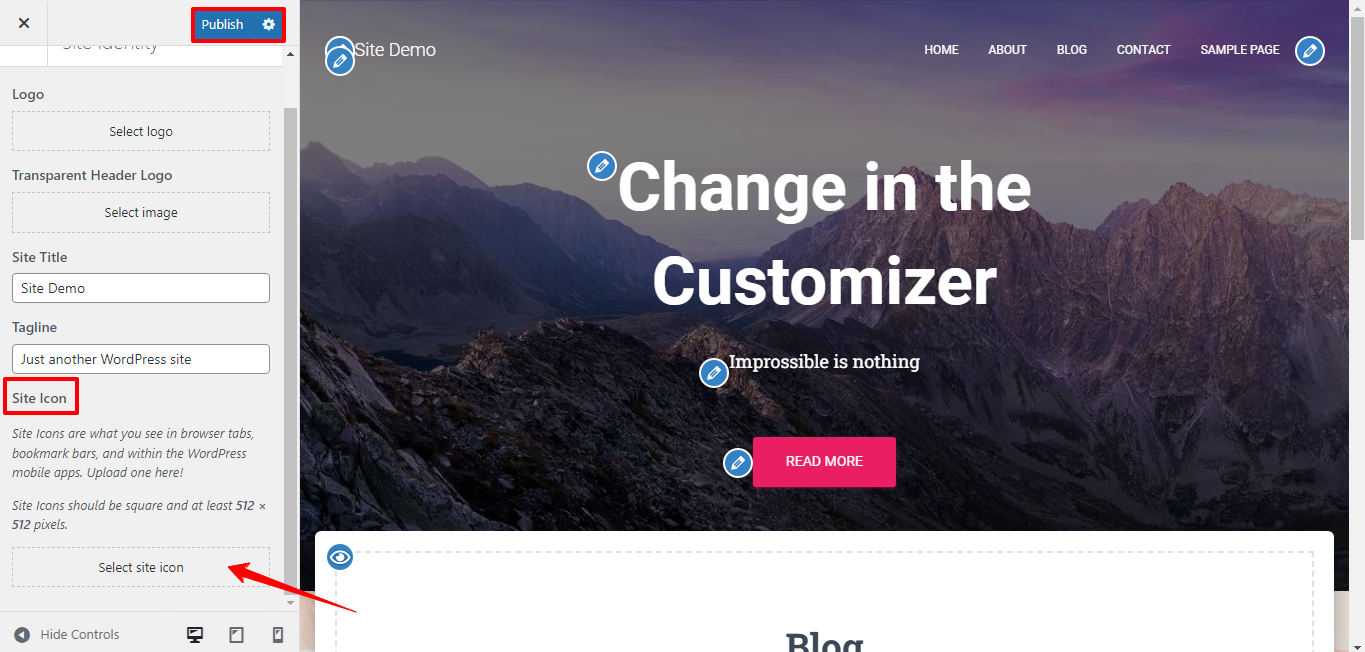
Go on Appearance –> Customize –> Site Identity to open the customizing window. In this place, scroll down to the Site Icon section, choose the Select site icon to upload your site icon mages. After that, don’t forget to click on Publish to save your site changes.
It’s also possible for you to upload or change the site logo, transparent header logo, title, and other options in your own way. You are able to adjust the size of your image icon to make it fit with the suggested size and display perfectly on any browser easily.
Solution 2: Using a plugin
This solution requires you to install and activate the Favicon by RealFaviconGenerator before doing the rest of this method. In case you have no idea about setting up a plugin, let’s follow us.
There are some simple steps for you to install and activate this plugin, including:
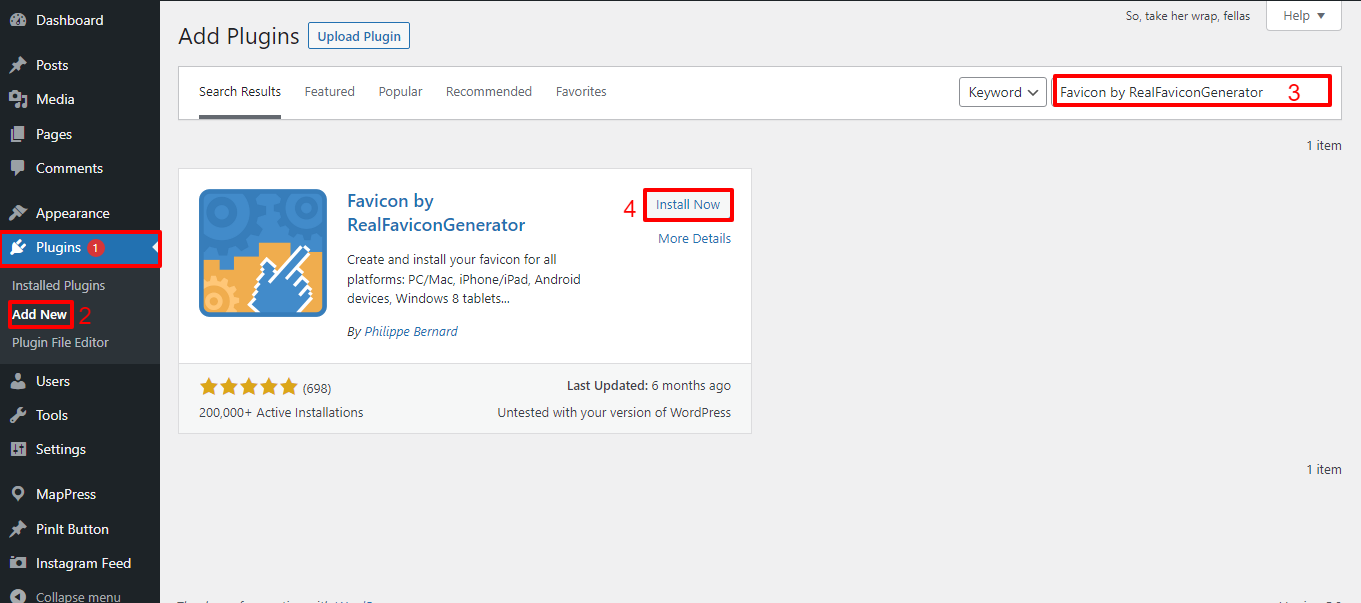
From the Admin dashboard –> Plugins –> Add new
Enter the name of the plugin in the Keyword search bar
Click on the Install Now button and when this button turns on Activate, click on it to finish.
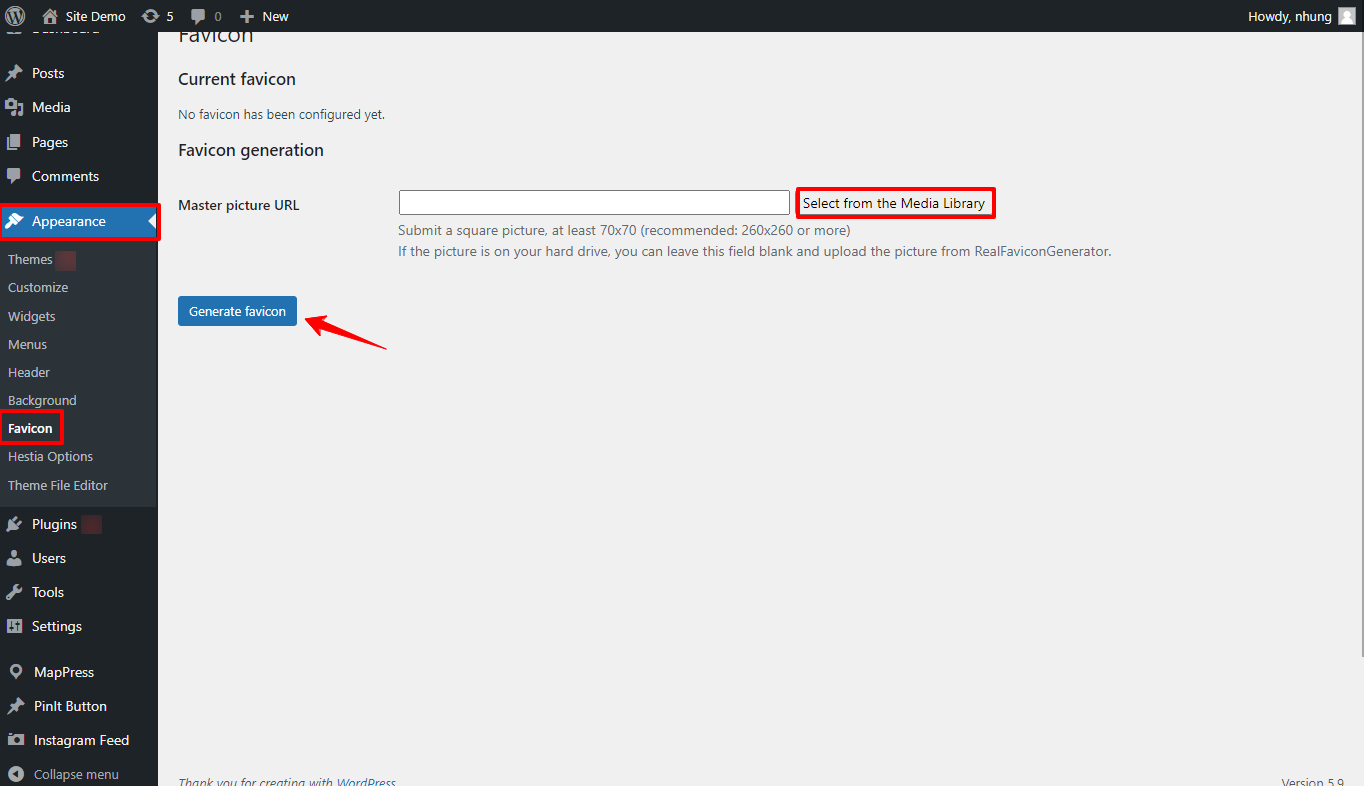
Upon activation, navigate to Appearance –> Favicon –> Select from the Media Library to upload your image icon and then select Generate favicon to add your own favicon.
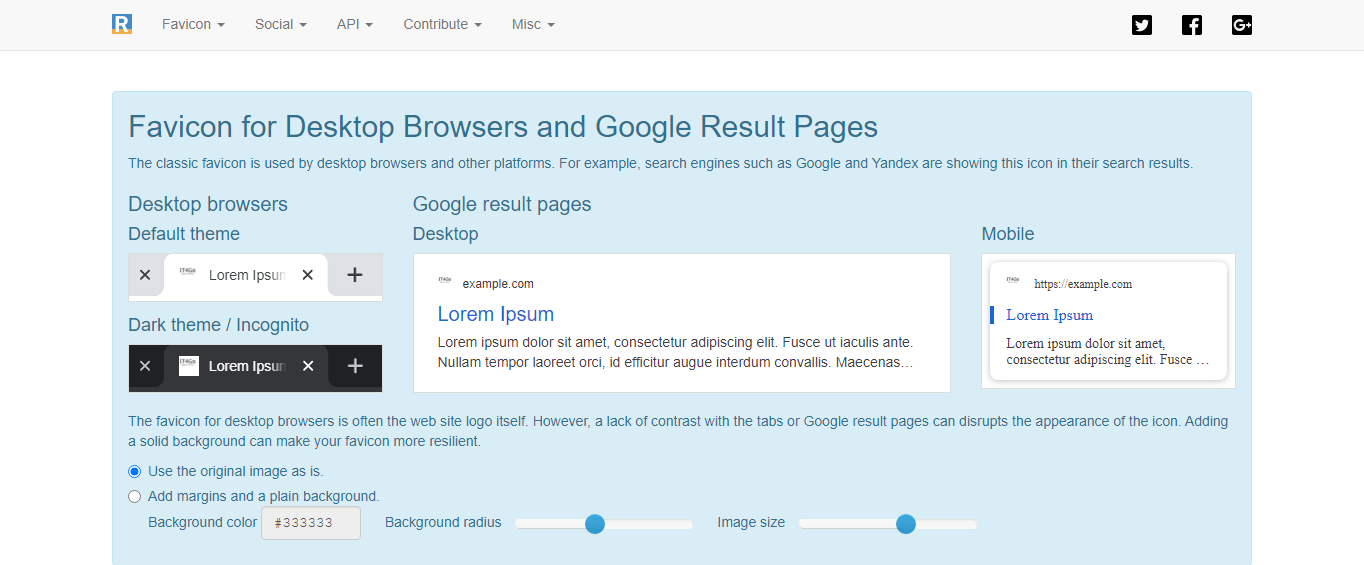
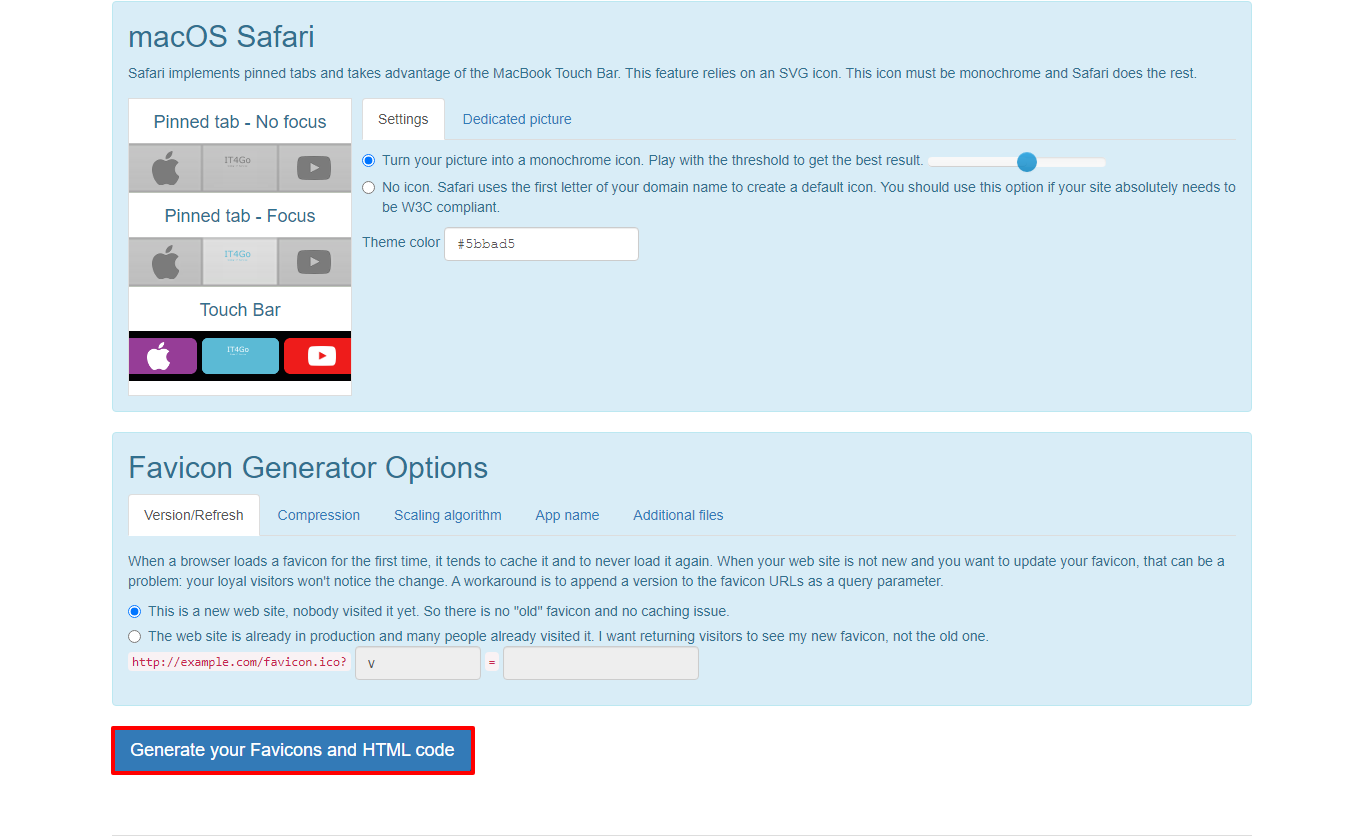
Then, you will be navigated to another window where you can live-preview and customize your favicon in different interfaces and browsers such as desktop browsers, Google result pages, IOS, and more.
When finishing the customizing process, click on Generate your Favicons and HTML code button.
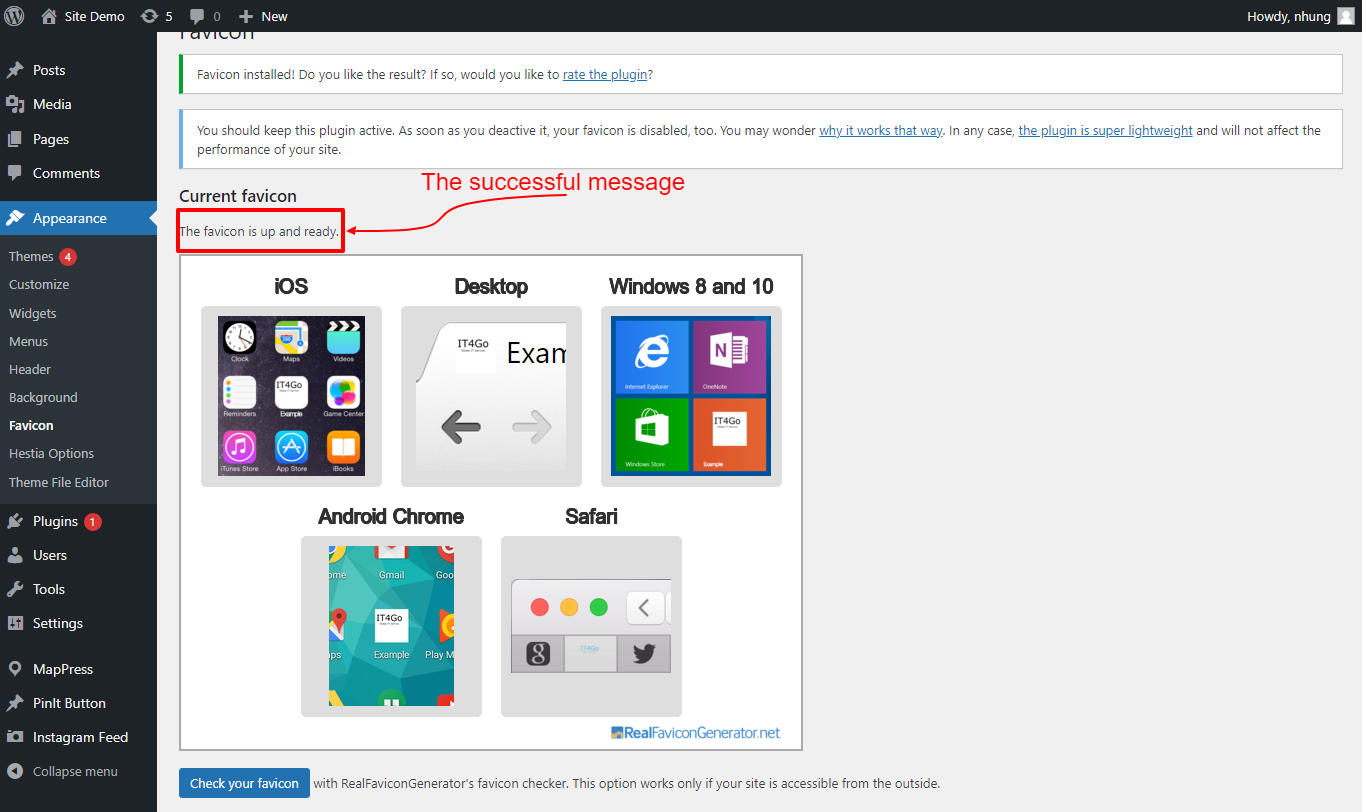
After that, it will automatically create a favicon and back you to the Admin Dashboard where you can see how your favicon looks on different devices and browsers.
Solution 3: Adding a favicon manually
If you are running WordPress version 4.2 or below, this method is for you.
Initially, log in to your site’s root directory from the File Manager in cPanel. Then, look for the theme’s header.php file and add the following codes:
You should replace example.com with your own site URL and don’t forget to save your changes.
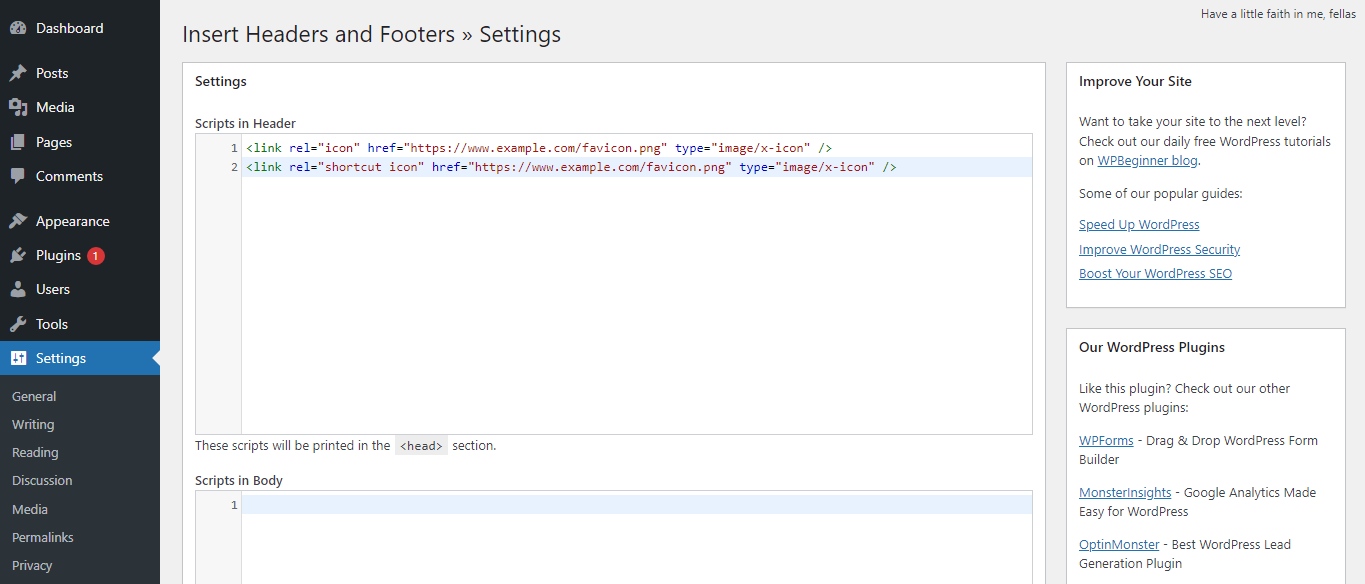
In case your theme doesn’t have the header.php file or you can not access it, don’t worry. In this situation, you might install and activate one of the top WordPress Header Plugins, the Insert Header and Footers WordPress Plugin. You can return to Solution 2 to learn how to install and activate a plugin with ease.
Thereafter, go on Settings –> Insert Headers and Footers. In the Scripts in Header, paste the codes that we offered above to the blank box, and click on the Save button to update your changes.
Summary
To sum up, there are three main ways for you to add a favicon to your WordPress websites. We believe that this article can help you more understand about favicon and its roles on your sites, too. If you get into any trouble with this tutorial blog, feel free to leave comments below.
And, if you are seeking eye-catching and elegant WordPress themes and templates to build your site, visit Free WordPress Themes to get more information! Thanks for reading and have a nice day!
We're a Digital Team from EngineTemplate with 5 content experts. Our team has 5 years exp in open source Joomla and WordPress, we make daily blogs and build useful resources for everyone who is having issues with open source while using it.