You want your WordPress site to use your brand colours and fonts everywhere: in buttons, headings, links and inside the block editor while you write. In a block theme, the place to set all of that once is a single file called theme.json. Get it right and every block, every pattern and the editor itself follow the same design rules, with no extra CSS to fight.
This guide shows how to customise colours and fonts with theme.json safely: where the file lives, how the colour palette and font settings work, how to style elements and individual blocks, and how to avoid the mistakes that make changes “not show up”.
What theme.json does
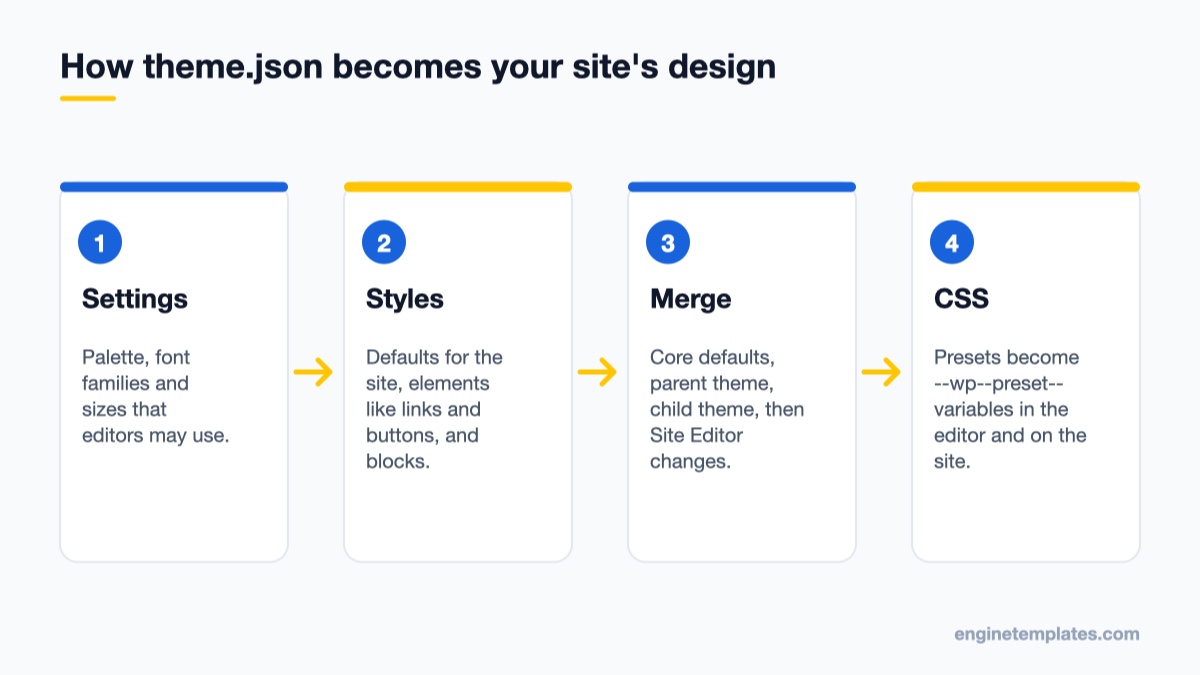
Settings define the options, styles apply them, and WordPress turns both into CSS variables
theme.json is a configuration file in the root of a block theme (and optionally in classic themes). It has two main jobs:
settings decide which design options exist: the colour palette, font families, font sizes, spacing scale, and whether users may pick custom colours.
styles apply those options: the default background and text colour, link colours, heading fonts, button styles and per-block styles.
WordPress reads the file, combines it with WordPress’s own defaults and with any changes made in the Site Editor, and outputs the result as CSS. Every preset becomes a CSS custom property, for example a palette colour with the slug primary becomes --wp--preset--color--primary. Those variables are available on the front end and in the editor, which is why the editor preview matches the live site.
The current file format is version 3, which is what the latest WordPress releases (WordPress 7.1 at the time of writing) still use. Start every file with the version and a $schema line so your code editor can autocomplete and validate keys:
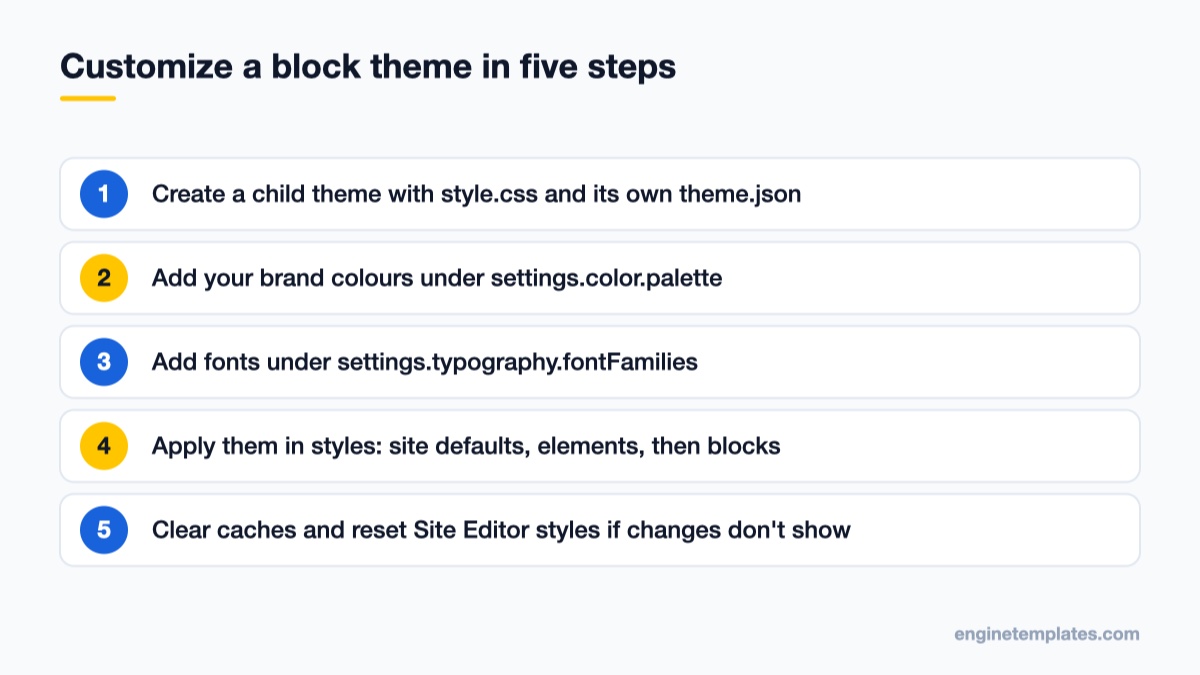
Never edit the theme.json of a theme you downloaded. The next theme update will replace your file. Create a child theme instead: a folder in wp-content/themes/ with a style.css whose header names the parent, plus your own theme.json.
/*
Theme Name: My Brand Child
Template: twentytwentyfive
*/
The Template line must match the parent theme’s folder name exactly. A child theme’s theme.json is merged on top of the parent’s, so you only write the parts you want to change; everything else is inherited. Test on a copy of the site first if you can; our list of WordPress staging plugins covers easy ways to create one.
Step 1: define your colour palette
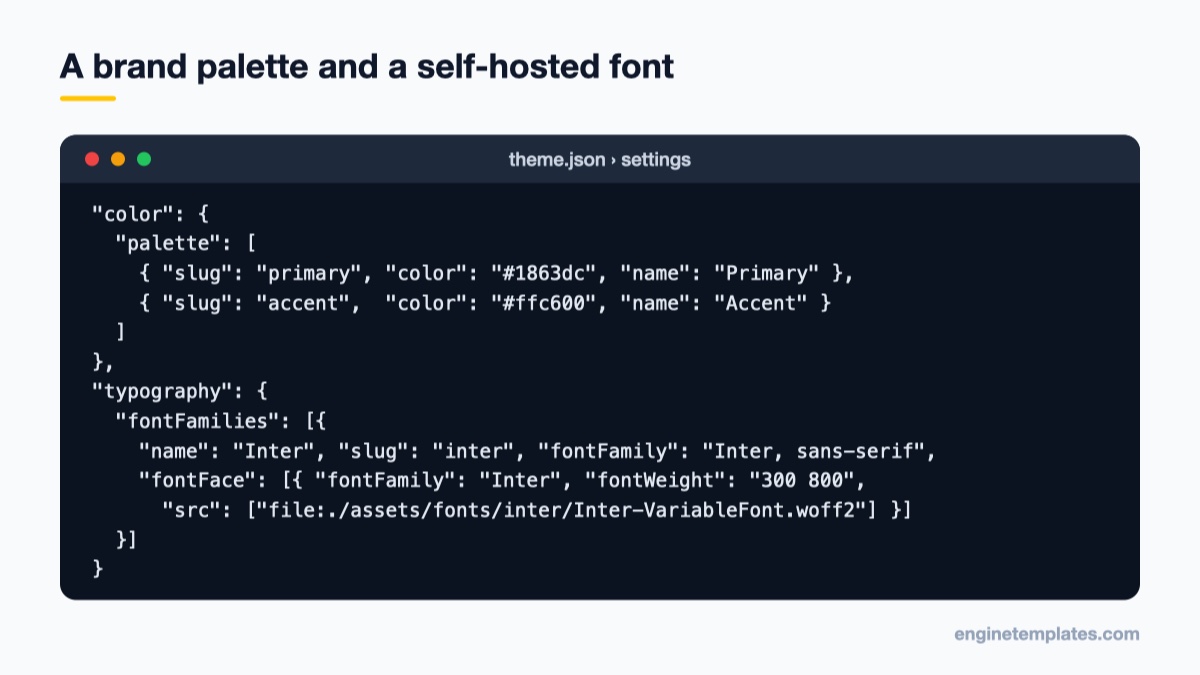
Add your brand colours under settings.color.palette. Each entry needs a slug (used in CSS variable names and class names), a color and a human-readable name shown in the editor.
"defaultPalette": false hides WordPress’s default colours from the colour picker, so editors only see your palette.
"custom": false removes the free colour picker, so nobody can pick an off-brand colour for a single block.
Keep slugs short and descriptive of role rather than hue (primary, not blue). If you rebrand later, you change the hex value once and the slug, CSS variables and every block that uses it stay valid.
Step 2: add your fonts
The settings section of a child theme's theme.json
Fonts go under settings.typography.fontFamilies. For a web font you host yourself, put the .woff2 files in the theme (for example assets/fonts/) and describe them with fontFace. Paths use the file:./ prefix, relative to theme.json.
This block goes inside settings, next to color. A variable font file such as the one above covers a whole weight range in one download, which is lighter than loading four separate weights. "fluid": true lets font sizes scale smoothly between small and large screens, and an individual size can set its own min and max.
Hosting fonts locally like this avoids sending visitors’ IP addresses to a third-party font service and usually loads faster than an external stylesheet. It also helps with the text flash problem many sites have, because WordPress loads the font files declared here for you.
Each family becomes --wp--preset--font-family--{slug} and each size --wp--preset--font-size--{slug}.
Step 3: apply colours and fonts with styles
Settings only make options available. To actually use them, set them in styles. Refer to presets with the var:preset|type|slug shorthand or with the full CSS variable:
Top-level color and typography set the site defaults. elements targets HTML elements that appear in many blocks: links, headings (or h1 to h6 individually), buttons, captions and more. Pseudo-classes such as :hover and :focus are supported for links and buttons.
Step 4: style individual blocks
The order that keeps your changes safe from theme updates
When one block type needs its own look, use styles.blocks with the block’s name:
This keeps block-specific styling in one place instead of scattered custom CSS. Because the values point to presets, a palette change updates these blocks too.
theme.json vs the Site Editor vs custom CSS
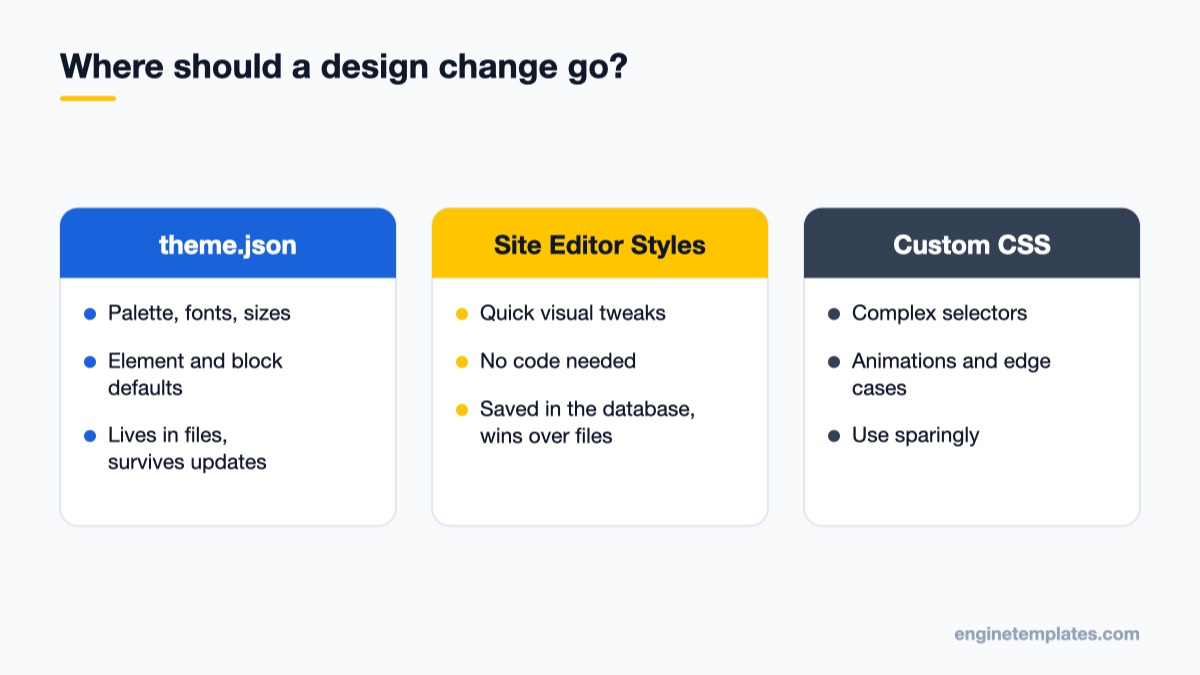
Use each tool for what it does best
You can change many of the same things in Appearance → Editor → Styles without touching code. The order of priority matters: WordPress defaults are overridden by the theme’s theme.json, which is overridden by your child theme’s theme.json, and changes saved in the Site Editor’s Styles panel override all of those. Site Editor changes are stored in the database, not in your files.
A practical split for most sites:
theme.json for the design system: palette, fonts, sizes, global element styles. It lives in version control and moves with the theme.
Site Editor Styles for quick visual adjustments by non-developers.
Custom CSS only for things theme.json cannot express, such as complex selectors or animations.
Common mistakes and fixes
My changes do not appear
Site Editor overrides. If someone changed the same setting in Appearance → Editor → Styles, that saved value wins. Open Styles, use the menu next to the Styles title to reset to the theme defaults, and reload.
Wrong theme active. Make sure the child theme is the active theme, not the parent.
Caching. Clear any page cache or performance plugin cache, and your CDN, then hard-reload the browser.
The whole site lost its styles
The file is probably invalid JSON: a trailing comma, a missing quote or a missing bracket. WordPress cannot read a broken file. Paste it into a JSON validator or open it in an editor that uses the $schema line, fix the error and reload. If you see PHP warnings, our guide to reading PHP error logs helps you find them.
The font does not load
Check the src path: it must start with file:./ and be relative to theme.json, and the file name is case-sensitive on most Linux servers. Also make sure the fontFamily name inside fontFace matches the name used in the family’s fontFamily stack.
Editors can still pick random colours
Set "custom": false and "defaultPalette": false under settings.color. You can also turn off gradients with "customGradient": false and "defaultGradients": false.
I edited the file in the dashboard and want to stop that
Editing theme files through the dashboard is risky on a live site. Our guide on how to disable the theme and plugin editor shows how to switch it off, so changes go through files and version control instead.
Starting from a finished design
If you would rather start from a complete layout and only adjust the colours and type to match your brand, a ready-made theme saves days of work. ET Poren suits portfolios and creative studios, and ET Epic Onepage is a single-page layout for small businesses. Check each theme’s documentation for where its colour and font settings live before you customise. You can browse more in our free WordPress themes collection.
Wrapping up
Create a child theme, define your palette and fonts under settings, apply them under styles for the whole site, elements and individual blocks, and keep quick tweaks in the Site Editor. With presets in place, a future rebrand is a few hex values and a font file away. If you are adding a dark colour scheme next, our guide on adding dark mode to WordPress is a good follow-up. For every available key, see the official Global Settings and Styles documentation and the theme.json reference.
We're a Digital Team from EngineTemplate with 5 content experts. Our team has 5 years exp in open source Joomla and WordPress, we make daily blogs and build useful resources for everyone who is having issues with open source while using it.
 ET Digital Team