Helix Ultimate is the world’s best and the most advanced Joomla template framework. It can be used as a standalone template or customize it to build a new Joomla template. In this article, we will guide you on how to install Helix Ultimate.
Let’s find out!
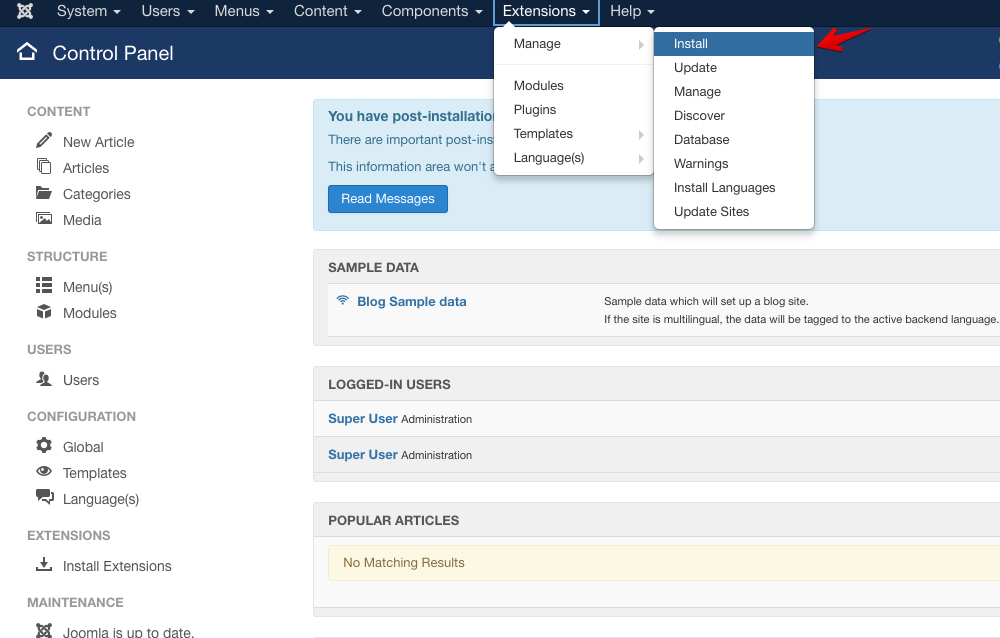
Step 1: Login to Joomla control panel (entering your username and password). Step 2: Go to Extensions, click “Manage” option then select “Install” as screenshot below.
Image by Joomshaper
Step 3: Now you can upload your template installation.
First, go to the “Upload Package File” option, now you can upload your file by clicking the browsing button (green button) or using the drag and drop method.
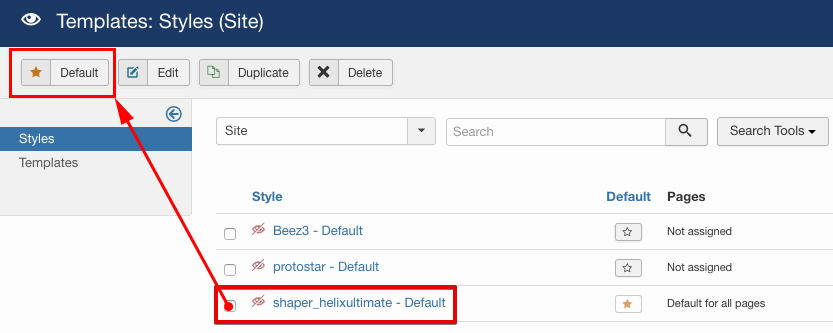
Step 4. Go to Extensions >> Templates and select Styles option then click the star button to set your template to default.
Image by Joomshaper
That’s all of the Helix Ultimate installation process. If you have any question about this tutorial, don’t hesitate to leave a comment below. And don’t forget to share with your friends if you find it useful! Thanks! ?
We're a Digital Team from EngineTemplate with 5 content experts. Our team has 5 years exp in open source Joomla and WordPress, we make daily blogs and build useful resources for everyone who is having issues with open source while using it.
Steve, I had the same problem on a new site. The Helix would not install zipped or unzipped. Strange that it worked fine on other domains I used helix on before. Make sure you have the latest php version installed though.
I am going to delete the entire domain and start from scratch and set up the .hta access again and see what happens. I could have built several sites while addressing this problem. The blank Helix ultimate is better than screwing around with existing templates and adding and removing things and re-designing. Those templates are good guides for designing your own stuff and little more. good luck
I’ve got no problem at installing it though I used another method I went to install extensions which in control panel, then I dragged and dropped the zip file. But I cannot see any of the template’s images.


DOES NOT WORK.
it says the file is either too small or too large.
Check your system requirement and make sure that it support Joomla! 3. Special with ‘max-upload-file’ option in your server.
I get a cant find XML file with Joomla 3.9
Please unzip download package first, then use Template install package for your install via extension manager.
Steve, I had the same problem on a new site. The Helix would not install zipped or unzipped. Strange that it worked fine on other domains I used helix on before. Make sure you have the latest php version installed though.
I am going to delete the entire domain and start from scratch and set up the .hta access again and see what happens. I could have built several sites while addressing this problem. The blank Helix ultimate is better than screwing around with existing templates and adding and removing things and re-designing. Those templates are good guides for designing your own stuff and little more. good luck
Try to re-download latest version and recheck it. Joomla 3 need PHP 5.6.x or higher, just notice it.
I’ve got no problem at installing it though I used another method I went to install extensions which in control panel, then I dragged and dropped the zip file. But I cannot see any of the template’s images.
For full website with image and content like demo, please follow this guide http://enginetemplates.com/install-quickstart-package/
Great! Instalation complete. Thanks very much! (from Brazil)
You’re welcome!