Akeeba Backup is most popular Joomla! extension for backup and restore Joomla! website. In this blog, I will intro you about how to install Quickstart Package that using Akeeba Backup and Kickstart files.
Get Quickstart package?
As an example for this blog instruction, I use ET Epic Joomla Templates, when you go with Pro version (Pro Standard or Pro Unlimited), you log in to Customer Area (login required) and download ET EPIC Free Responsive Business Joomla Templates package.
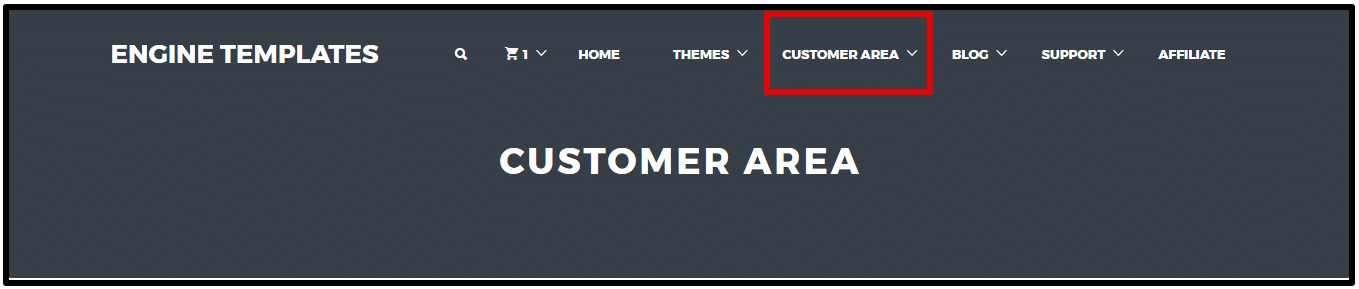
Picture A: Customer Area, ET EPIC download package
After download it, you unzip package and you will see three sub packages includes ET Epic Template Install Package, ET Epic Quickstart package and the Documentation.

Picture B: Downloaded package, unzip packages and three sub packages
The installation process is easy and requires just a few clicks. You won’t need any coding or design skills to install a fully-functional Akeeba kickstart within minutes.
Upload Quickstart package to your hosting/server
For install Quickstart package, you just upload Quickstart package on your server and extract it
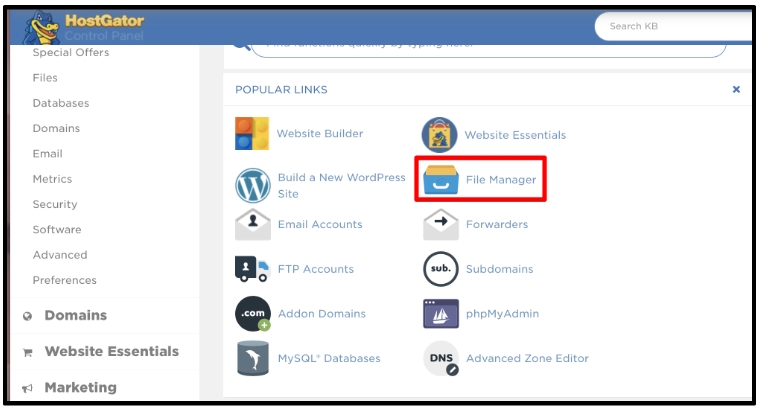
Option 1: Upload with Cpanel
STEP 1: Upload Quickstart files
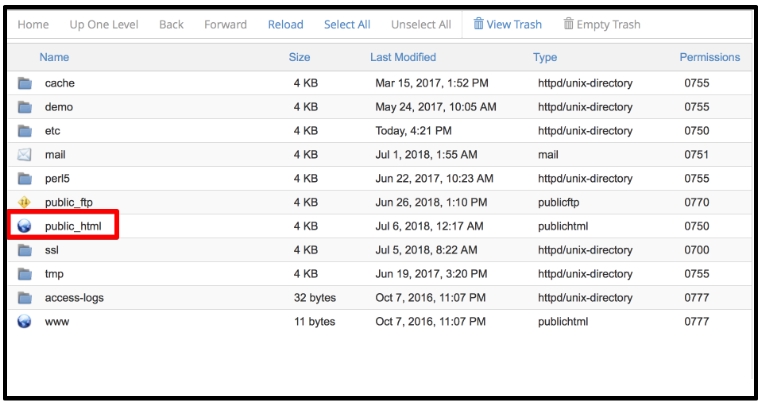
If your hosting support cPanel (such as Hostgator.com), you can go to cPanel > File Manager, go to your website folder and upload theme Quickstart files. Don’t forget to unzip the file after uploading.
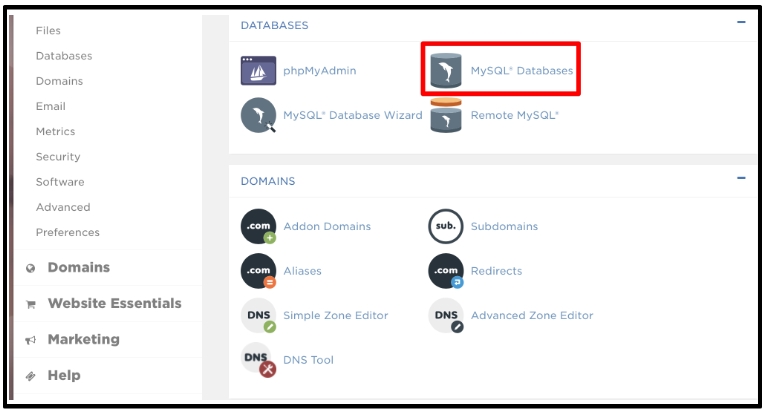
STEP 2: Create new database from your hosting
Create new database for your website via Database Manager in Hosting controls. If you don’t know how to create database, just read hosting user guides or contact hosting support staff.
After uploading all the files, let’s move to section IV to continue installing Quickstart package
* If your hosting doesn’t support cPanel or File Management to unzip it, just unzip it on your local PC and upload it via FTP Clients such as FileZilla or Cyberduck.
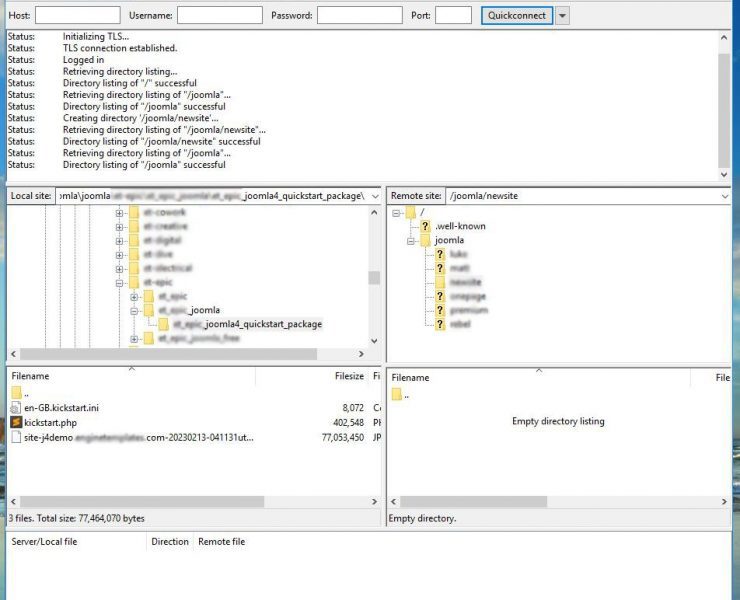
Option 2: Upload with Filezilla
Once you connect, simply browse your local drive to upload from the Local Site window on the left. Drag the files to an appropriate folder in the Remote Site on the right, e.g. /var/www/html
After uploading all the files, let’s move to section IV to continue installing Quickstart package
Option 3: Upload with localhost
Installing quickstart package on localhost is straightforward but can be tricky the first time you attempt it. So for this step we’ve provided instructions on how to do it right from scratch.
Now, in order to run quickstart package, you need not only a web server, but also 2 more things: PHP script interpreter and MySQL database system. It sounds complicated but thankfully, there is a single package called XAMPP with all the elements included.
Let’s install XAMPP on your computer.
Step 1: Installing XAMPP
- Download the XAMPP and Install XAMPP Locally on PC
- Run the installation file as you do with regular software and follow the step by step instructions.
- Open “XAMPP Control Panel Application” and start “Apache” and “MySQL”.
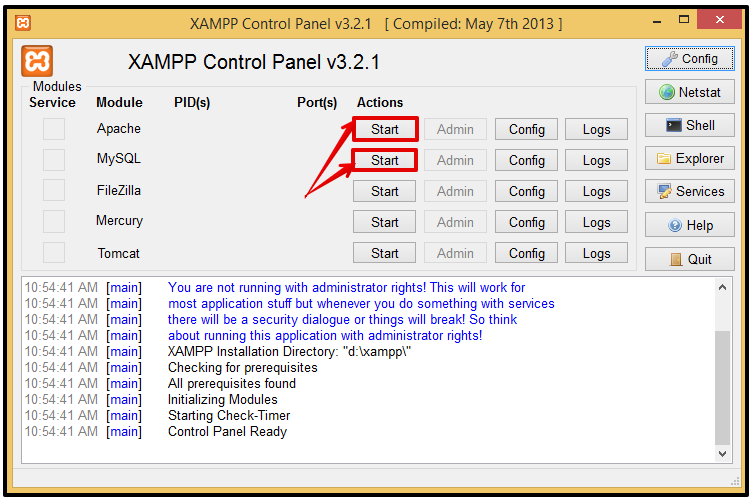
That’s it, your localhost is now installed. You can check if it works or not by typing the address: “http://localhost” in your web browser.
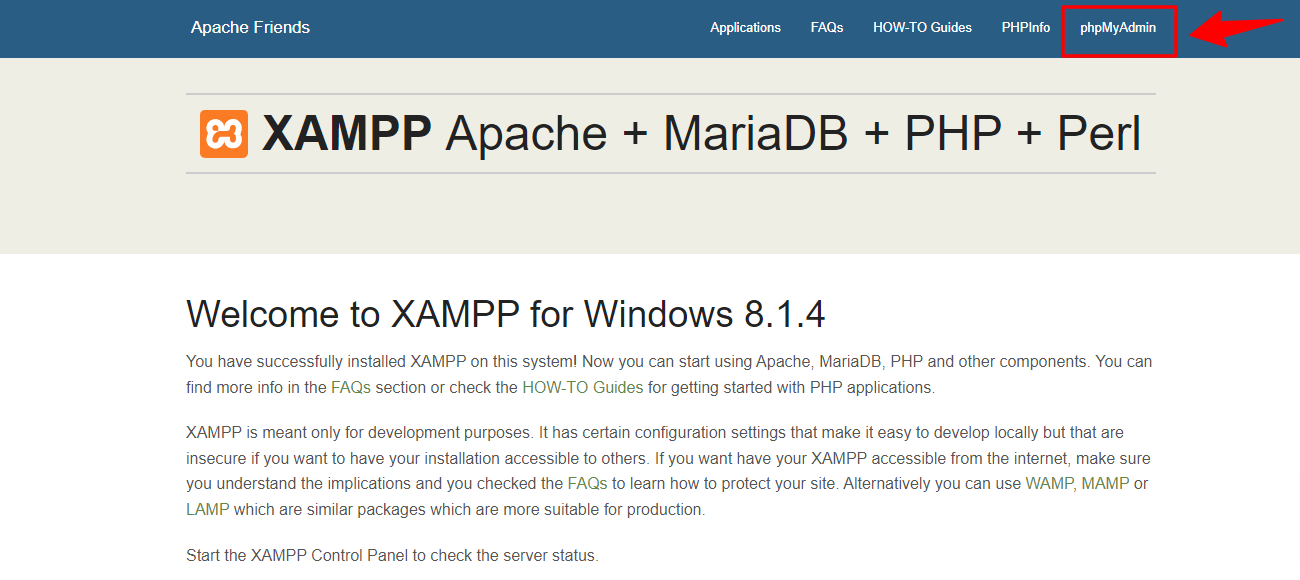
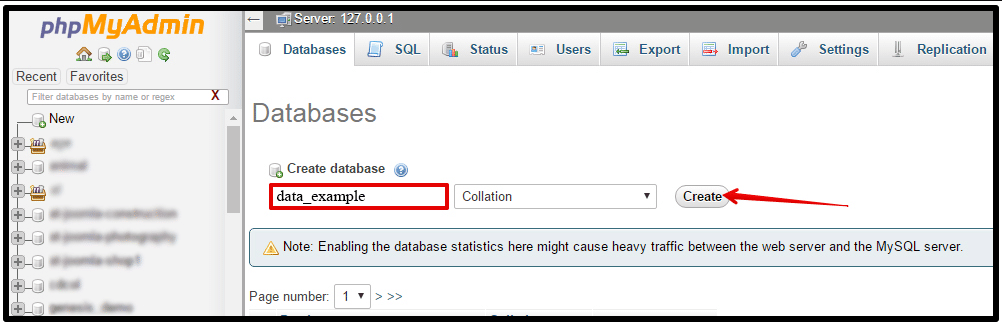
Step 2: Create a database in phpMyAdmin
From the XAMPP interface, click phpMyAdmin to start creating the database.
Next, click Database in the toolbar as illustrated in the following
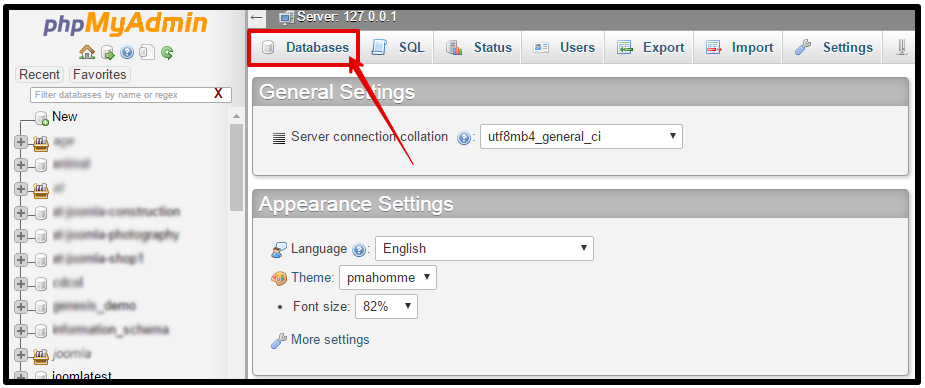
And enter the database name and then click “Create”
Now you are ready to install quickstart package.
Step 3: Create a new folder in older “htdocs” in the XAMPP folder
– Create a new folder entitled “test-quickstart” in folder “Test” in folder “htdocs” in XAMPP folder. Normally it will be located at “C:/xampp/htdocs”.
– Unpack the downloaded package file into the folder “test-quickstart”.
– Go to the URL “http://localhost/Test/test-quickstart”.
Run Quickstart package
So, all files uploaded, we start to install Quickstart package step by step:
Step 1: Run file ‘kickstart.php’
Run file ‘kickstart.php’ by access your domain[yourdomain.com]/kickstart.php
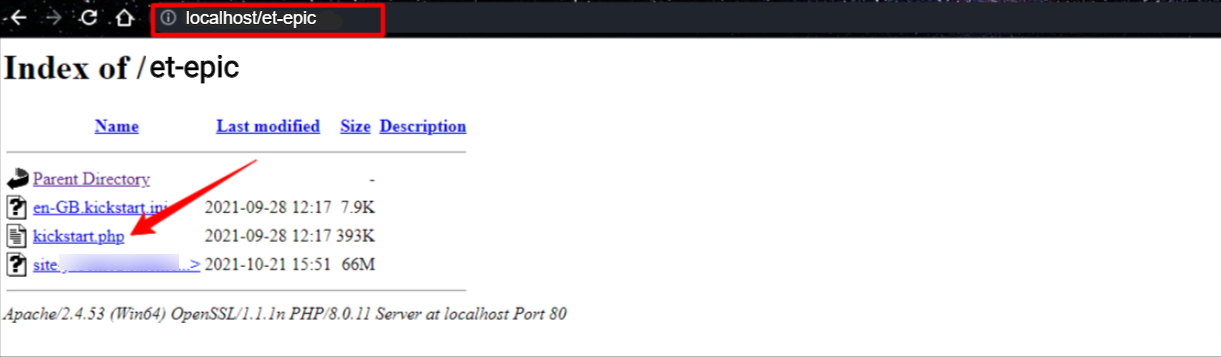
Picture II.1a: Run ‘kickstart.php’ file
* Troubleshoots:
– If you got 500 error when you run it, please change permission for all Quickstart files and try again.
– If you got 404 not found when you run it, please recheck folder that you uploaded, it might be uploaded to the wrong folder in your hosting.
In Install Panel, please select the backup file, it’s JPA file format (.jpa), not select or use default ZIP (.zip) file.
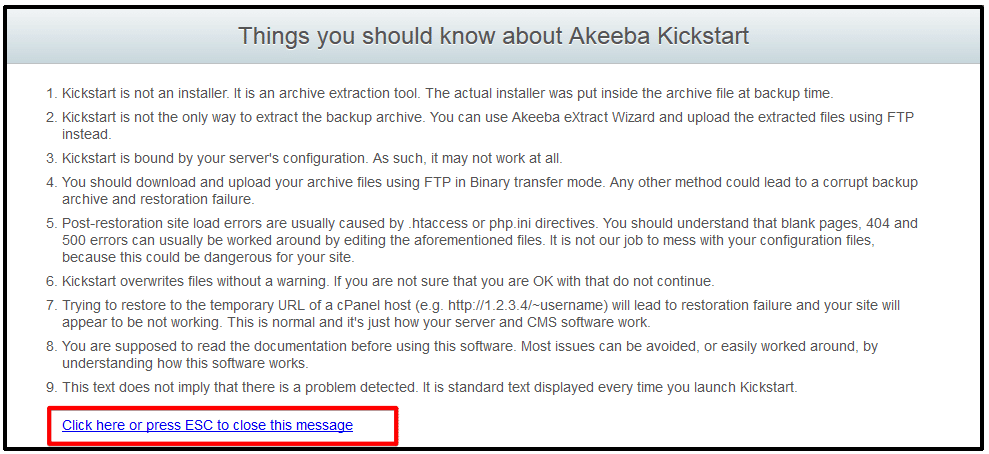
Picture II.1b: Intro about Akeeba
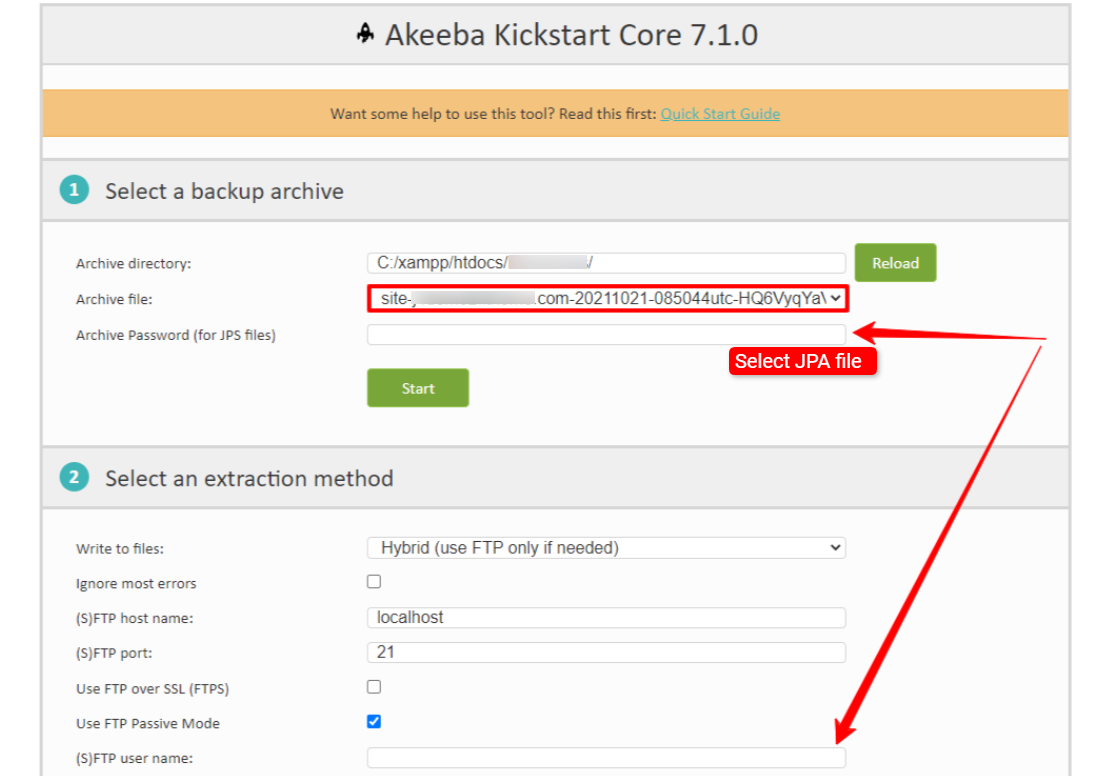
Picture II.1c: Select backup file
* Troubleshoots:
– If you got ‘Wrong Files’ after this step, so you select ZIP (.zip) file instead for correct JPA (.jpa) file, so just back to Install panel and re-select JPA (.jpa) file.
– If you got an error that ‘Can’t Extract File’, so you should use other methods to extract it. Default extra method in kickstart tool use ‘Hybrid (use FTP only if needed)’, but in some case, if your hosting does not accept it, just use ‘Directly’ method instead, you can select it via ‘Write to files’.
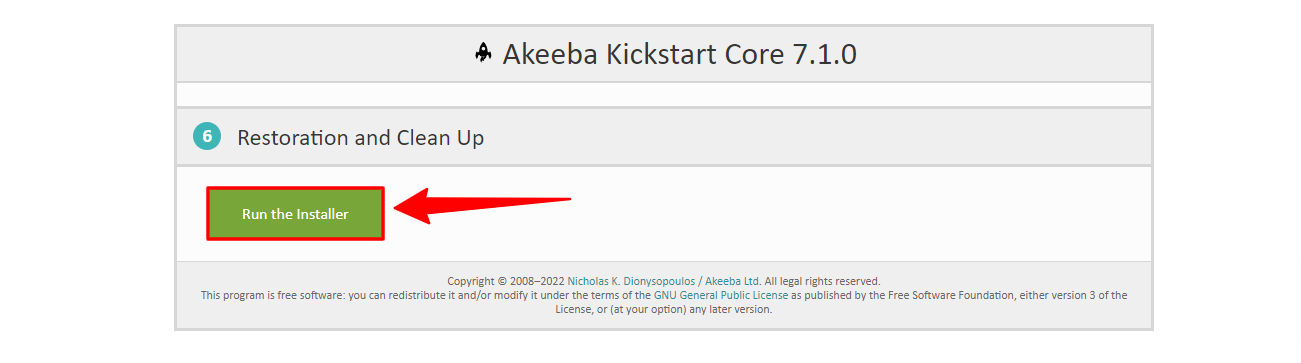
Step 2: Run the Installer
After extracted files, you just click to button ‘Run the Installer’ to go to next step
Step 3: System pre-check
After clicked to ‘Run The Installer’, you will move to the next step. This is System Checking panel as you can see below, just click ‘Next’
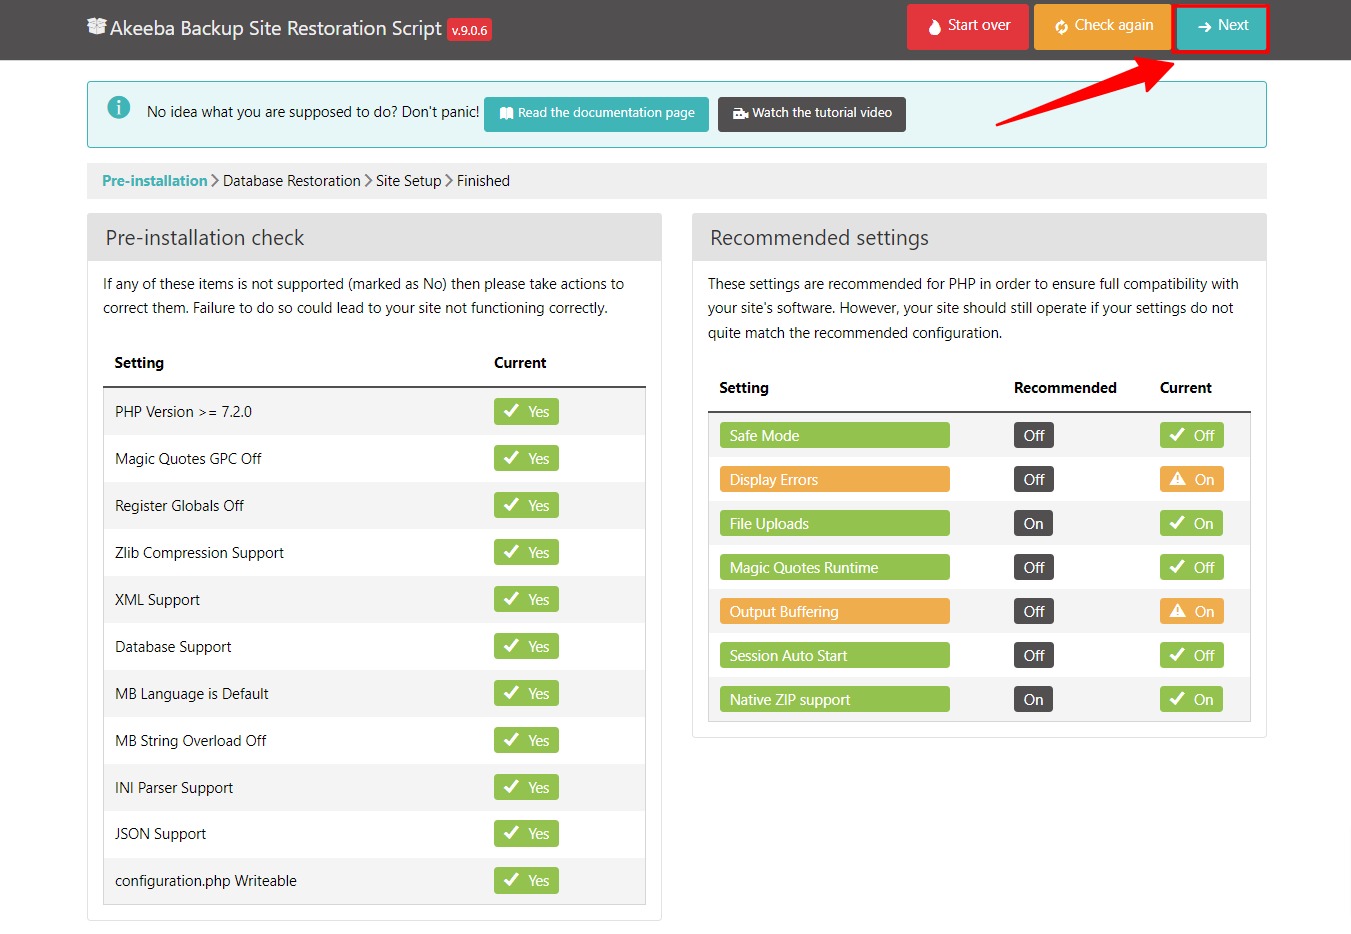
Picture II.3: System Checking panel
* In some cases, if you have different PHP version, you will get a warning message above, but don’t worry, it’s fine!
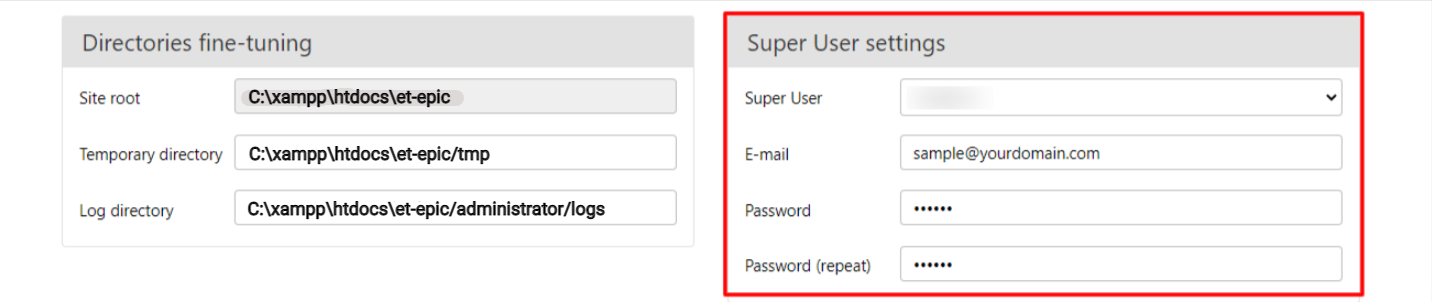
Step 4: Enter the information
Enter your database information such as database server hostname (default is localhost), database username, database password, database name, database prefix, etc.
Check the “Force UTF-8 collation on database” and “Force UTF-8 collation on tables”
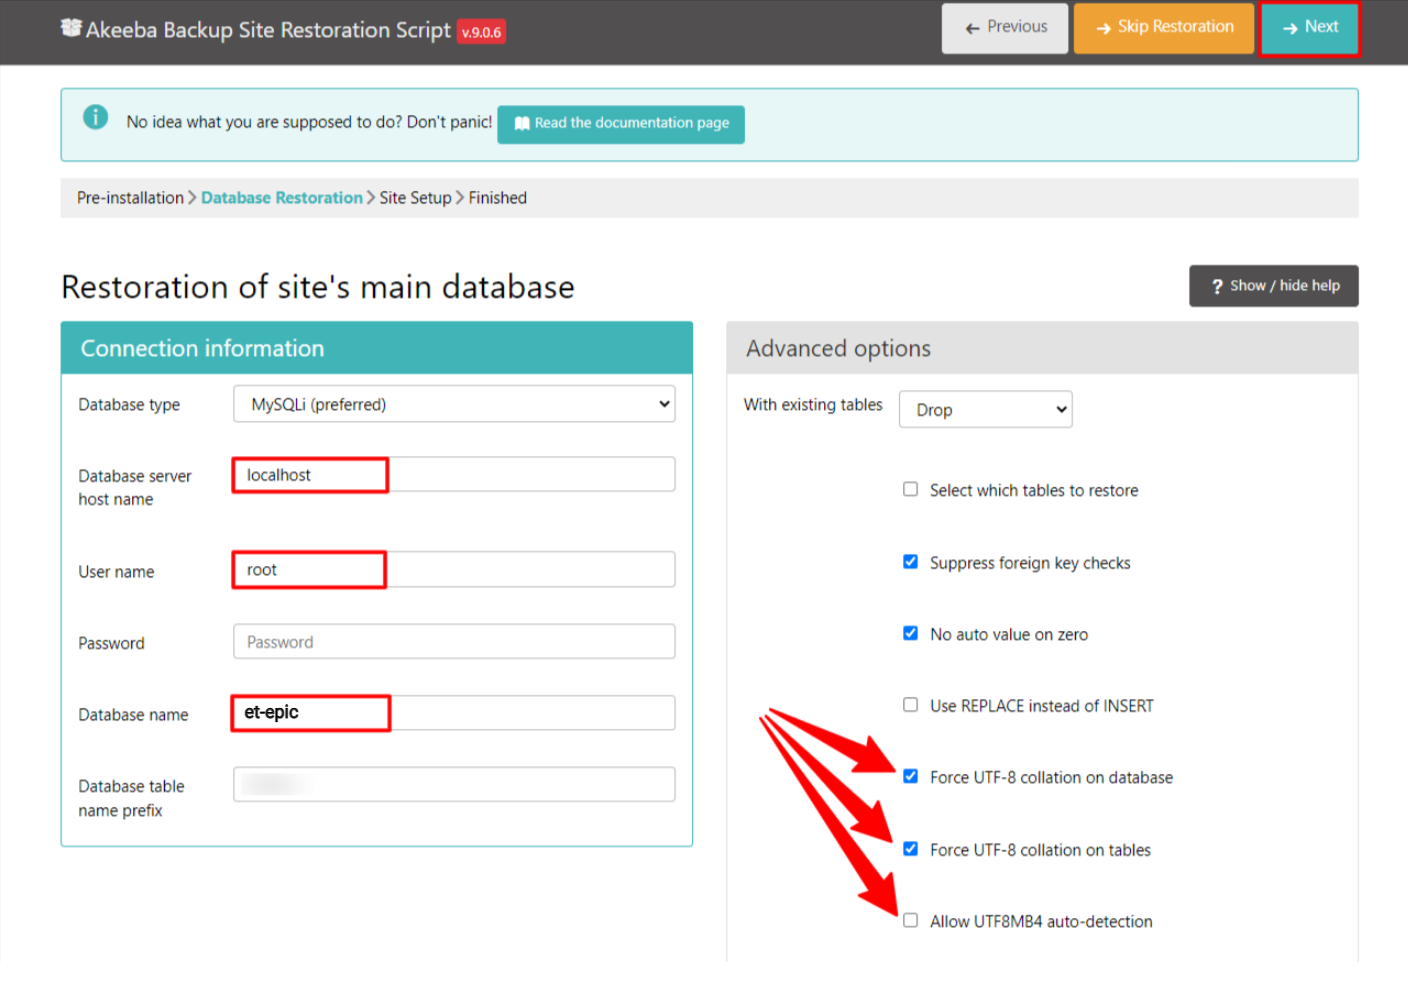
Picture II.4a: Put your database information
After entering your info, click ‘Next’, if you put all correct info, so it will appear a message ‘The Database Restoration Successfully’. Otherwise, it will appear a message about ‘Can not connect database’, so you should recheck database information.
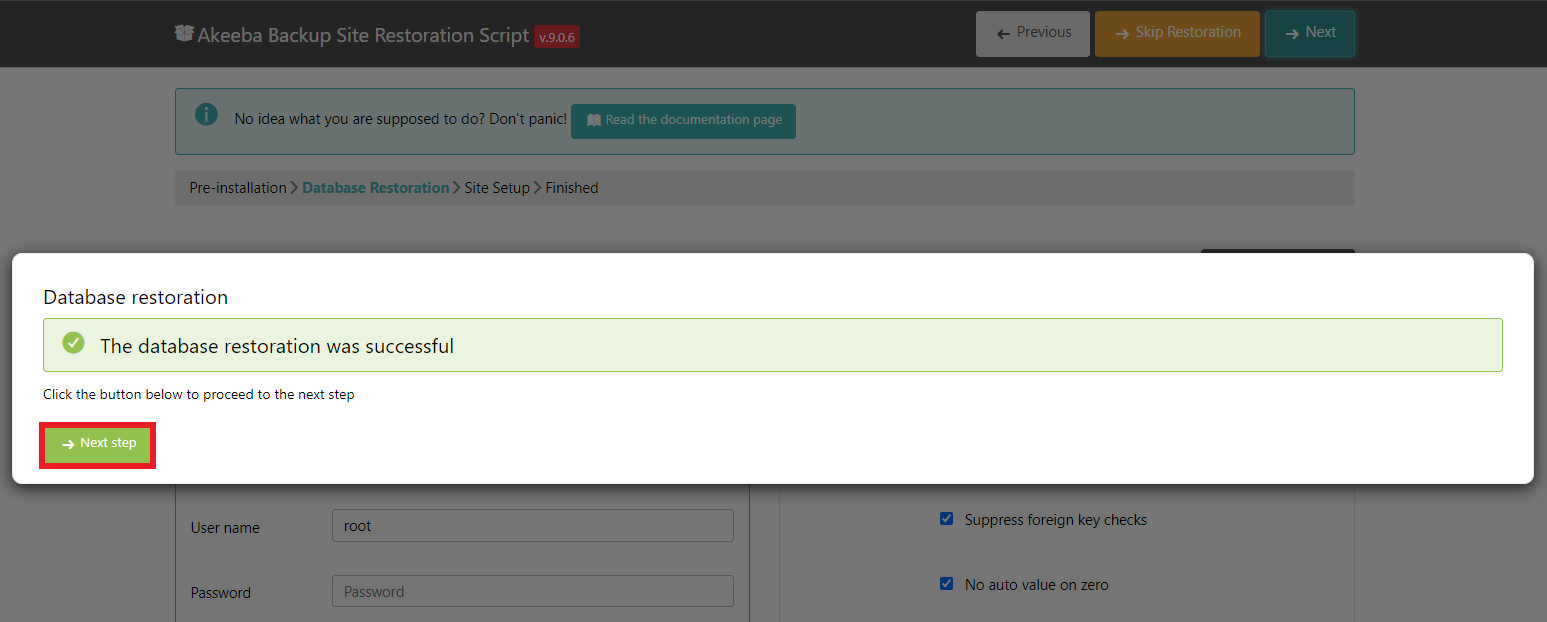
Picture II.4b: The Database Restoration Successfully
Step 5: Site info
In this step, you need to fill out Site Info as well as FTP Layer Option (this option should be kept as default, we can change it later).
It’s necessary for you to define a new username and password for the admin account. You should enter a new password.
Step 6: Last step to remove the installation folder
Last step to remove the installation folder and ready to see your website

Picture II.6a: Remove installation folder
Yes, this step is the last step to process install Quickstart, just click to button ‘Clean Up’ to clear up Kickstart files which include in backup by default. It will make your source clearly. Also with file backup ‘.jpa’.
Just click to button ‘View your site’s front-end’ and ‘view your site’s back-end’.

Picture II.6b: Visit your site’s front-end

Picture C: Site is ready
* NOTE: After completing install quickstart package, if you click the button “visit your site’s front-end” without seeing the display demo content, please Log on to your Joomla Admin Panel, from the main menu select Quick and You will now see a screen with a list of all of the pages on your website. From this screen, you can click button “clear cache” and F5 your site’s front-end. Content will be displayed.
Troubleshoots
If after finish install, if your website return blank content but without any style.
In this case, you just open file ‘configuration.php’ located at the root of your source code and search for
$live_site = “your_domain.xxx”;
and leave it blank like as below
public $live_site =””;
Save and it will work.
*** If when you log in but it doesn’t work and doesn’t have an error message, just open file “configuration.php” (located at the root of your source code)and search for the string “$cookie_domain”, then just leave blank for this option. Normally, when you got this problem, it caused by your domain cookie that you put. So, just leave it blank as the default setting for this option.
Default Login
1. Default login: http://[yourwebsite]/administrator
If you’re using Joomla! 4 package, so the login is
- user: j4admin
- pass: j4admin@happyworks
2. If you changed Supper User Settings during install Quickstart package (Step 4), you must use that login info. If you forgot it, you can see this instruction how to restore Joomla! password.
Conclusion
Akeeba Backup is really useful software that helping to create Backup and Restore easily. Most of the template provider use this method instead for default Joomla! quickstart package. Because in some hosting config, you will have problem with Joomla! installation, but Akeeba Backup and Kickstart can solve it. Thank you very much for the powerful tool Akeeba!
- [Hikashop] How to fix Error – Cannot pass parameter 3 by reference - October 7, 2019
- Collection of Greatest Woocommerce Order Status plugins - February 21, 2019
- How to Create a WordPress Job Board using Job Board Manager Plugin? - November 7, 2018

hello dears .
I try to install your package but when i finnish i got this
“Error: Failed to start application: Failed to start the session”
plesae can you help
best regards
Hi,
Please submit ticket support, so we can help.