Are you seeking a simple method to add WordPress Categories and Tags for pages? Congratulations, this blog is the right place for you. Today, we will show you how to add categories and tags for WordPress pages by using a free plugin. Now, let’s check them out.
Why do you need to add WordPress Categories and Tags for pages?
It goes without saying that Categories and Tags are useful taxonomies to help you organize and classify content in WordPress. However, WordPress doesn’t support these taxonomies for pages.
Fortunately, there are numerous effective plugins from the WordPress repository that will help you handle this problem. By using these plugins, you can easily add WordPress categories and tags to your page. As a result, it will boost your site navigation as well as improve the user experience on your website by lessening a lot of time to find related pages on your WordPress site.
How to add categories and tags to WordPress pages?
In today’s blog, we will introduce to you a simple method by using the Pages with category and tag plugin. This tool will help you effortlessly add categories and tags to a WordPress page without configuration. To do so, you need to follow the steps below.
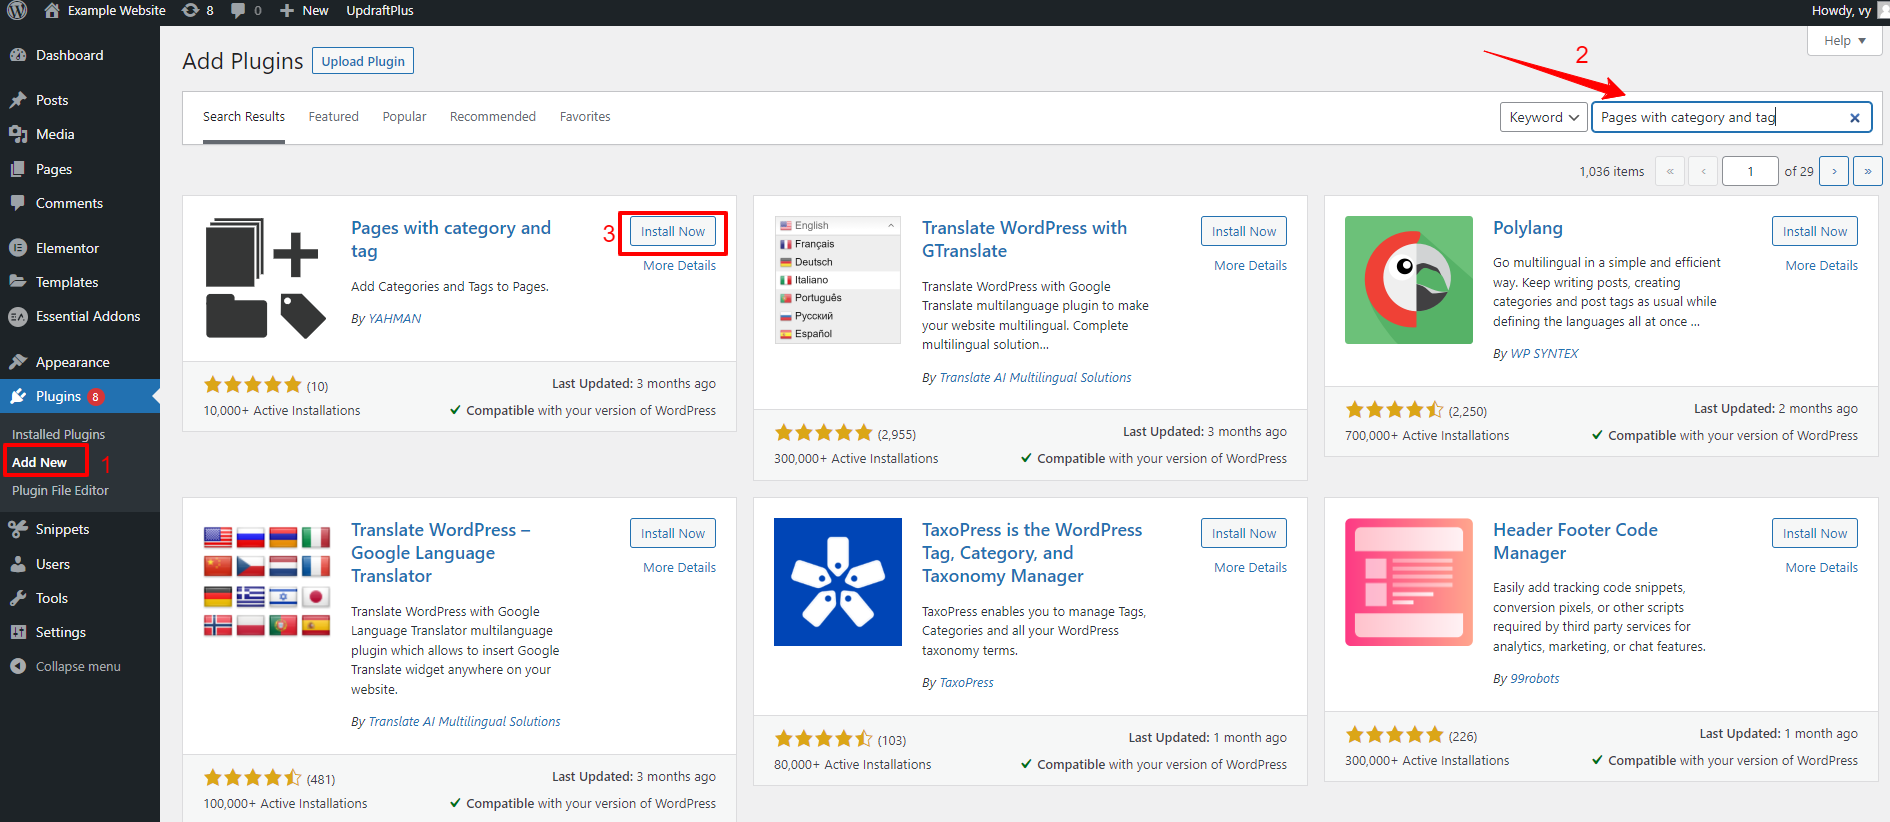
First of all, you need to go to Plugins > Add New from your WordPress dashboard and then search the search bar to find the plugin from a list of results. After that, simply click on the Install Now button and Activate it.
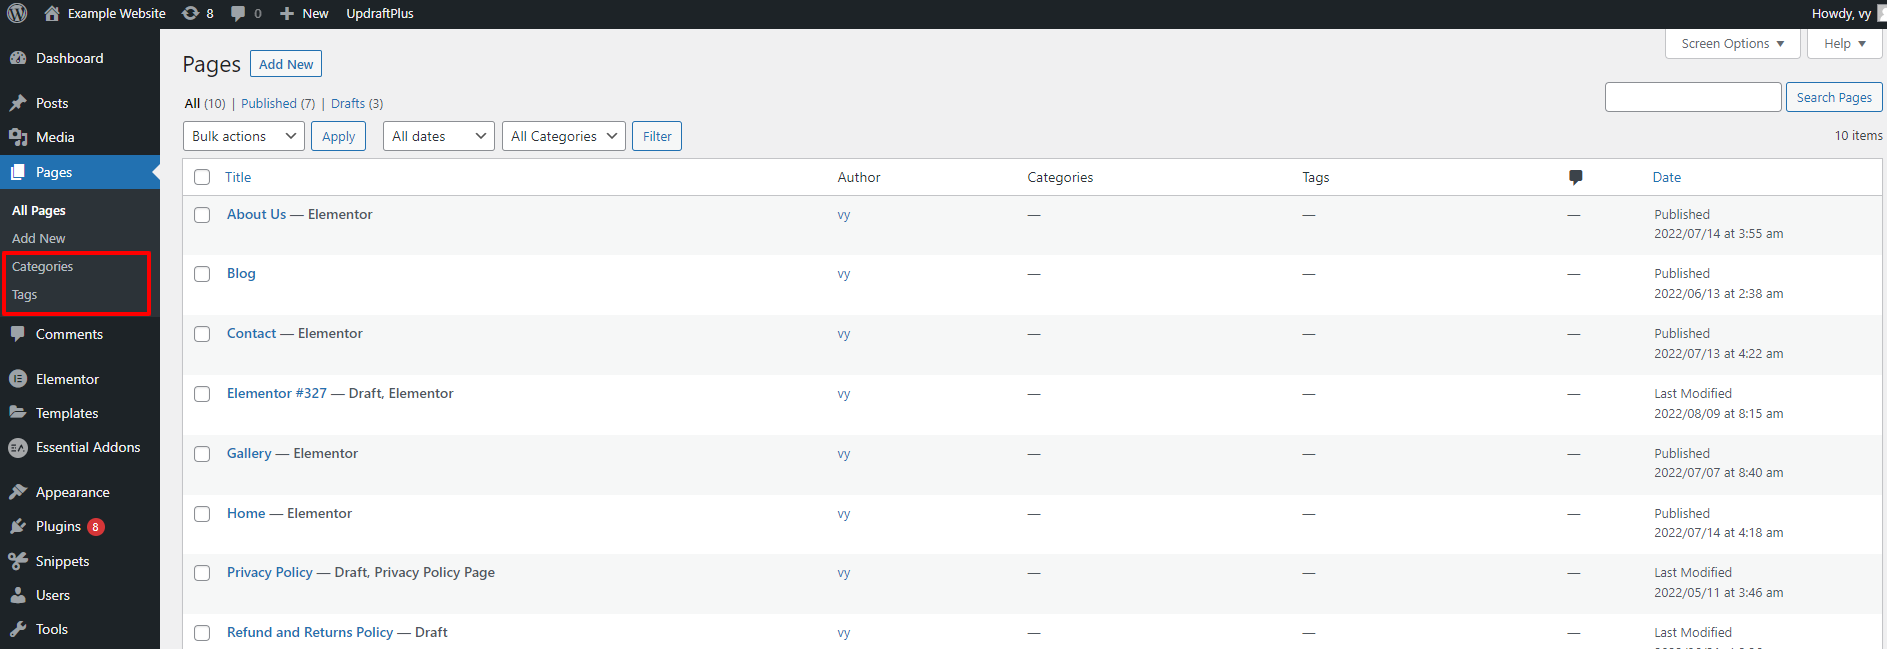
Once the plugin is activated, let’s navigate to Pages > All pages and you will see the Categories and Tags page being available on your website.
Now, you need to create categories and tags for your WordPress pages.
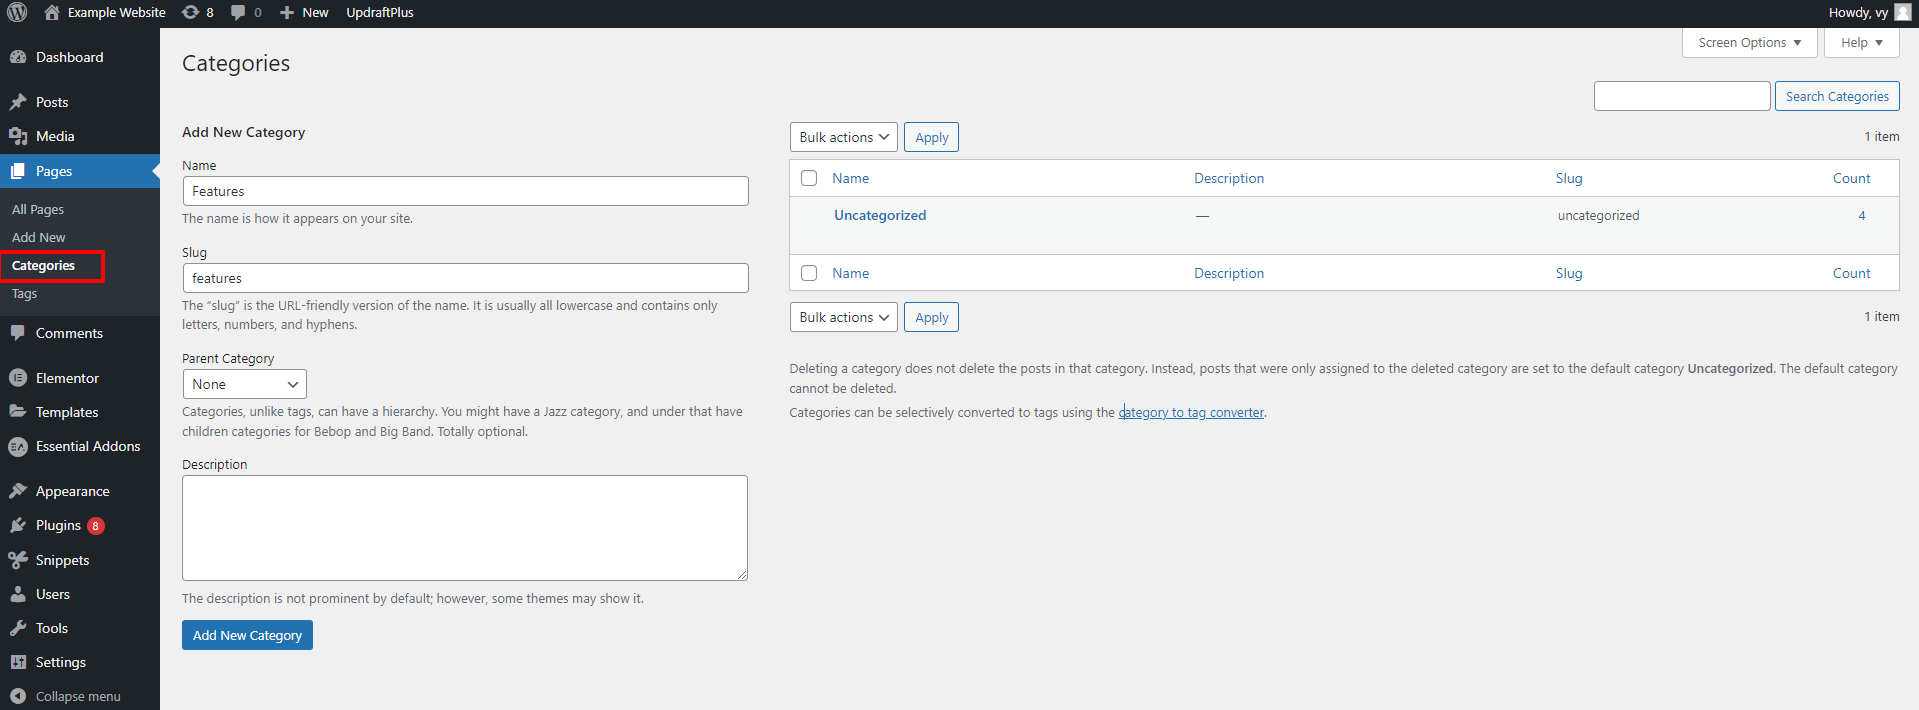
In order to add a category, you simply navigate to Pages > Categories from WordPress Admin Dashboard. Then, you need to provide a “Name” and “Slug” for your category.
Next, you can choose a “Parent Category” for your category. In addition, you are able to provide a description of your category.
After completing, simply click on the “Add New Category” button.
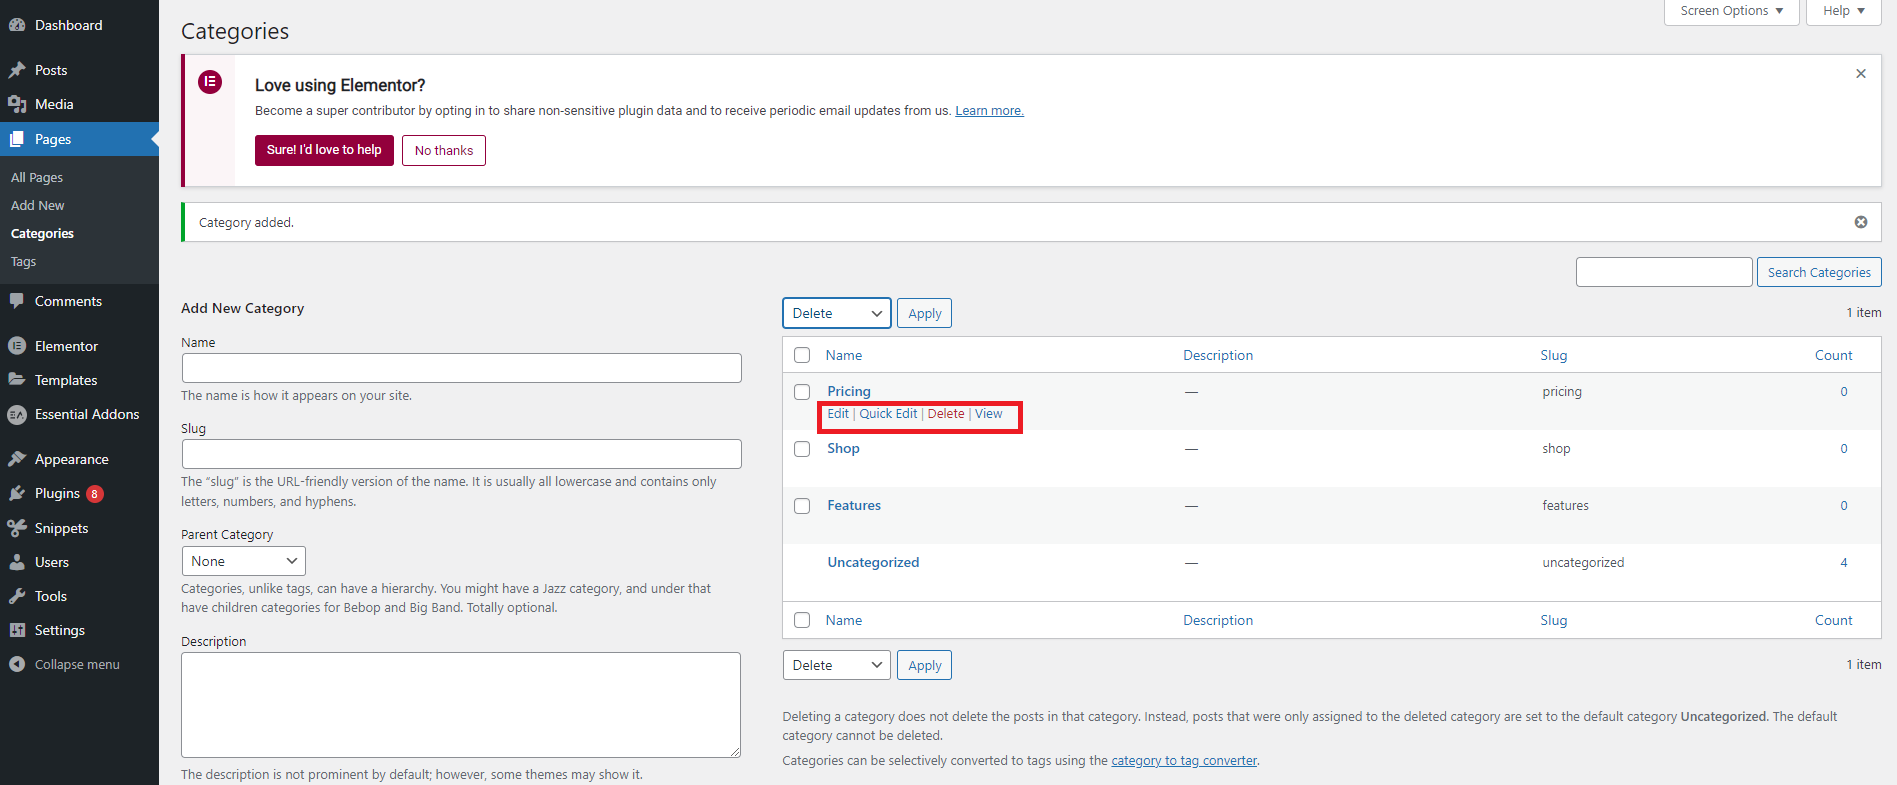
If you want to edit any category, simply hover over the category that you want to edit and select the Edit link under it. Additionally, it also allows you to delete and view your category.
Now, you can assign your page to the categories that you have just added. To do that, you can edit any available pages or navigate Pages > Add New to create a new page.
In the WordPress Classic editor, you can select a suitable category and add multiple relevant WordPress tags for pages from the menu on the right-hand side.
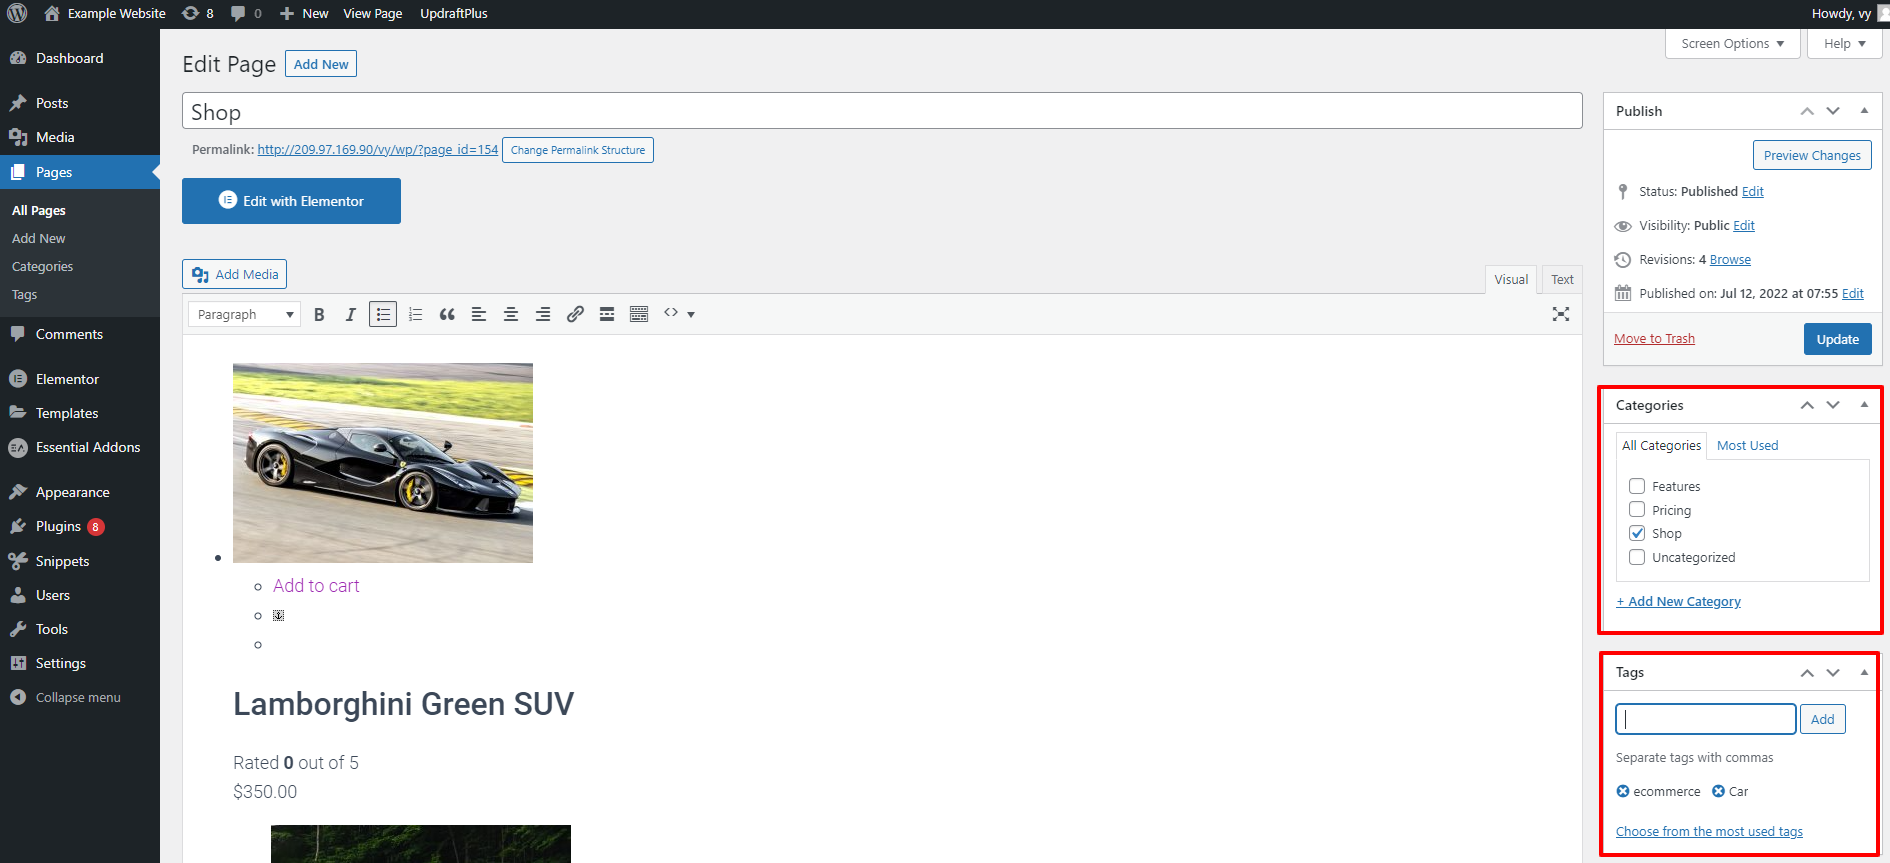
Once you selected categories and added tags for your page, simply click on the Update button or Publish your WordPress page.
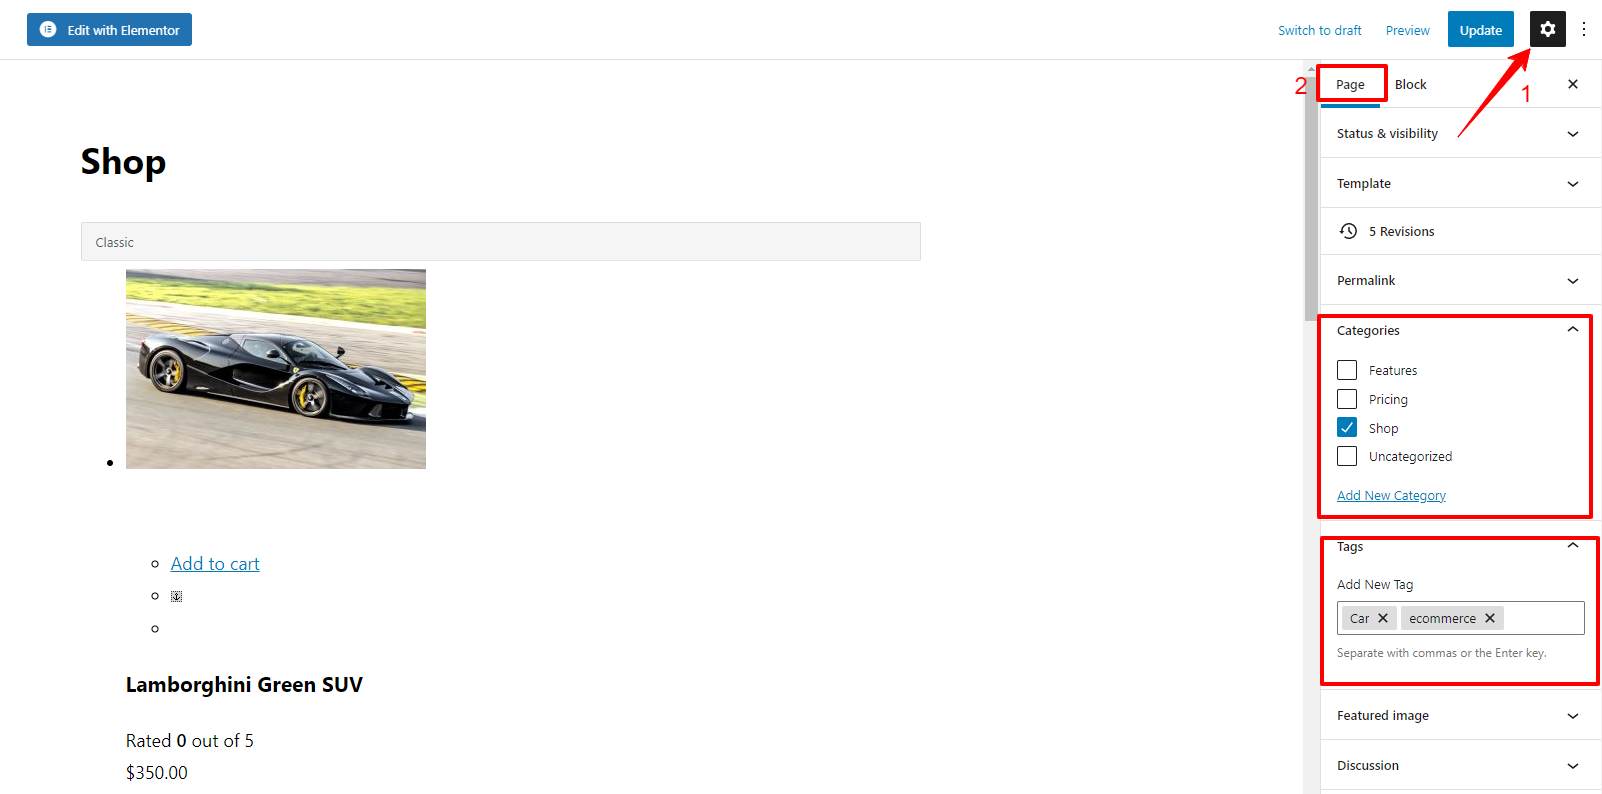
In case, you are using the Gutenberg block editor, you need to click on the Settings button and choose the Page tab. From that, you will see Categories and Tags options. Similarly, you can choose relevant categories and add tags to your WordPress page.
The bottom line
Adding WordPress categories and tags for pages is a great method to organize your website content effectively. It also helps your customers save a lot of valuable time trying to find content on your website. Hopefully, our blog helped you easily add WordPress Categories and Tags for pages. If you have any questions, don’t hesitate to leave a comment below, if you have any question or queries.
By the way, our website has plenty of charming, well-structured free WordPress Themes that will support you in creating a beautiful website without touching any line of code.


