In this post, you will learn how to find the elements you want to customize and how customize them.
CSS Edition
Follow this part if you need to change the CSS properties of an element.
For example, you want to change the size and the color of the price on a product listing, you need your browser console or an add-on like “Firebug” for FireFox to see the HTML and CSS of your page.
Press the F12 key to have the console show up. You should have something like that displayed:
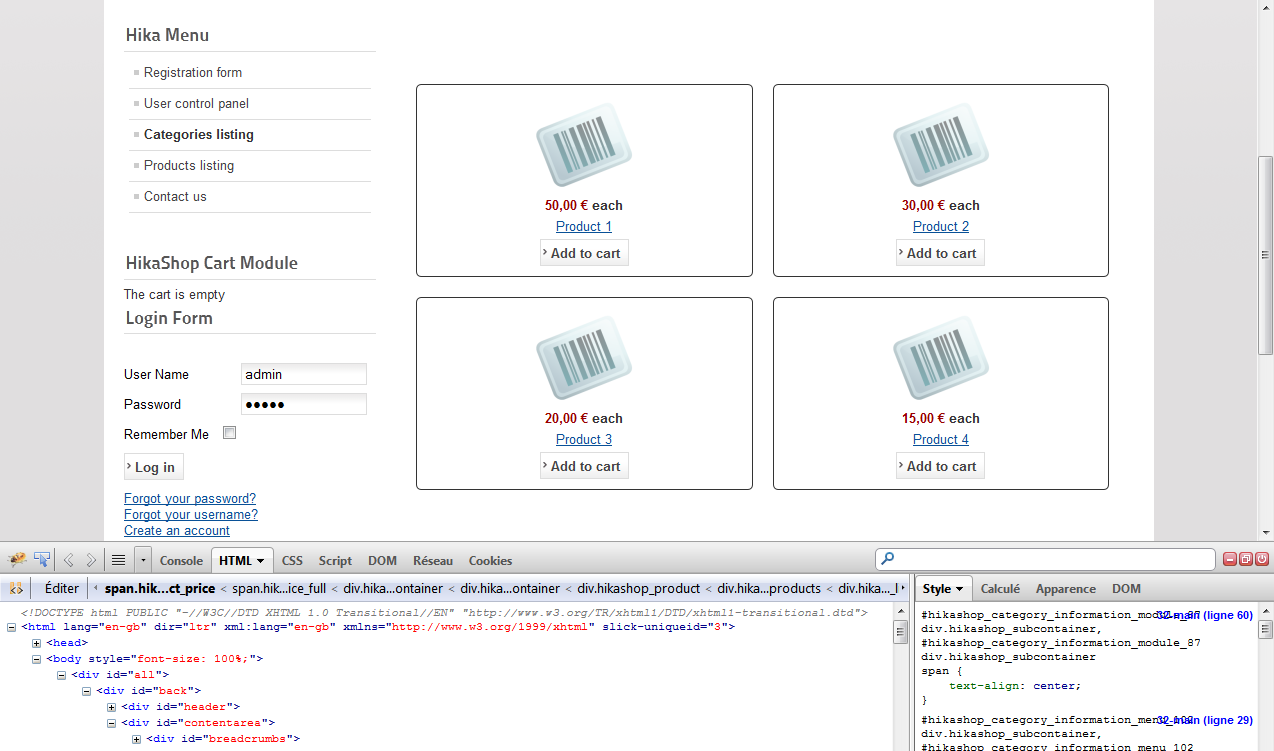
In this case, we are using Firebug.
If you want to find the element to edit, you can right click on it then choose “inspect the element”. The window should display the HTML of the desired element, you can find its class and/or id.

To edit the price display, you have to edit the class “hikashop_product_price”.
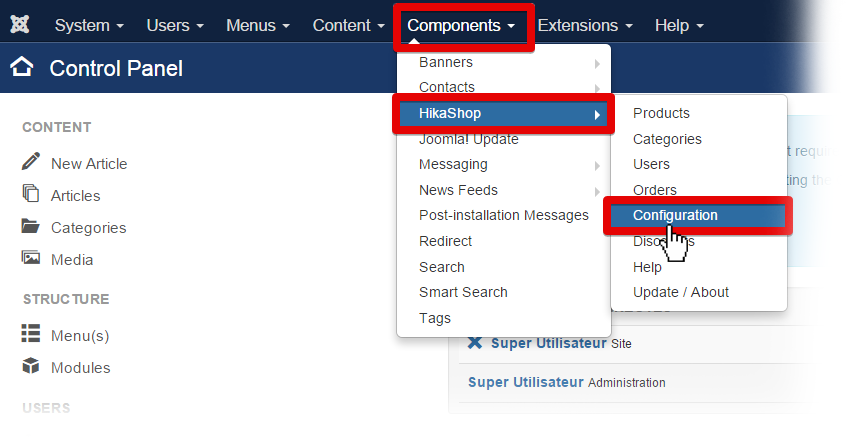
In HikaShop >> Configuration >> Display >> CSS, you can edit the Front-end CSS File to set your custom properties.
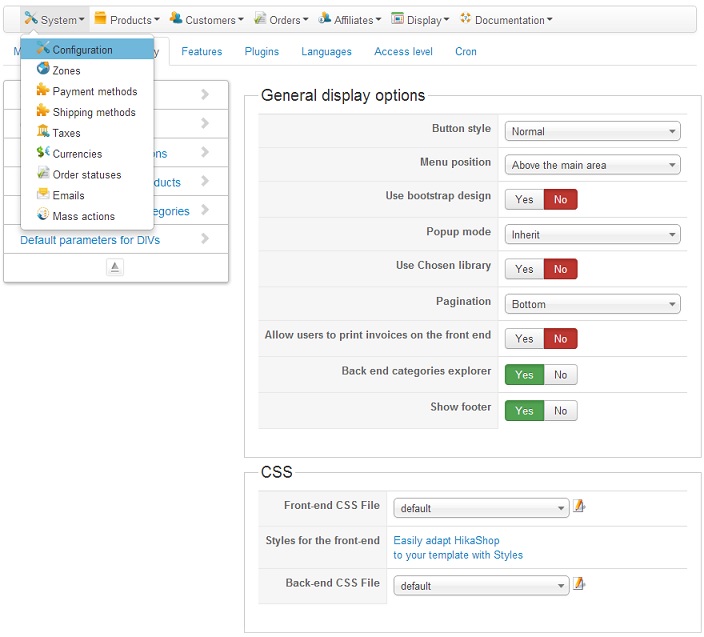
To change the color and the size of the price you can use a property like:
.hikashop_product_price{ color: #99cc00;font-size: 14px;}
If you need to edit the class in, for example, only one module, you can prepend the id of the module to the CSS code.
When using the CSS code:
#module_25 .hikashop_product_price{ color: #99cc00;font-size: 14px;}
the color and the size of the price will be changed only in the module with the id “module_25”.
Remember that “#” is used for the IDs and “.” for the classes.
Layout customizations
Follow this part if you want to move an element in the page, or add something in it.
To go further with customization, you can override the view files of HikaShop via the menu Display>Views.
To know which view you have to edit, just set the “Display view files” setting to “all” under the “Advanced” tab of the HikaShop configuration.
This will add dashed borders around eah view file used with the name of the view file used on the top left corner of the view file. It will have 2 parts separated by a /. The left part will be the view name and the right part will be the file name so you’ll be able to easily find what you need to edit.
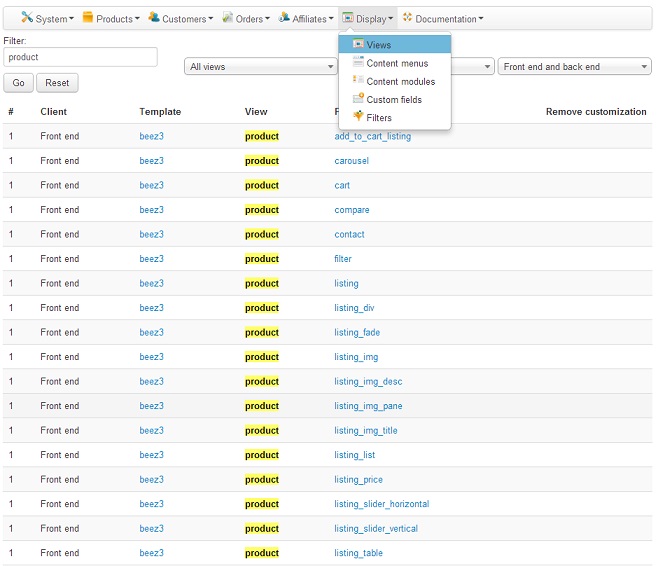
In the edition page, you can find all the different parts between the HTML comments.
<!- … –>
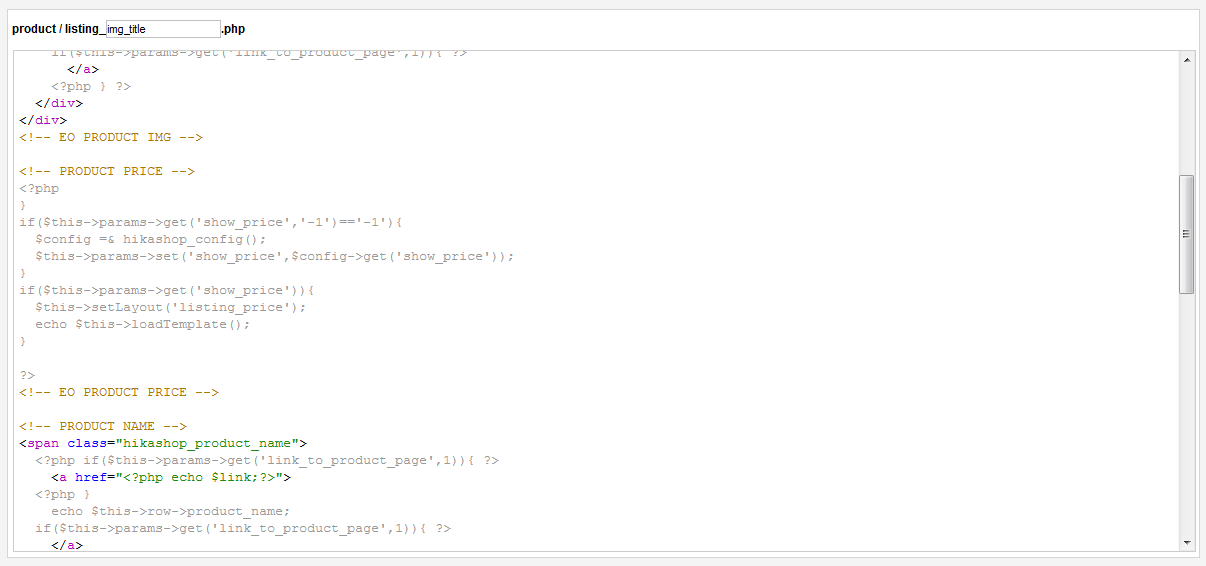
Just cut and paste the part for the product name before the product image part.
And “voilà” you have moved the name before the picture of the product.
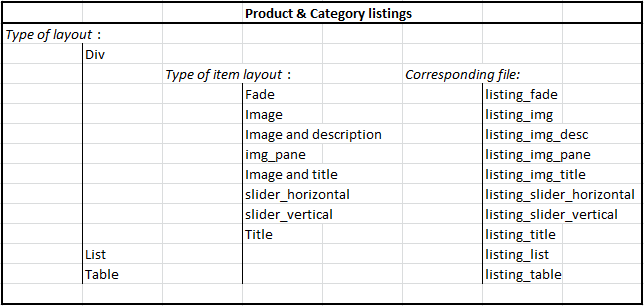
Listing types:
Check this tab you’ll be able to know which file to edit via «Hikashop->Display->Views » regarding the value of the « Type of layout » and « Type of item layout » options.
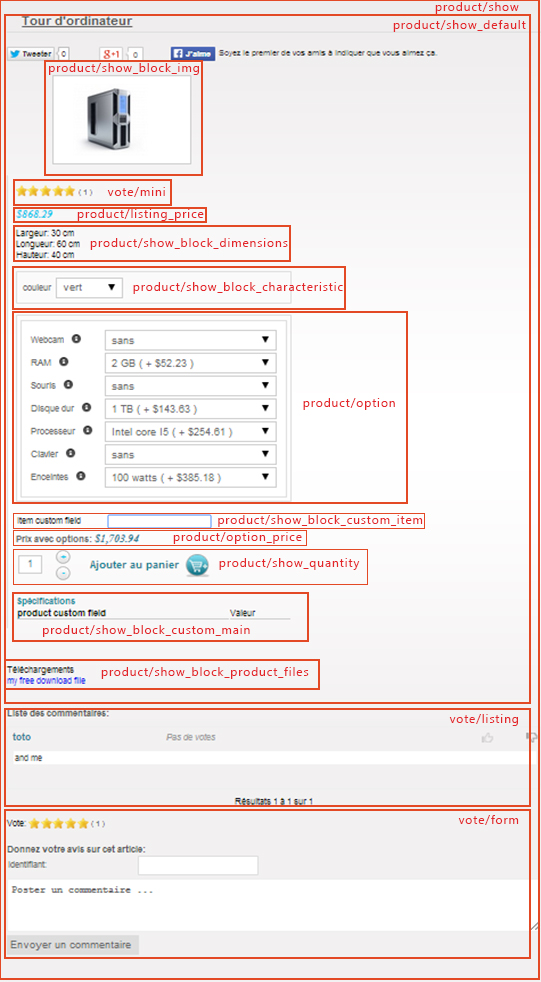
Product page customization:
Have a look at this picture to know which file to edit via «Hikashop->Display->Views » regarding what you exactly want to change on product page.
To change the cart module display, you have to edit the view “product / cart”. If you want to customize the emails, you have to go in HikaShop > System > Emails, only available in the business edition of HikaShop.
If you need more customizations, it require HTML and probably PHP skills. If you don’t have enough knowledge you can learn these programming languages on the web.
If you have any question about this post, don’t hesitate to leave a comment below. And don’t forget to share with your friends if you find it useful! Thanks!

