During the install process, HikaShop will be automatically configured using your Joomla Configuration but it also allows you to modify it if you want.
Toolbar
Check database: This tool will check the HikaShop database structure in order to fix potential issues as well as content problems like products without categories, Joomla tags, etc.
Save: Save the configuration and return to the dashboard screen.
Apply: Apply the modifications to the configuration and stay on the same screen.
Cancel: Return to the previous screen without saving the modifications.
Help: This button enables you to turn ON/OFF the help section, this screen will appear or disappear.
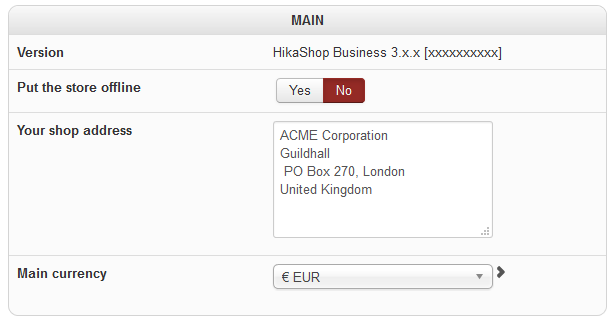
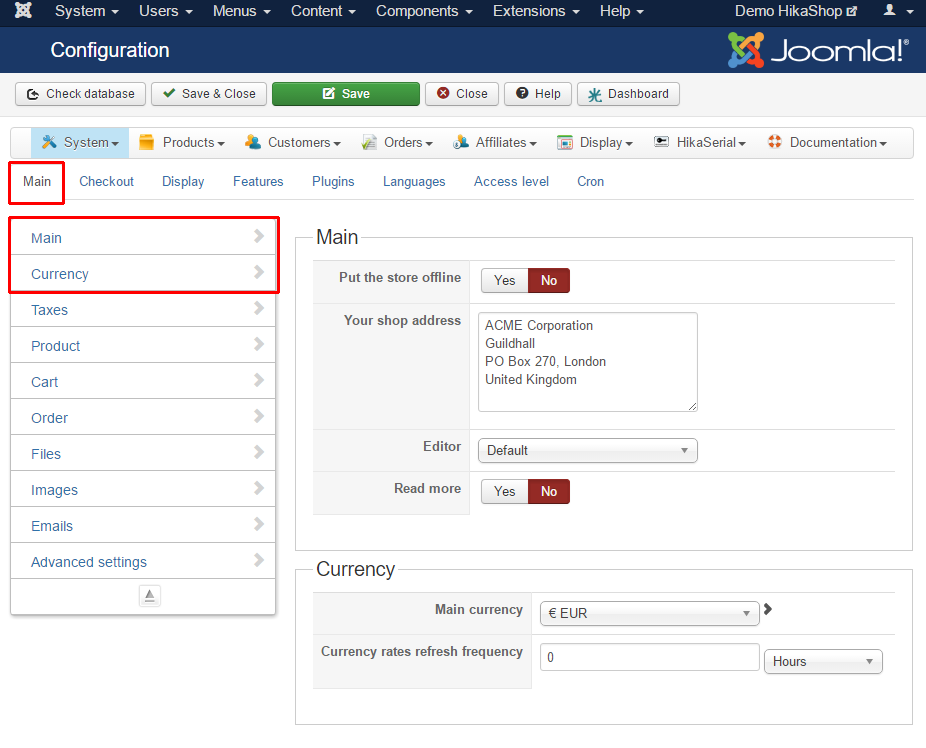
Main
Main
Version: The build number of your HikaShop. That number is actually the date and hour or when the package of HikaShop you installed has been generated on our end.
Put the store offline: Choose YES to disable the whole store on the front end.
Your shop address: Enter your shop real address because it will be displayed on the invoices that you or your customers will be able to print..
Main currency: Set your main currency here. By default the prices will be displayed in that currency and payments will be possible in that currency.
You can set additional currencies via the currencies management screen.
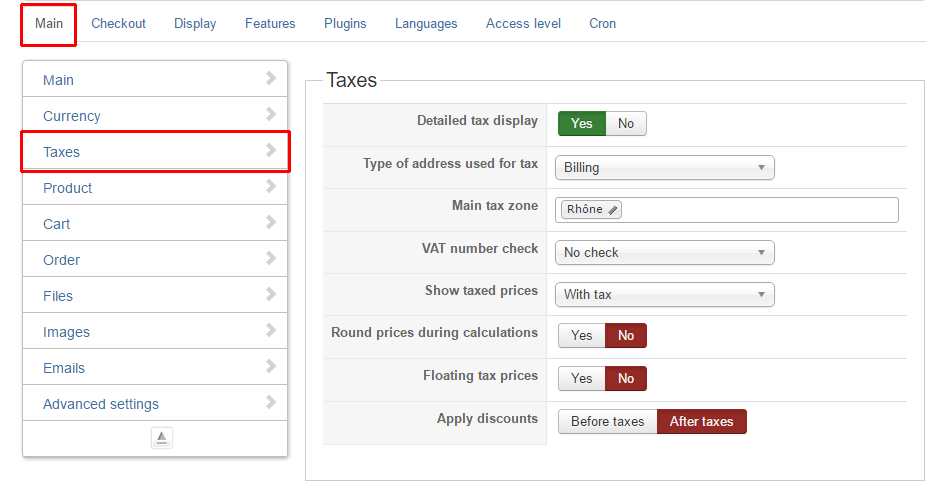
Taxes
A small note about taxes calculation:
– Taxes calculation can become quite complex as their are a lot of parameters to take into account.
– Each zone of the world has a set of tax rules that all businesses operating in its zone need to follow.
– Taxes will be adapted based on the product type and where the customer is living. ( That means if your company is based only in France, you will have to input the tax rules of the french administration).
– You will be able to lower the amount of rules by restraining your sales to a part of the world, the type of products, the type of the customer.
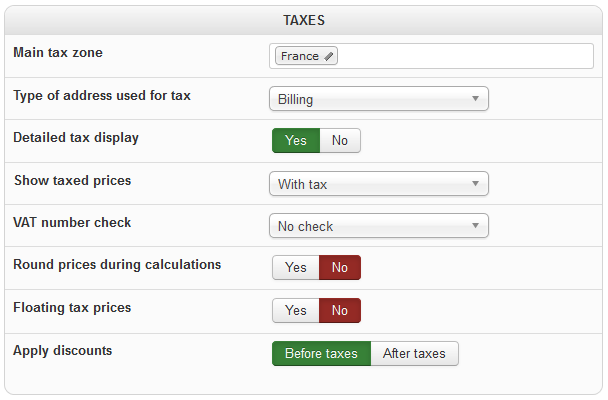
Main tax zone
Select your zone here. That parameter will be used to calculate taxes.
Type of address used for tax
Depending on where you live, the tax office will use the billing address or the shipping address for tax calculation. You can get advice from your local tax office to set this option.
Detailed tax display
Show detailed all the different taxes present in the cart, the orders and the invoices.
Show taxed price
Display the prices with tax, without tax or with and without tax.
VAT number check
If you want to check the VAT number, please select here.
You can set it to check that it conforms to the format specifications defined by each European country or, on top of that, validate the VAT number against the European VAT checking web service (Only available if you have the PHP SOAP extension installed on your PHP. If not, an error message will be displayed to the user).
By default, the VAT number field is unpublished. You can activate it in the fields management screen.
There, you will also be able to choose whether the VAT number should be required or not (It could happen that you want to make the field required, and check it against the online server to be sure that all your customers are European companies with a valid VAT number).
Round prices during calculations
If you want the prices to be rounded during the order calculation, then activate this option.
Floating tax prices
If you activate this option, the prices entered in each product will be considered as the prices with taxes and HikaShop will calculate the taxes and the prices without taxes out of these based on your tax rules, allowing you to always display the same price with taxes to the customers, regardless of whether taxes apply to them or which tax rate apply to them.
Apply discounts
Apply discounts
The tax office will want you to apply discounts before or after tax calculation depending on where you live.
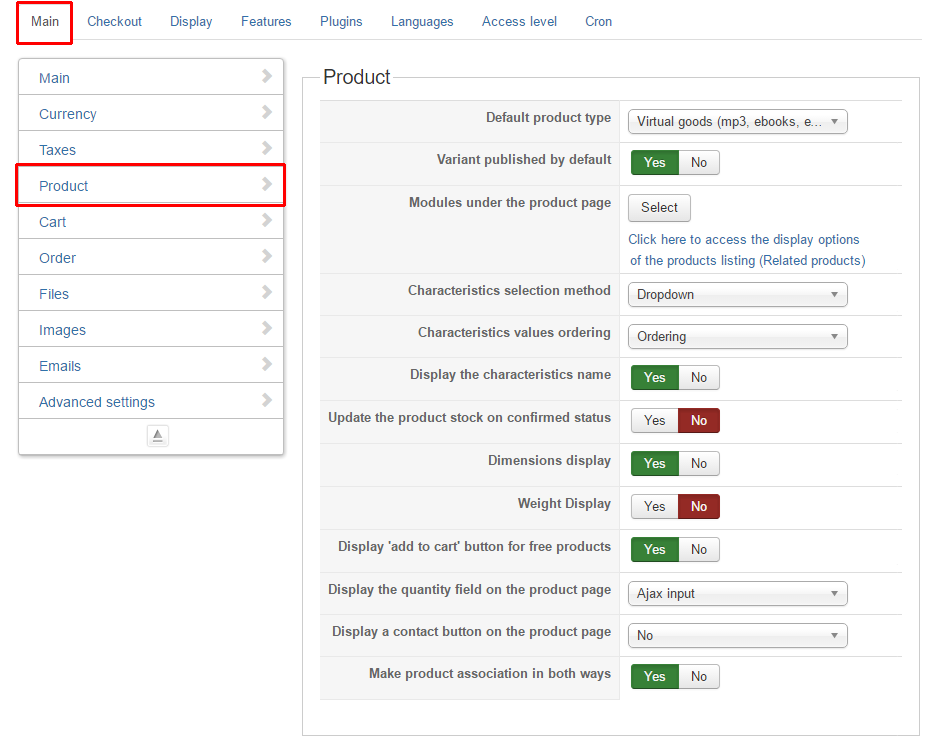
Product
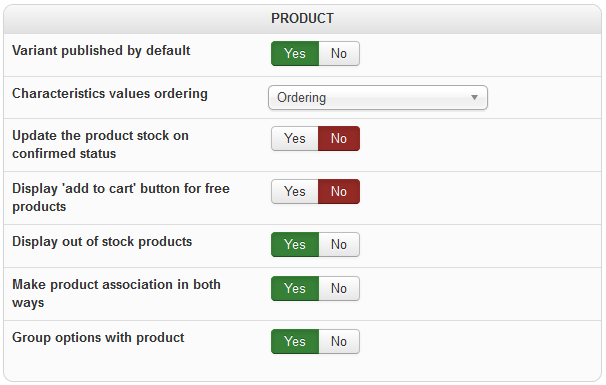
Characteristics values ordering
You can choose here whether to sort the characteristics values alphabetically or by characteristic id (in the order you added them to the characteristics).
Update the product stock on confirmed status
The product stock will be decremented only when the order status changes from created to one of the statuses selected in the “invoice order statuses” option, and not when the order is created.
Display “add to cart” button for free products
By default, the “add to cart” button is only displayed if the product has a price, if you want to display “add to cart” button for free products, then turn this option on.
Display out of stock products
You can choose to display or not products when their stock reach 0.
Make product association in both ways
If you set a “product related”, it wil create an association between two products.
Group options with products
When you activate this opyion, the options will be displayed together with the main product in the cart while when the option is deactivated, each option will be considered as a separate product in the cart.
Cart
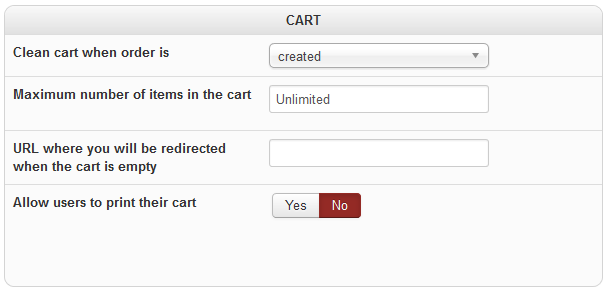
Clean cart when order is
You can choose to remove the current cart of the user directly when the order is created at the end of the checkout, or only when the order is successful.
And when the user comes back from a payment gateway, they can continue their order.
Maximum number of items in the cart<
Define a maximum number of items for the cart here. This option is only available in commercial versions of HikaShop.
URL where to redirect when the cart is empty
When the customer try to access the checkout and their cart is empty, they are redirected to an HikaShop product listing.
You can put an URL here to redirect the customers to a specific page.
They will get a “the cart is empty” notice in all cases.
Allow users to print their cart
You can allow users to prints their cart on the checkout by activating this option.
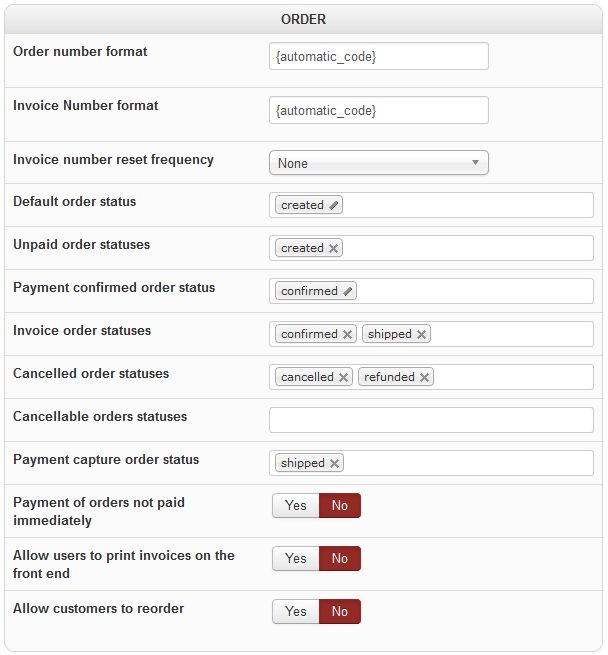
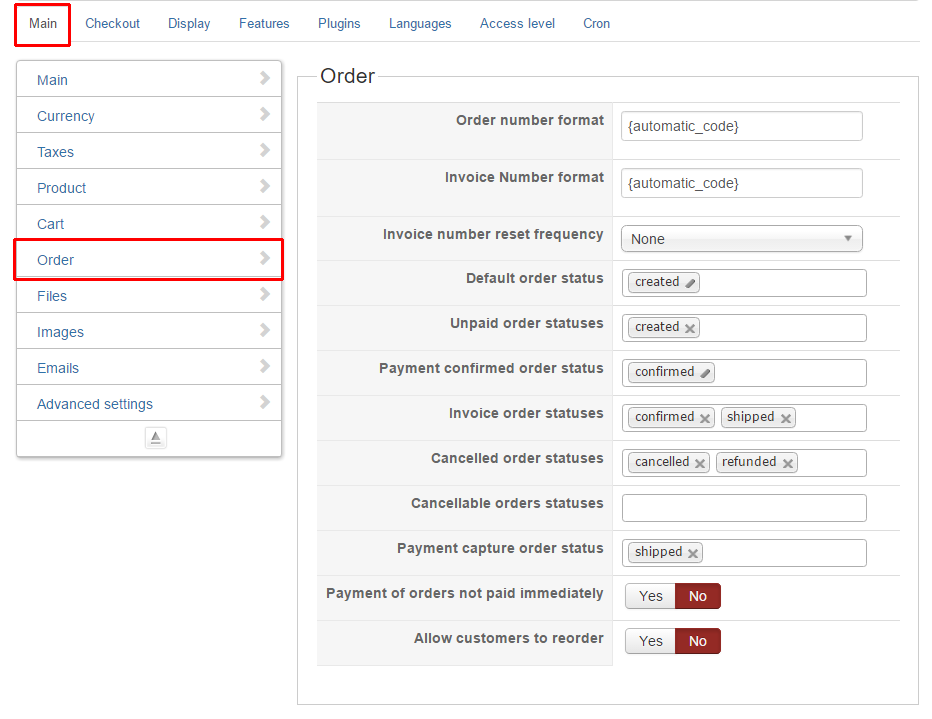
Order
Order number format
This option is only available in commercial versions of HikaShop. It enables you to set the format of order numbers. By default, the order number uses letters and numbers interleaved together, this is represented here with the tag {automatic_code}.
If you want to use the order number directly, you can use the tag {id}. In the tag id, you can specify the number of numbers with the size attribute. For example, {id size=”5″} will result in 00123 for the order with the id 123.
You can also use the date tag in order to insert date information. For example, {date format=”m/y”} will result in 02/11 for an order made in February 2011.
You can combine them to generate pretty advanced order numbers like the format RE-{id size=”5″}/{date format=”m/y”} used for German accounting which will result in RE-00123/02/11 for the order 123 made on February 2011.
The order number (and the order id) is generated when the order is created. So after you change the format here, only new orders will get their order number in the new format.
Invoice number format
This option is only available in commercial versions of HikaShop. Note: – If you use the {id} tag, you will get the order invoice id, nor the order id. If you want to get the order id as your invoice number, you’ll want to use the {order_id} tag instead.- The invoice number (and the invoice id) is generated when the order status is changed to confirmed (based on the settings in the menu System>Order statuses). So after you change the format here, only new confirmed orders will get their invoice number in the new format.
Invoice reset frequency
This option allows you to set a reset frequency of the invoice id. It is only available in commercial versions of HikaShop.
Payment of orders not paid immediately
You can activate this option via the listing of the orders of the user.
He will have an additional button below the status of the order. Upon clicking on it, he will be redirected to the payment gateway in order to pay for the order.
This option is available in all commercial versions of HikaShop.
Allow users to print invoices on the front end
This option allows users to print invoices of their orders from their HikaShop user account.
Allow customer to reorder
Allow the customers to reorder, create a new order with the exact same content by adding a button in the customer order listing.
Before HikaShop 3.0, there were some settings which are now directly available in the HikaShop order status management.
Default order status
Set the order status which will be assigned to a new order.
Unpaid order statuses
If you are using the setting to allow customer to pay order not paid immediately, that setting will be used to determine the order statuses which make an order “not paid”.
Payment confirmed order status
Set the order status which will be assigned to an order when a payment notification is received.
Invoice order statuses
Set the order status which will generate the invoice number.
If “created” is listed, you will have the same invoice number than the order number.
That setting is also used by plugins or other feature in order to know when an order is considered as “confirmed”, while the “confirmed order status” only target one status, this one can have several.
Cancelled order statuses
When an order has its status changed to one of those statuses, the quantities of products in it are restored.
Cancellable orders statuses
If you enter order statuses in that field, for all the orders with one of these statuses, it will display “cancel” button on the orders listing of your customers on the front end.
That will enable them to cancel their orders and you will be notified by email when that happens. Note: Payments won’t be cancelled by that process.
Payment capture order status
Some payment methods are compatible with the “Authorize / Capture” system which allow to capture the payment once the order change to one status listed here.
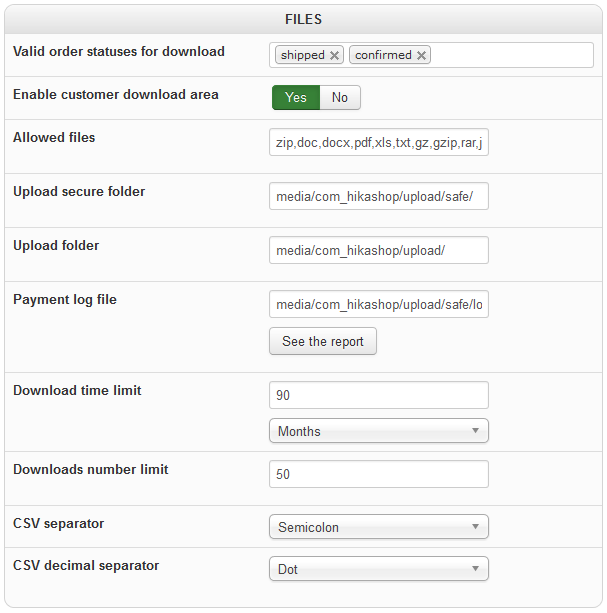
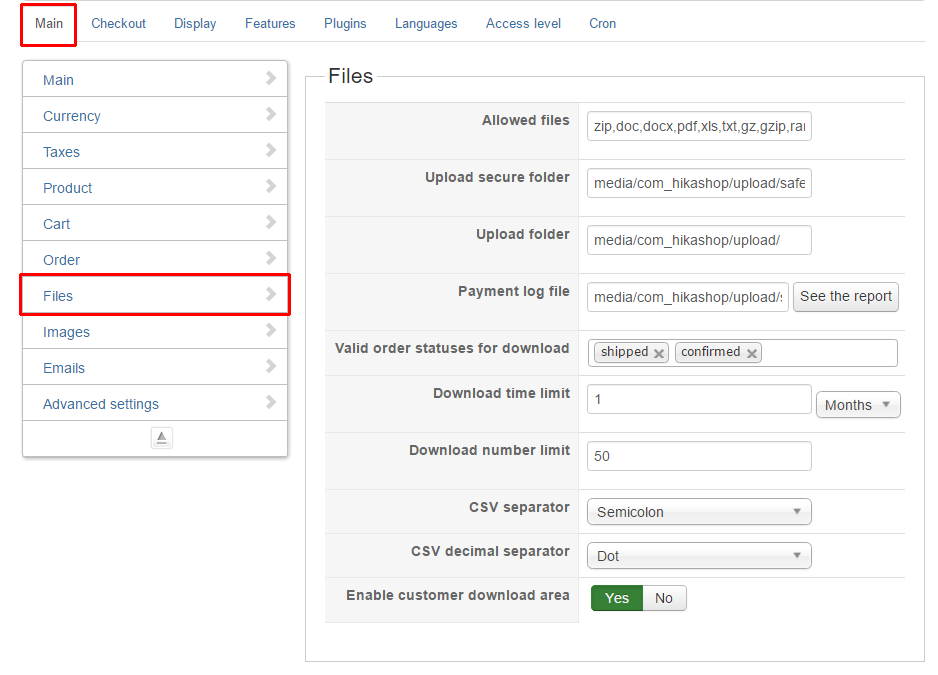
Valid order statuses for download
You can list the order statuses which will allow the customer to download the files for the products of the order.
Files
Enable customer download area
Choose YES to add a button in the HikaShop user panel and provide a specific interface where the customer can see the list of his available downloads.
Allowed files
List of allowed file extensions for the emails attachments and products files.
Upload secure folder
Folder in which the products files will be uploaded to.
Please make sure this folder is writable otherwise HikaShop won’t be able to upload your files in it.
You should put this folder outside your joomla installation folder. If your website is hacked, you have more chances that the products files won’t be changed.
Upload folder
Folder in which the attachments and images will be uploaded to.
Please make sure this folder is writable otherwise HikaShop won’t be able to upload your files in it. This folder needs to be inside your joomla installation folder.
Payment log file
A file where the payment notifications will be recorded.
Download time limit
You can set 0 for unlimited download time.
Download number limit
You can set 0 for unlimited download.
CSV separator
Select here to separate columns by a comma or a semicolon in the CSVs you can export from HikaShop.
CSV decimal separator
Select here what character will be used as decimal separator when HikaShop is generating CSV files.
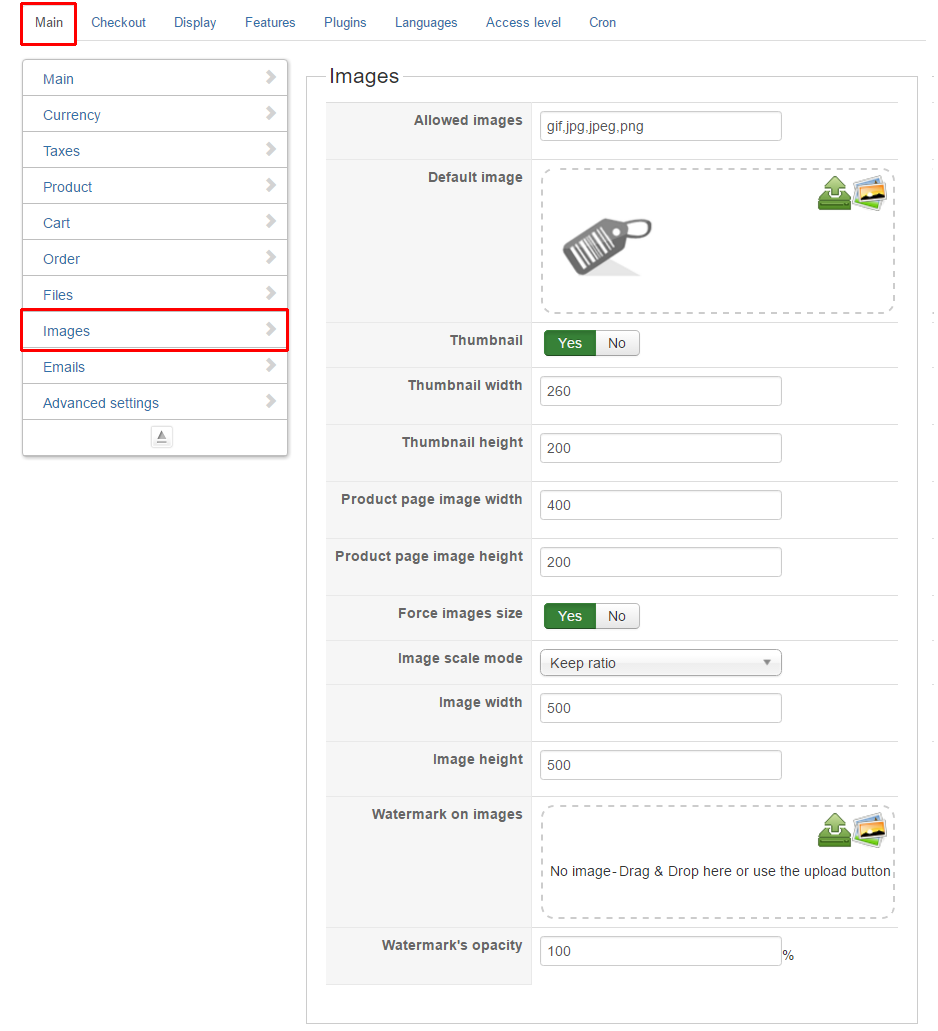
Images
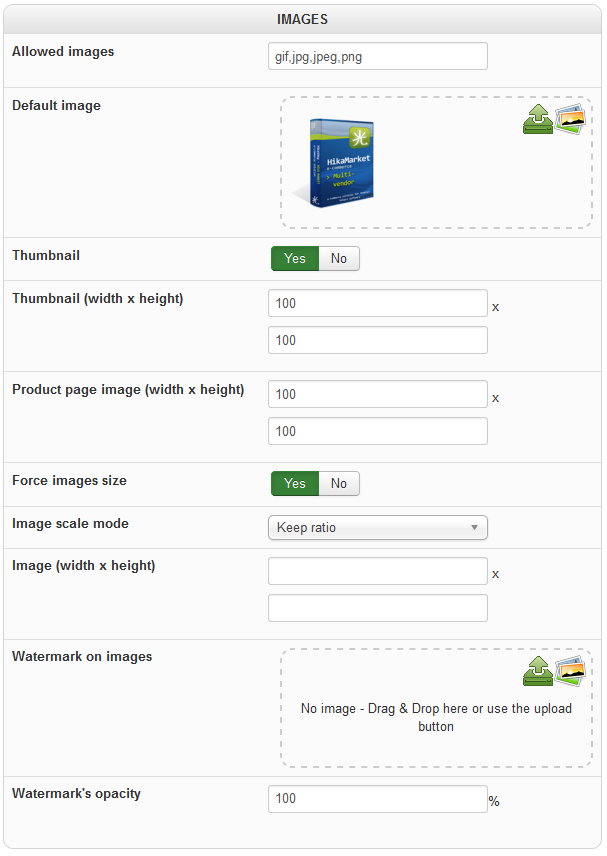
Allowed images
List of allowed file extensions for the images.
Default image
Set a default image. This image will be used for your products or category with no image.
Thumbnail
Choose YES to allow the generation of thumbnails automatically when the images are above the limits below. Thumbnails will be generated automatically.<br§> You need the GD extension for PHP in order to resize images.
If it is not installed a message will be displayed in the back end when it tries to resize an image.
If you have it, either install GD or ask your hosting company to do so, or turn this feature off.</br§>
Thumbnail (width x height)
When you change the width and/or height of thumbnails, they won’t be resized automatically.
Their width and height will be fixed in the img tag so that they appear at the good size.
However, that means that they could get quite blurry. In such cases, you can go the the folder media/com_hikashop/upload/thumbnail via FTP and delete all the files there.
The system will recreate the thumbnails on the fly with the new size when they need to be displayed.
Also, by default, these values will be used on listings of categories and products AND on the product page.
However, for each hikashop menu/module you created, you can define a specific image size by editing them via the Joomla menus/modules Manager.
Product page image (width x height)
It allows you to specify the max size of the main image displayed in the product page.
Force image size
This setting will force the image size during the generation of thumbnails.
The thumbnail will have the exact dimension specified in the previous setting instead of resizing the image and keeping his proportion,
Image scale mode
When the image size is forced, that setting specify how the scale is made.
By keeping the ratio, the image will have blank borders. By cropping the image, some part of the image will not be visible in the thumbnail.
Image (width x height)
It allows you to specify a maximum width and a maximum height for images attached to products.
If the images appears to be bigger, they will be resized automatically during the upload process. You can leave these fields blank if you want to resize images.
These options only apply to the “zoomed” image of products on the product page and to the current category image on category/product listings. Note: If you change these values, the images you already uploaded in your products/categories won’t be resized as this process is done at the moment you upload them.
Watermark on images
Upload a watermark image which will be added to all the product images you upload on the product edition page.
This option is only available in the Business version of HikaShop.
Watermark opacity
You can define the opacity of the watermark here.
This option is only available in the Business version of HikaShop.
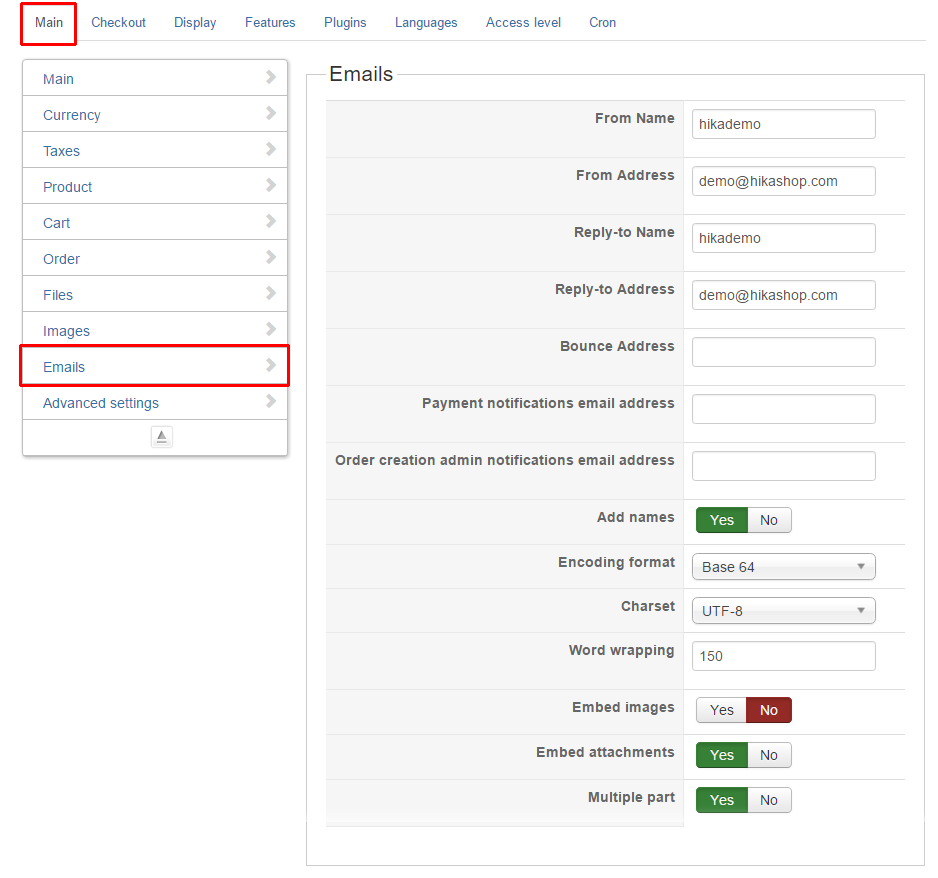
Emails
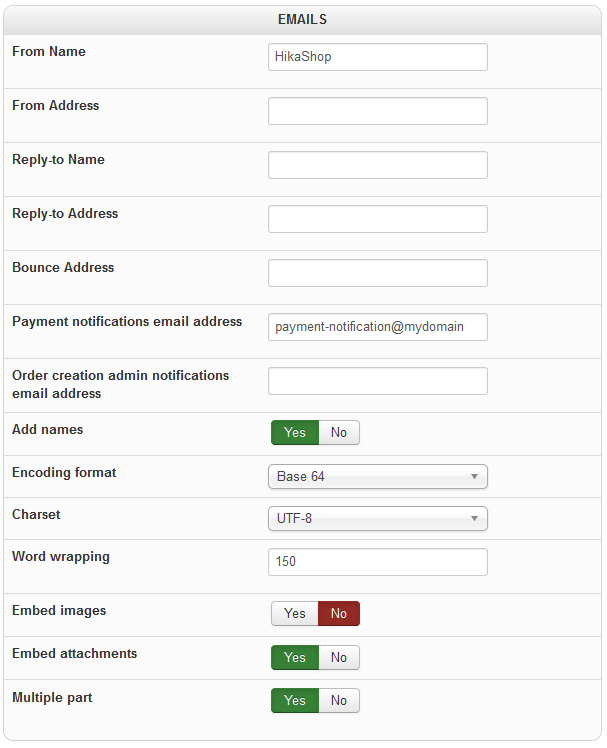
From Name
Default “From Name”used in all your emails.
From Address
Default E-mail address used as “from” in all your emails.
You can modify 2 properties: From Name and From Address for each email you write.
Reply-to Name
Default “Reply To Name” used in all your emails.
You can modify this property for each email by editing the email via email edition interface available in all commercial versions.
Reply-to Address
Default E-mail address used as “reply-to” in all your emails.
So if your receivers click on “reply-to”, their response will be sent to this e-mail address.
You can modify this property for each email by editing the email via email edition interface available in all commercial versions.
Bounce Address
Any automatic response will be sent to this e-mail address. This e-mail address will not be visible for your receivers.
Some servers restrict the use of this parameter to a local e-mail account, so make sure you can still send emails after editing this parameter.
Payment notifications email address
When a payment notification is received from the payment plugins, you will receive an email to this address. You can set several emails here separated by a comma.
Order creation notifications email address
When an order is created, you will receive an email to this address. You can set several emails here separated by a comma, or disable it by leaving it empty.
Add names
Some servers do not allow you to send emails with names in the headers. You can still send email if you set this option to NO.
Encoding Format
Encoding format used for all your emails. You should use “base 64”.
Charset
It used for all your emails. You should use UTF-8 if you send english or international emails.
You should to use the charset used in your country if your business is local.
Word Wrapping
Some servers do not allow you to send emails with more than xx characters per line. This parameter enables you to set this limitation.
Embed Images
If you choose YES, Hikashop will embed your pictures inside the emails, the recipient won’t have to download the picture form your website in order to display it. But the send process will take more time.
Note: It’s possible that your emails get rejected by the recipient server because email size is often limited on the receiving email server. So you should set this option to NO, the send process will be much faster because HikaShop won’t send the attachment but a simple link.
Embed Attachments
If you choose YES, HikaShop embed your attachments inside the emails. Otherwise HikaShop will add a list of attachments with a link to your website in order to download it. If you set it to NO, then the send process will be much faster as HikaShop won’t send the attachment but a simple link.
Note: It’s possible that your emails get rejected by the recipient server because email size is often limited on the receiving email server. So you should set this option to NO, the send process will be much faster because HikaShop won’t send the attachment but a simple link.
Multiple Part
If you set this option to YES, HikaShop will HikaShop will send the text and the html version in the email so that depending on the recipient email client, the appropriate version will be opened.
Checkout
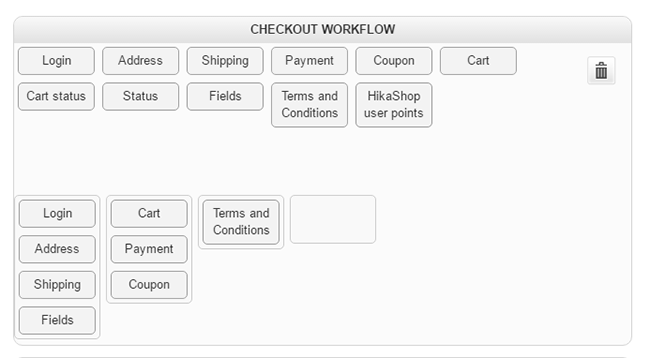
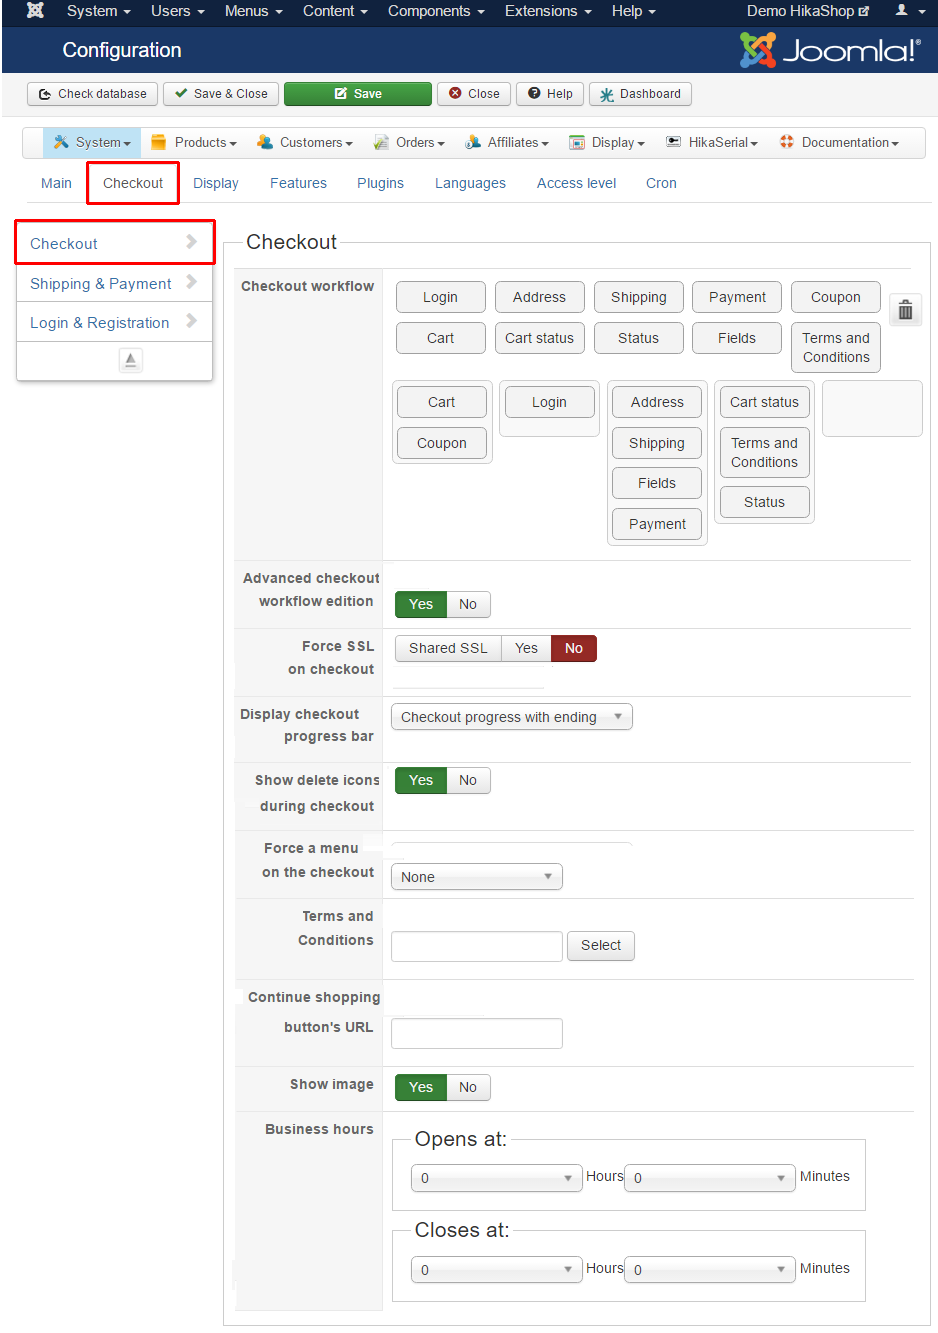
Checkout workflow
The checkout consists of steps and views. One step is a column of view boxes.
It allows you to put whatever view you want in a step by drag’n’dropping it from the top area.
You can also reorder them in a step, or move them to a new step column (empty box next to the last step column) with drag’n’drop.
When you start the checkout process some views won’t be visible.
For example, if you are logged in you won’t see the login view but you will see the address view. On the other end, if you’re not logged in, you will see the login view and not the address view as it requires you to be logged in to be displayed.
So, you have some dependencies of information between the views even if they are in the same step.
The fields layout enables you to ask your customers additional information thanks to custom fields of the table “order”
These custom fields are only available with HikaShop Business.
An additional checkout view called “Terms & Conditions” can be added so that the customer is required to check the terms & conditions checkbox before finishing his order. Note:
– Addresses are linked to user accounts so you can’t have the address view without the login view.
– On top of that, all those views are customizable via the views management screen in case you really need to do/display something special. And if you need to add new views to the checkout workflow, it’s also possible thanks to the “Checkout API” of HikaShop that you can find in our developer documentation page.
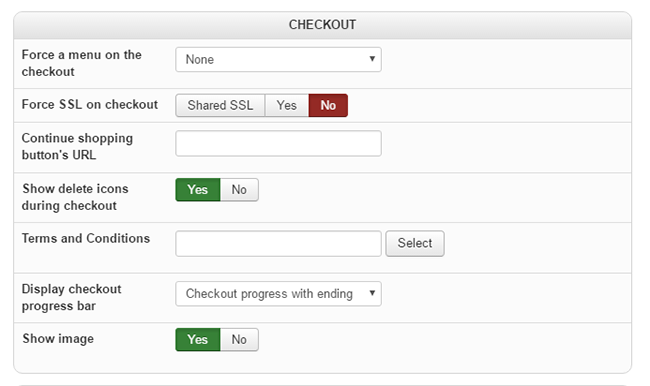
Checkout
Force a menu on the checkout
You can set here a specific menu where your users will be redirected when displaying the checkout page. That allows you to display different modules/templates on the checkout than on the rest of the shop. If you don’t set it, the user will keep all the modules and templates of the rest of the store when displaying the checkout page. Force SSL on Checkout
This option will force HTTPS on the checkout pages. Before you can activate this option, you need to have HTTPS configured and a valid SSL certificate. Otherwise the checkout will appear as broken and this option will be deactivated by the system. You will have to ask your hosting provider about how to setup HTTPS and obtain a valid certificate for your website. Continue shopping button’s URL
Enter a URL here, a “Continue shopping” button will be displayed on the checkout pages (except on the last step where you don’t want it). Show delete icons during checkout
Choose YES to allow to show the delete butto on the cart view of the checkout. Terms & Conditions
Select an article which you want it to be displayed for the terms and conditions of your checkout.
Note: You also need to have the block “Terms” in your checkout workflow. Terms & Conditions popup size
If you click on the Terms and Conditions link, size of the Terms and Conditions popup will appear.
This option will only appear once you selected an article in the Terms & Conditions option. Display checkout progress bar
You can choose to display a checkout progression bar during the checkout process on the front end. You can also have the possibility to display or not a step for the end step. Show image
The main image of your products will be displayed on the cart view of the checkout if you set this option to YES.
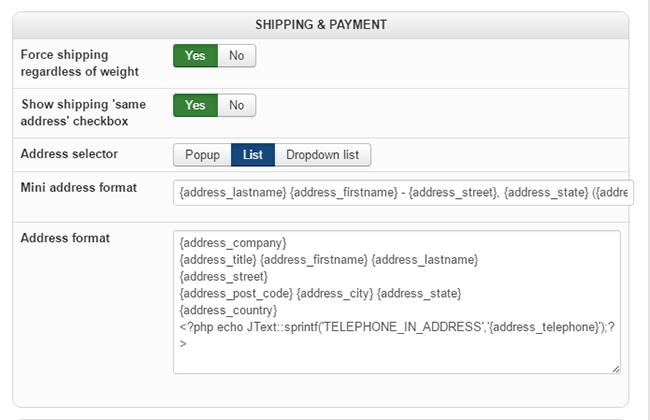
Shipping & Payment
Force shipping regardless of weight
If you set this option to NO, the shipping methods selection and the shipping address views will be displayed on the checkout regardless of whether the products have a weight or not (you still need to have your shipping methods configured). Address selector
It defines the way the addresses can be selected/modified on the checkout.
You should use either the list or the dropdown list in order to avoid incompatibilities with popups and javascript libraries, and to be responsive. Mini address format
This option is mainly used for the dropdown list selector in order to generate the text for each address in the dropdown.
The tags used here correspond to the column name of the address fields that you can find via the menu Display-> Custom fields. Address format
You can specify here the normal format HikaShop will use to display the addresses on invoices, on the checkout, on emails, etc.
The tags used here correspond to the column name of the address fields that you can find via the menu Display-> Custom fields.
It is also possible to add custom PHP code and get the address data with such PHP:
<?php $address = $this->params->get(‘address’); ?>
Login & Registration
Login
Choose YES to activate the login box on the left of the login view of the checkout with that option. (or choose NO, deactivate). Display method for registration
By default, that’s the All in one page” option, the login and registration forms display one next to the other.
If you choose the “Selector” option, you will have on the left of the view a radio for each element (login, registration, guest checkout) that you activated and the element selected will display on the right side of the screen.
When you select the “Selector” mode, instead of having to choose between the registration and guest checkout in the “Registration” option, you’ll then be able to choose both at the same time and it will be the customer which will be able to choose for himself what he wants to do. Default registration view
If you use the “Selector” for the registration display method, it allows you to select which view will be the default one. Registration
If you choose “registration”, the users will have to register on the website during the checkout.
If you choose “simplified registration with password”, it will work like the “simplified registration” but with the user having to enter his password on the registration form.
If you choose “simplified registration”, the fields name, username, password and password verification from the HikaShop registration form will be removed but an account will be automatically created for the users and an email will be sent to him with his assigned username and password.
If you choose GUEST, the fields name, username, password and password verification from the HikaShop registration form will be removed and no Joomla user account will be created for the user on the website.
This option is available in all commercial versions of HikaShop. On the starter edition only the registration mode is possible.
Note: You can turn off the user account activation with the “New User Account Activation” setting of the Joomla user manager.
If it appears the text “Registration not allowed”, it means that the “Allow User Registration” setting of the Joomla user manager is deactivated. Display email confirmation field
The users have to enter their twice. Ask address on registration
If you set this option to NO, the system won’t display the address fields in the user registration so it will be actually like a joomla registration form. The address view of the checkout will automatically display the address form after the registration as it will detect that the user didn’t fill yet any address. User group on registration
If you choose inherit, HikaShop will use the user group configured in the Joomla user manager settings screen for the user group of newly registered users registering from the HikaShop registration form.
If you choose user group, HikaShop will use that user group instead.
Finally, it’s also possible to select a custom address field or a custom user field of the types radio button, simple dropdown, multiple dropdown or checkbox. That way, you can let the customer choose himself his user group among a list of user groups you entered in the values of the custom field.
The custom field values should have the user group id in the “value” column for the system to work properly in such cases. Allow registration after guest checkout
When you turn this option on, if the customer placed an order as a guest, the order notification emails will contain a registration link in order to register on the website.
This option is only available in the Essential and Business editions and it requires the guest checkout to be activated in the “Registration” option above.
Display
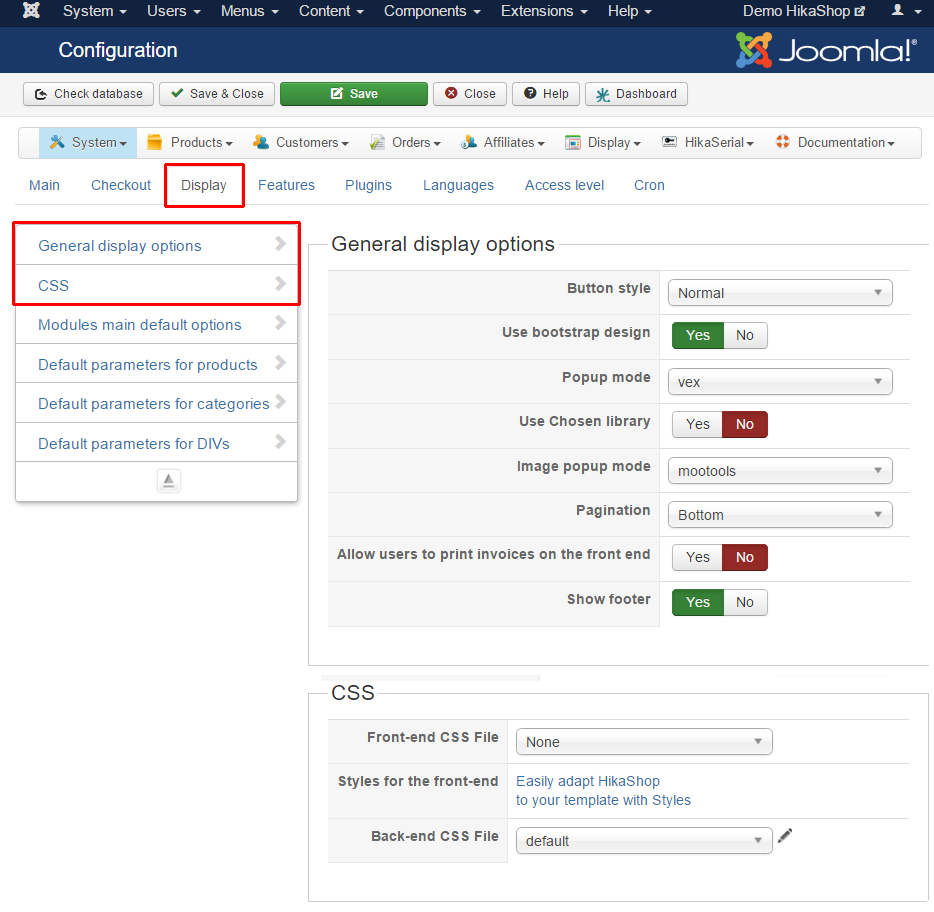
General display options
Show footer
You can set this option to YES if you want to display the HikaShop footer, with the HikaShop version.
Button style
You can define a special style for buttons on the front end. By default, this option is set to normal.
Popup mode
You can choose the Javascript library used to display popup in your website (front-end and backend).
By default HikaShop use the Vex library which is a standalone library.
But you can use Inherit to let HikaShop decide between Mootools Squeezebox or Bootstrap depending your Joomla version.
Note: Bootstrap requires a template compatible with Bootstrap 2 (included in the Joomla core).
You also can force the usage of one specify library, provided directly by HikaShop or provided by a HikaShop plugin.
The Vex should be the most compatible of them all.
Image popup mode
The default value is mootools, HikaShop will use the mootools popup system for the image lightbox on the product page.
If you have display issues, you can use “Shadowbox (external)” (or “embeded” if your website already have shadowbox with your template or a plugin).
Chosen library
This option will only appear on Joomla 3.0 and above. By default it is set to NO.
The Chosen library will convert all the dropdowns of your frontend so that they get more user friendly and good looking. However, with some templates, it might break some of the display, in this case, you can turn it off and the dropdowns will then display normally on the frontend.
Pagination
You can set the pagination at the top or at the bottom, or none at all, for products and categories listings on the frontend.
CSS Options
Front-end CSS file
Select the CSS file used by HikaShop on the front-end.
The front-end CSS contains all the positioning CSS of HikaShop in order to display properly its default layout.
Styles for the front-end
You can choose one style to apply on your template.
The styles CSS contains all the color/margins/images CSS of HikaShop front-end.
Back-end CSS file
Select the CSS file used by HikaShop on the back-end.
CSS for buttons
Write here CSS classes to be added to buttons generated by HikaShop on the frontend.
By default the value is “hikabtn” which has CSS defined in the front-end CSS.
Another possible value is “btn”, the Bootstrap CSS class for buttons, if your template includes Bootstrap.
Extra CSS for add to cart buttons
You can write here CSS classes to be added to “Add to cart” buttons generated by HikaShop on the frontend.
Extra CSS for add to wishlist buttons
You can write here CSS classes to be added to “Add to wishlist” buttons generated by HikaShop on the frontend.
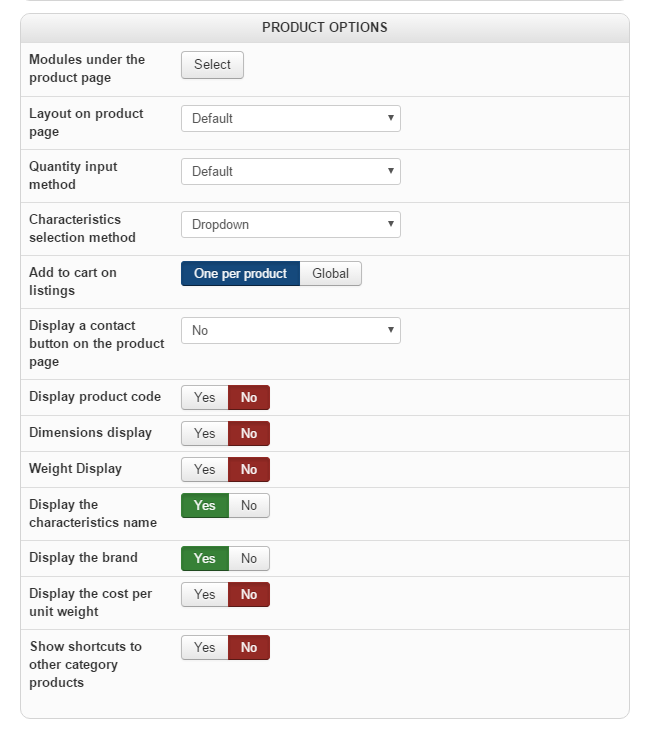
Product Options
Modules under the product page
Enable the of display HikaShop content modules under the product page.
By default, the Related products module is enabled there so that HikaShop will automatically display related products at the bottom of the product page when you add related products to your products.
Layout on product page
Choose how you want to display the product page.
HikaShop include several layouts named : Default, Reversed and Tabular.
That setting can be overridden per category and per product with the corresponding setting in the categories/products edition page.
You can also modify these layouts via the menu Display-> Views.
Quantity input method
Select how the customer will be able to enter the quantity information for the products.
This will affect the quantity input on listings, on the product page, but also on the cart, the checkout, etc.
None: No quantity input at all. The add to cart button will add 1 item each time
Default: The default input box with + and – link on the right side
Show select: It will display a dropdown with fixed quantity values. It will either use the product minimum quantity or 1 as increment. And it will either go up to the maximum quantity or up to 15 elements.
Show select by price: It will display a dropdown with fixed quantity values. It will use the prices of the product with one entry for each minimum quantity of the prices available for the product.
Show simple: It will display like “None” but with a hidden input field for the quantity.
Show left and right: It will display the – link on the left of the input and the + link on the right of the input in an unified area.
Show simplified: It will display a simple input box without – and + links.
Show HTML5: It will display like a simple input box but with the “number” type of HTML5 to have up and down arrows in the field to increment/decrement the quantity.
Show default in div: It will display like the “Default” mode but with DIVs instead of a table for the positioning of the elements.
Show regrouped (legacy): This will display the + and – links grouped on the right side next to the input box with the input-append CSS class of Bootstrap
You can customize these display modes with either CSS, or by editing the file “show_quantity” via the menu Display->Views.
Characteristics selection method
You can choose between several possibilities for the characteristics selector on the product page:
Dropdown: a dropdown for each characteristic
Radio Button: radio buttons for each characteristic
Table: a 2D table layout where you will have a characteristic’s options as rows and another’s as columns with one radio per possibility.
List: a list of the variants of the product
Notes:
– The “Table” option only works with 2 characteristics per product. If a product does have a different number of characteristics, they will default to the dropdown display.
– With the Dropdown and Radio Button options, you’ll be able to change the display mode in each characteristic for greater flexibility. – If you want a color selector for your products, you can use a characteristic as described in this tutorial.
Add to cart on listings
You can either have one quantity field for each product of the listing and one main add to cart button for all of them. Or one quantity field and one add to cart button for each product of the listing.
Display a contact button on the product page
That option will add a contact button on your product page so that users can contact you about your products.
You can also add that button on a per product basis. That means that you will have to choose to display or not the button for each product (you will then find that option when you edit your product). Note: You can add custom fields of the table “contact” via the menu Display -> Custom fields in order to add additional fields to the contact forms. This option is available in all commercial versions of HikaShop.
Display product code
Default option to choose if you display or not the code of the product.
If activated, it will display on the product page, on listings, in the cart, in the invoice, in the email notifications, etc.
Dimensions display
Set this option to YES if you want to display the width, height and length of products on their product page.
Weight Display
If you want to display the weight of products on their product page, then set this option to YES.
Display the characteristics name
You can choose to display or not names before the characteristics selector.
Display the brand
Select if you want to display the brand on the product page.
Display the cost per unit weight
You can define whether or not to display the cost per unit weight on the product page when a weight is set for the product (for example: 5€/Kg)
Show shortcuts to other category products
Display Previous and Next button, switch between the products of the same category.
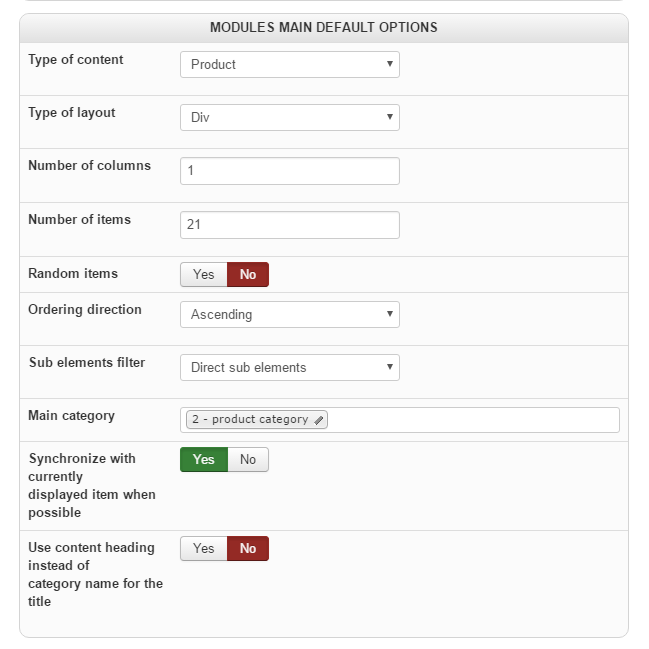
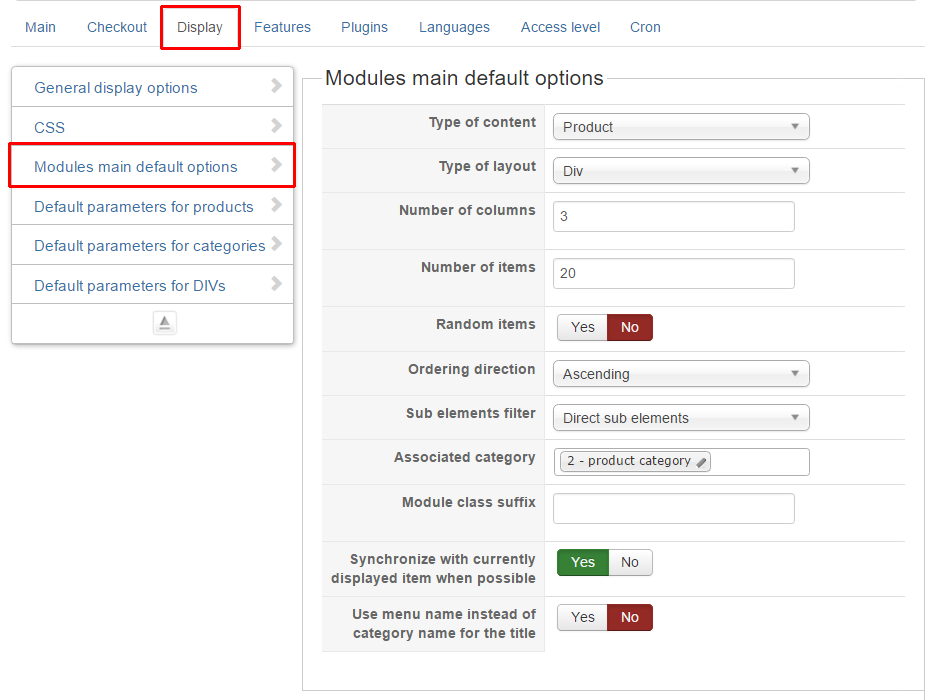
Modules main default options
Type of content
Select what content to display by default in a HikaShop content module : products or categories.
Type of layout
Select how to display the content by default in menu items or modules : using DIVs, lists or tables.
Number of columns
The numbers of columns in your menu items or modules to display your content items in.
For a module positioned on the side, you will usually set it to only 1 column.
For a menu item or modules with an horizontal display you will want to set several columns.
Number of items
The maximum number of items to display on a page of a menu item or on the module. If you have three columns set and you limit the items to 6, it means that you will have 2 rows of three items each.
Random items
Set this option to YES to display randomly chosen items in the module.
Ordering direction
You can set a direction for the ordering of the elements.
Ex: If you are loading categories based on their category_created column, if you set the direction to ascending, you will always get the firstly added sub categories displayed in the module. But if you set the direction to descending, you will get the latest created categories displayed first.
Sub elements filter
For categories, you can choose to only display direct sub categories of the current category or all sub categories regardless of their depth.
For products, you choose to only display products in the current category or in all the sub categories of the current category regardless of their depth. Note: The corresponding setting in menu items and content modules configured to display products will also allow you to display the products in all the sub categories grouped by category.
Main category
Select the main category that will be used by default for new menu items and content modules.
The system will display the sub elements of that main category when you access the menu item or when the content module is displayed.
Synchronize with currently displayed item when possible
This option will define in which categories to pick items from for content modules.
For categories, when synchronized:
On the product page, it will display categories based on the product categories. If the product isn’t linked to any category, it will be based on the main category option.
On a category listing page, it will be based on the current category.
On other pages, it will be based on the main category.
For products, when synchronized:
On the product page, it will depend on the option “Content on product page” of the module.
On a category listing page, it will be based on the current category.
On other pages, it will be based on the main category.
For categories or products, when not synchronized, it will always be based on the main category.
Use content heading instead of category name for the title
This option is only for men items and allow you to have the name of the current category used as title instead of the menu item page heading.
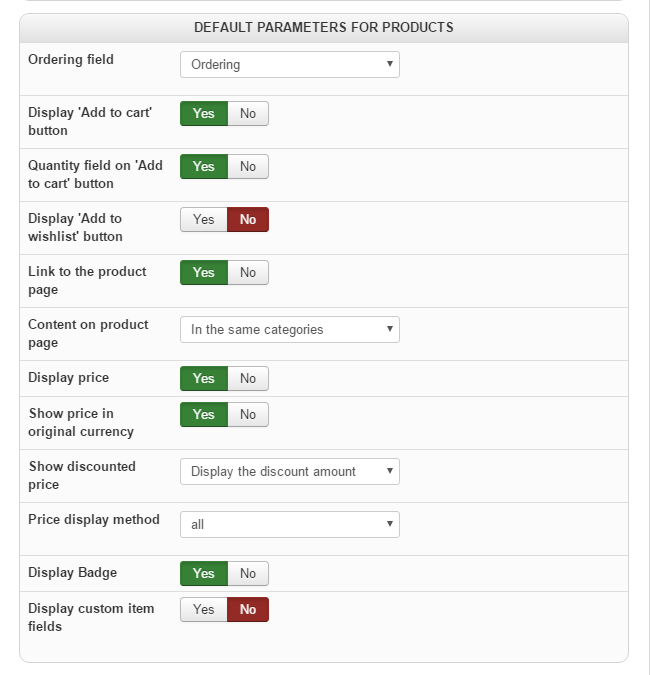
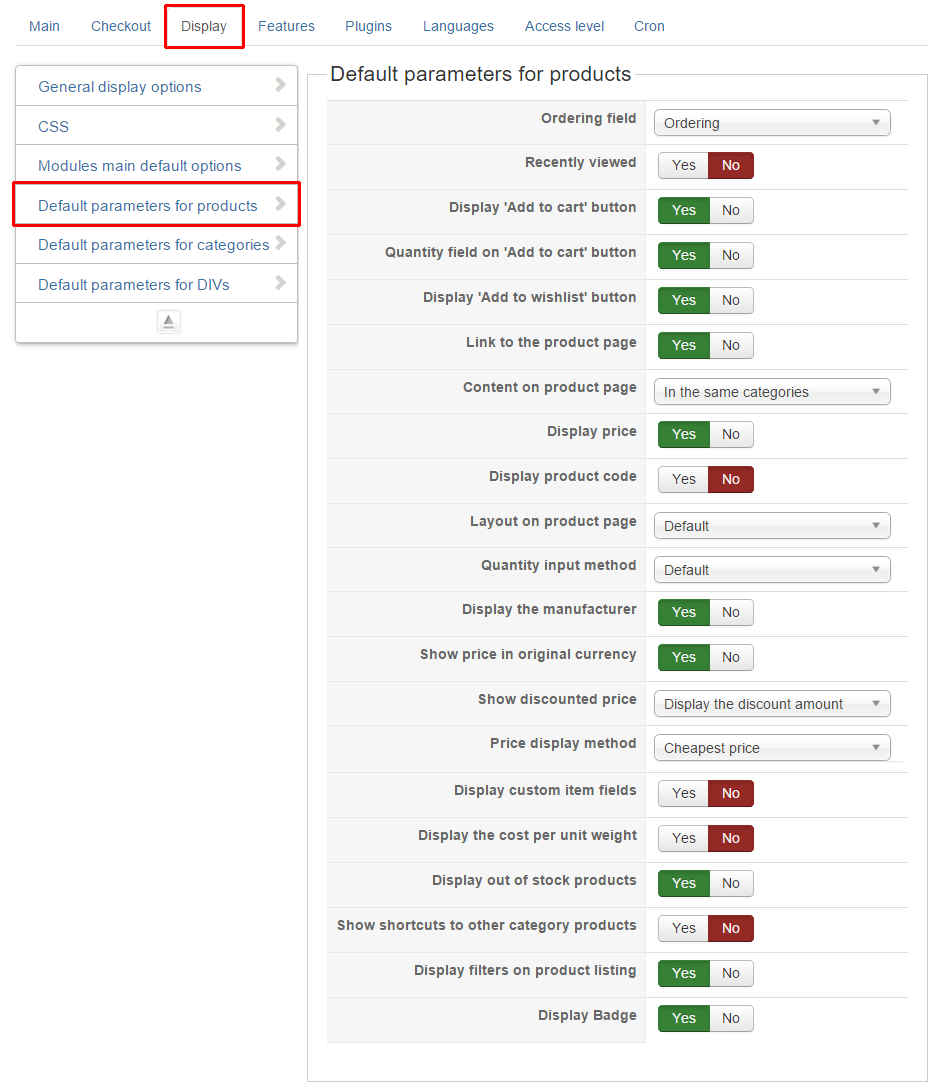
Default parameters for products
Ordering field
Select a field on which the products will be ordered on listings.
By default the products will be ordered using the ordering field.
This enables you to set a specific order of display between all the products directly linked to a category with the “order” column of the backend products listing.
Display add to cart button
Default option for displaying the add to cart buttons.
The product page will display the add to cart button based on it, and listings will be based on that option if their “Add to cart” display option is set to “inherit”.
Quantity field on “Add to cart” button
Default option for displaying the quantity field for add to cart and wishlist buttons.
Display add to wishlist button
Default option for displaying the add to wishlist buttons.
The product page will display the add to wishlist button based on it, and listings will be based on that option if their “Add to wishlist” display option is set to “inherit”.
Link to the product page
If enabled, when you click on the item name or picture of a product on a listing, you are redirected to the item page.
Content on product page
Select here the content that you want to be displayed on products listing content modules with their synchronize option turned on.
This option value will be used when the “Content on product page” setting of the module itself is set to “inherit”.
Display price
You can choose to display or not the prices of products on the product page and listings.
Show price in original currency
Based on how you configured your store, HikaShop might have to convert prices between different currencies dynamically.
When doing so, it can add the original price next to the converted price when displaying it.
Show discounted price
If HikaShop needs to apply discounts to the prices displayed, it can also show the price before the discount was applied as an incentive for your customers to buy the products or the discount amount.
Price display method
When you have several prices in the same currency for the same product, the system needs to decide what to display.
That will be the case for prices based on the quantity. So you will either be able to display the lowest of all the prices, or display the price for buying only one item, or the lowest and highest prices as a range of prices.
Display Badge
Enabling this option will display the badges on your products images.
Display custom item fields
Show custom fields fo the table “item” on the products listings.
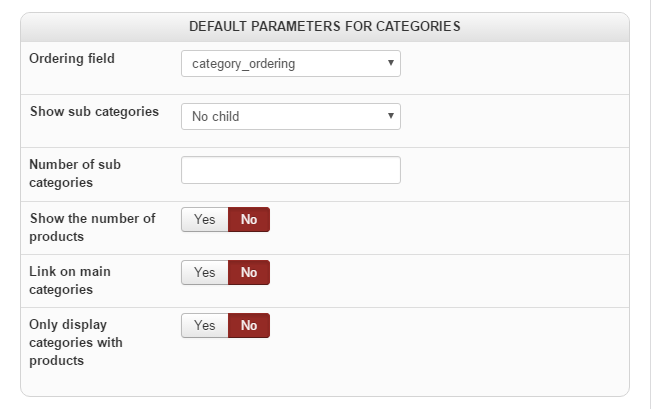
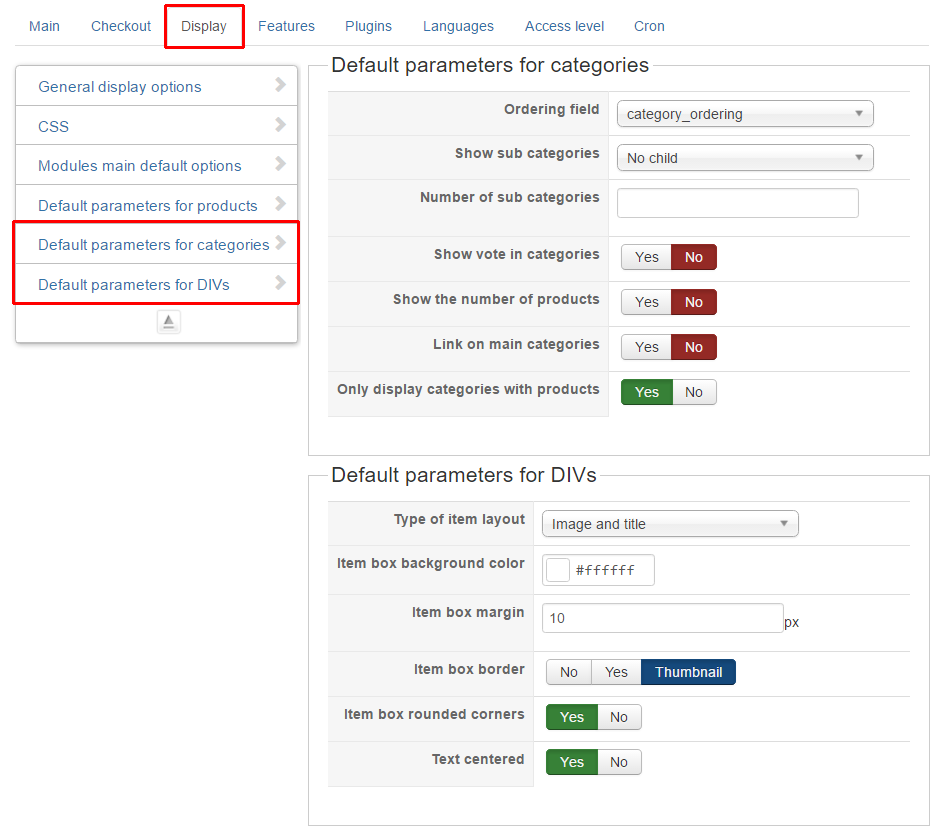
Default parameters for categories
Ordering field
Select a field on which the categories will be ordered on listings.
By default the categories will be ordered using the ordering field.
This enables you to set a specific order of display between all the categories directly under a category with the “order” column of the backend categories listing.
Show sub categories
This field will enable you to display subcategories under each category displayed on the listings.
Number of sub categories
You will be able to restrict the sub categories to only a certain number in order to avoid having too much of them displayed.
Show the number of products
Display the number of products linked to the category next to its name on listings.
Link on main categories
For the accordion listings of categories, it enables the link on the first level of categories or not.
Only display categories with products
Display only categories which are not empty.
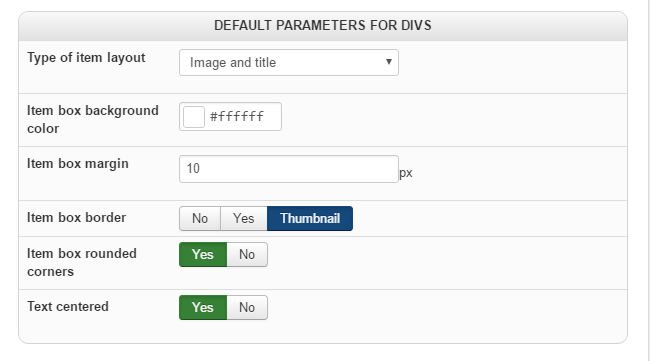
Default parameters for DIVs
Type of item layout
You can select a layout which will be used for each item display on listings.
You will be able to customize them in the views management screen ( front end, category or product views, listing_* layouts ).
You can also create new ones by adding new files (listing_*) to the front end category/product tmpl folder as standard joomla views and they will be automatically available here.
Item box background color
The color of each item box on listings.
Leave empty for a transparent background.
Item box margin
The margin (empty space around) of the each item box on listings.
Item box border
Set the border of each item box on listings:
No : No borders around each one
Yes : Adds a border class to each item with the corresponding CSS in the frontend CSS of HikaShop to add by default a 1px black border.
Thumbnail : Add the Bootstrap thumbnail class to each item to get the thumbnail border of Boostrap
Item box rounded corners
Set it to yes if you want each item box to have rounded corners.
Text centered
Set it to yes if you want the text inside each item box to be centered.
Features
Main
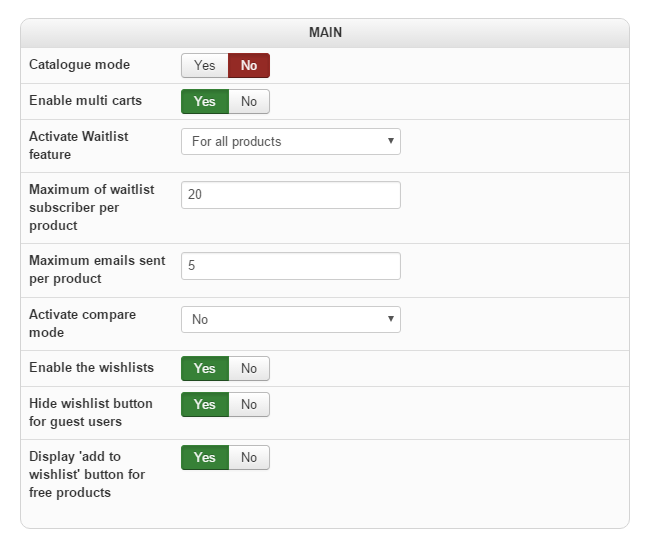
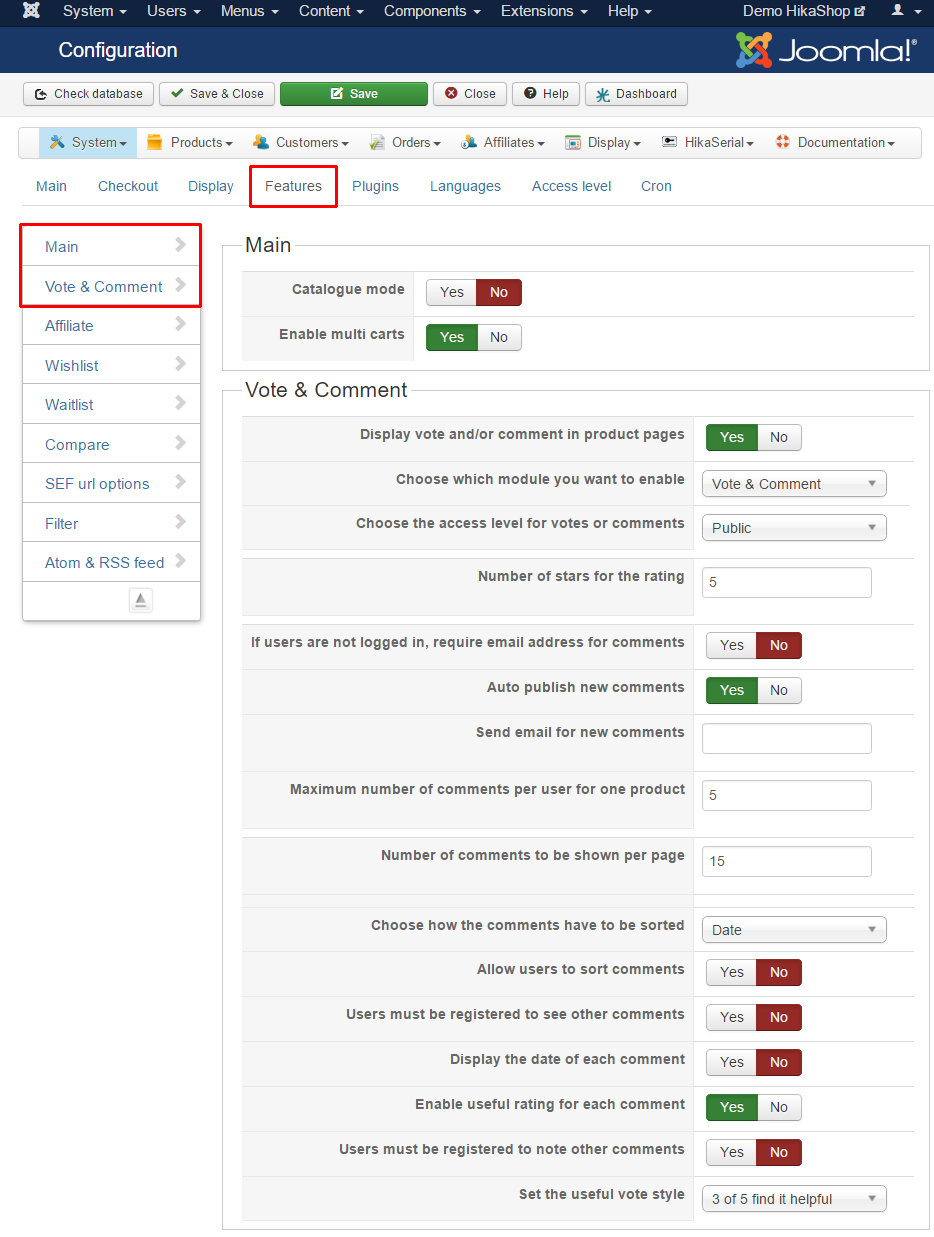
Catalogue mode
When the catalogue mode is turned on, the “add to cart” buttons are removed from all the pages.
Enable multi carts
The multi carts system allows the users to have many carts. That way, they can manage their carts in their user control panel, change their current cart, swap a product from one cart to another, etc.
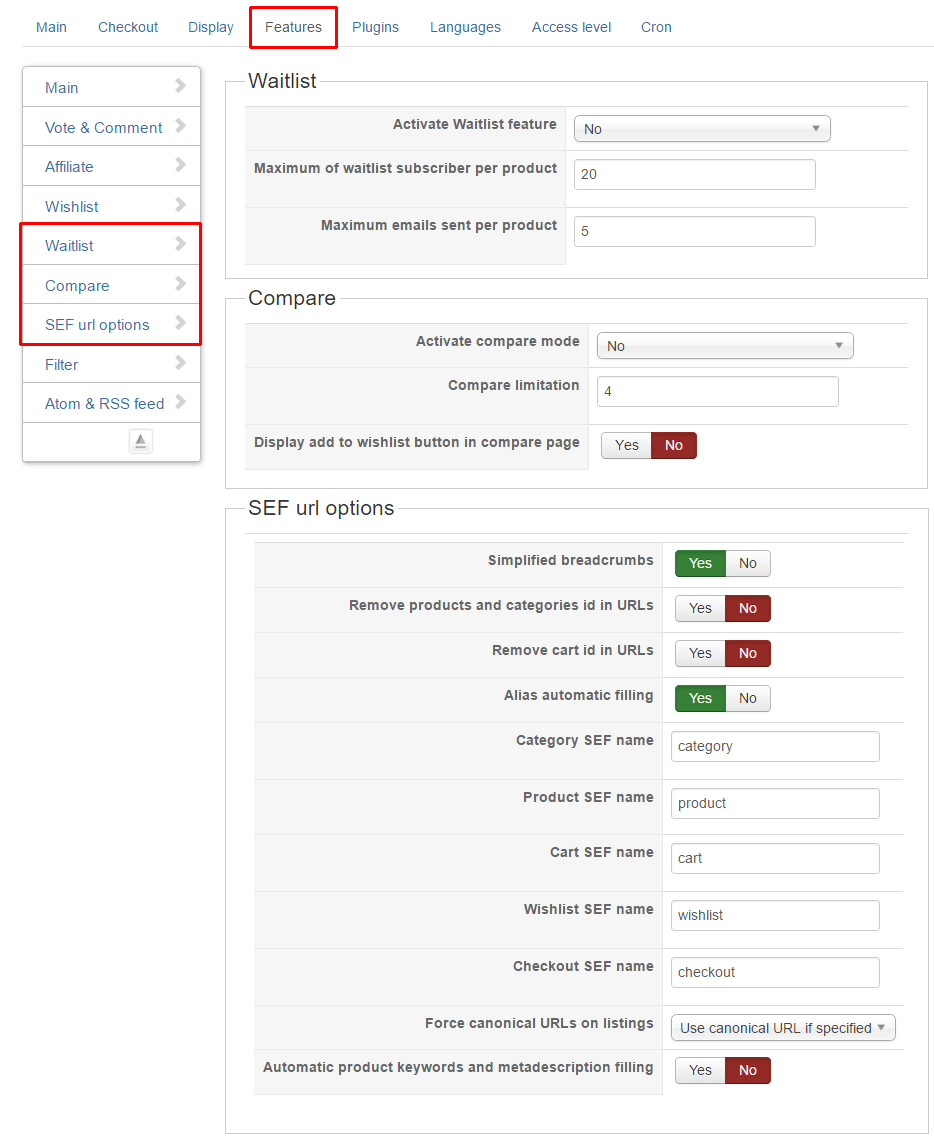
Activate Waitlist feature
That option will add an “Notify me when available” button on your products page when the products are out of stock so that users can be notified when the products stock is replenished (when you set a quantity for the products).
You can also add that button on a per product basis. That means that you will have to choose to display or not the button for each product (you will then find that option when you edit your product).
Please note that you will also have to publish the HikaShop Product Wait List Notification plugin via the Plugins tab and configure your CRON task via the CRON tab of the configuration page. This option is available in all commercial versions of HikaShop.
Maximum of waitlist subscriber per product
Above that number of subscribers for a product, the “Notify me when available” button won’t be displayed anymore.
Maximum emails sent per product
That’s the maximum number of emails which will be sent by the waitlist plugin each time it checks for replenished products in order to notify the subscribers.
In the plugin, you can also change the frequency of these checks.
By default the plugin will do its checks every 2 hours once your configured the cron task in the “cron” tab of the configuration and that you published the waitlist notification plugin in the Plugins tab of the configuration.
Activate compare mode
This option enables you to activate a comparison feature so that your customers can compare products together easily.
It will add a compare button for each product on the products listing
Also, by default, there are no fields to be compared in your products.
You will have to add custom fields of the table “product” via the menu Display->Custom fields in order to be able to enter additional information in your products which will then be presented on the comparison table.
You can have custom fields of the type “custom text” to have “separators” in the comparison table. This option is only available in the Business edition.
Compare limitation
The maximum number of products you want your users to compare at once.
That’s important to set properly to avoid layout issues caused by the width of your template’s main area. The option will only appear if the “Activate compare mode” setting is enabled.
Display add to wishlist button in compare page
Display an add to wishlist button on the compare page to add all the compared products in the wishlist. The option will only appear if the “Enable wishlists” and the “Activate compare mode” settings are enabled.
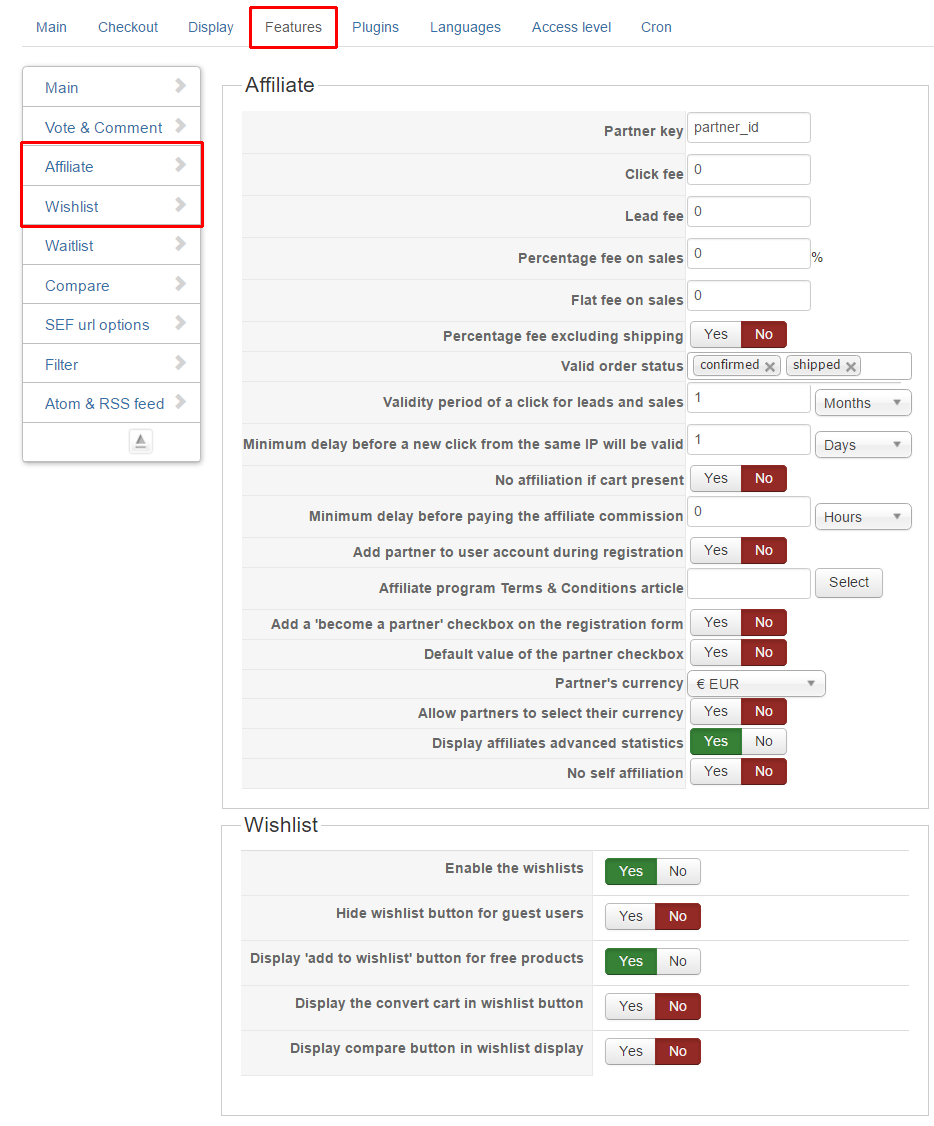
Enable wishlists
The wishlists are shared products list, the users can share their wishlists with other people, and then other peoples can buy the items and can offer them to the wishlist owner.
It’s useful for wedding gift lists, newborn gift lists, etc. Note that the wishlist system requires the user to be logged in.
Hide wishlist button for guest users
When activated, the “Add to wishlist” button won’t be displayed if the user is not logged in.
When deactivated, the “Add to wishlist” button will display to everyone, but if you click on it while not logged-in, it will display an error message. The option will only appear if the “Enable wishlists” setting is enabled.
Display “Add to wishlist” button for free products
The “Add to wishlist” button is only displayed if the product has a price unless that option is turned on. The option will only appear if the “Enable wishlists” setting is enabled.
Vote & Comment
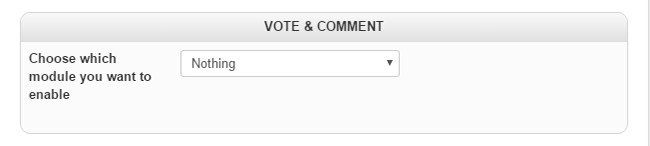
Note that options relative to the vote system will only display if you select “Vote only”, “Vote & Comment” or “Vote & Comment connected”, and the options relative to the comment system will only display if you select “Comment only”, “Vote & Comment” or “Vote & Comment connected” in the setting “Choose which module you want to enable” and then save the settings.
Choose which module you want to enable
Here you can select if you want to display only the rating stars, or only the comment form, or both.
Another option is “Vote & comment connected”. With this option, customers must both select a rating and enter a comment in the comment textarea before validating the comment form.
Choose the level access to vote or comment
Three choices are available:
Public: Anyone can vote or comment.
Registered: Only registered users can comment or vote.
Bought: Only users who already purchased the product can participate.
Number of stars for the rating
Set the star numbers to ise for the rating system. All the rates are calculated based on this number.
If users are not logged in, require email address for comment
If the access level is “public” the users must fill in a username, and if you enable this option, the users also have to fill their email address.
Auto publish new comments
When a comment is posted, you can publish it or not. If new comments are unpublished, you have to enable them manually in the backend interface.
Send email for new comments
If you fill this field, each time a comment is submitted, you receive an email with the name of the user and a link to edit the comment, publish or unpublish it.
You can set several emails addresses by separating them with a coma (“,”).
Maximum number of comments per user for one product
Set how many comments a user can post for each product.
Number of comments to be shown per page
If the limit is reached, the pagination system is enabled.
Choose how the comments have to be sorted
This option allows you to choose how you want to sort the comments:
Date: The oldest comments first.
Date – revese order: The latest comments first.
Helpful: The most helpful comments first.
Allow users to sort comments
Enabling this option will add a dropdown on the comments listing to give the user the possibility to order the comments the way they want.
Users must be registered to see other comments
If the user is not logged in, he can’t see the previously posted comments.
Display the date of each comments
Choose if you want to display the date of each comments in the comments listing on the product page.
Enable helpful rating for each comment
The users can vote for or against the comments.
Each comment get a rating which can be positive or negative.
All the comments are then listed with their rating.
This can be used by the system to order comments by “Helpful” order.
Users must be registered to note other comments
If enabled, only logged-in users will be able to vote for or against the comments of others.
Set the helpful vote style
Here, you can choose between two different ways to display the helpful rate of each comment.
Display votes and/or comments on product pages
If that option is disabled the votes/comments interface won’t be displayed on the product page. Otherwise, it will.
Display votes on listings
Select if you want to display the votes rating on the products on the products listings.
Note that this parameter will only be taken into account on listings if the “Vote” display setting of the listing menu item / module is set to “inherit”.
Affiliate
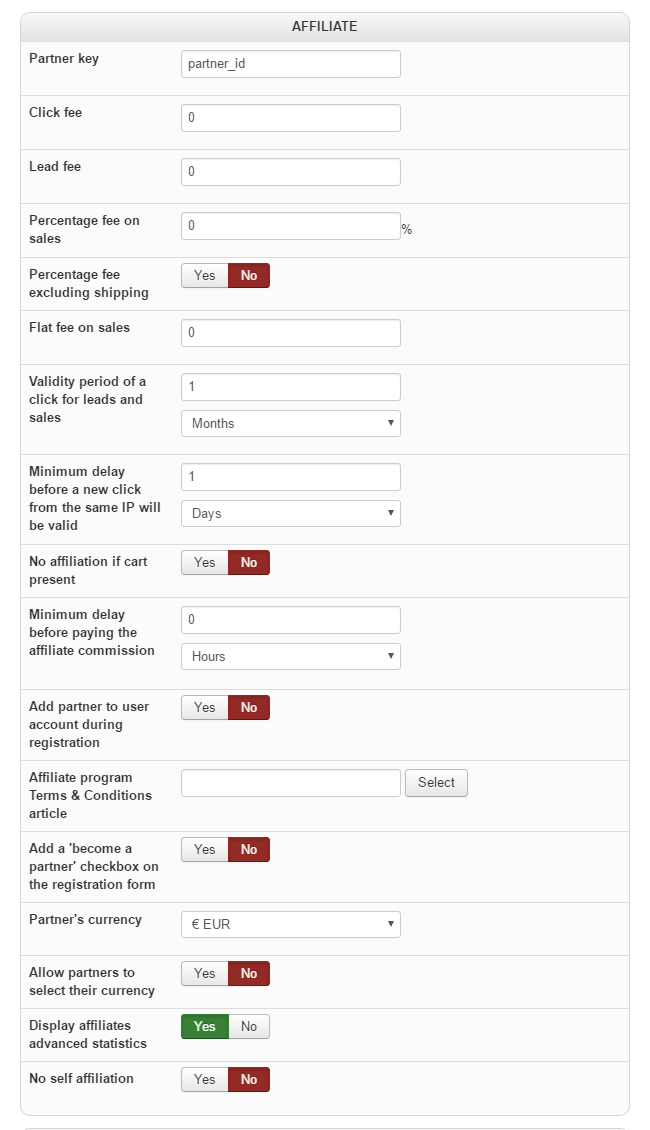
Partner key
In the urls of the banners you will have a parameter automatically added which will enable HikaShop to know from which partner the user is coming from.
This parameter’s name can be customized. So instead of partner_id=42 you could have aff=42 appended at the end of the urls (?aff=42 or &aff=42 depending your query string).
Note that once you activate your affiliate program, you should not change it as your partners will already use it in their urls and hikashop would not be able to detect those old urls anymore.
Click fee
The fee for clicks (when someone comes to your website from the partner’s website).
Lead fee
The fee for leads (new inscriptions when the user comes from the partner’s website).
Percentage fee on sales
The percentage fee for sales.
The amount will be calculated based on the valid orders (based on their status and the “partner” status toggles in the menu System->Order statuses) total amount and converted in the currency of the partner.
Percentage fee excluding shipping
If that option is turned off the shipping fees of the order won’t be taken into account for the calculation of the amount based on the percentage fee.
This option is only available when a value has been entered in the “Percentage fee on sales” field.
Flat fee on sales
The flat fee for sales.
The amount will be calculated for the valid orders (based on their status and the “partner” status toggles in the menu System->Order statuses) and converted in the currency of the partner.
Validity period of a click for leads and sales
When a user comes to your website using a link from a partner, a cookie is stored in his browser with a validity period.
That enables HikaShop to remember him next time he comes to your website. After the validity period, the cookie is destroyed.
When this user comes to your website to register or place an order, he will be included in the leads/sales of the partner only if the cookie is there.
Minimum delay before a new click from the same IP will be valid
If you pay your partners per click coming to your website, each time someone comes to it, your partner user account is credited of the click fee you set.
To avoid having someone clicking several times in a row on an affiliate link, virtually increasing your partner’s credits, you can set here a time limit before you will take into account a click coming from the same IP address.
This option is only available when a value has been entered in the “Click fee” field.
No affiliation if cart present
Do not accept the affiliation if a cart is already present in the user session when the user arrives on the website via an affiliation link.
The goal of an affiliation system is to pay partners for them to bring new customers to you. If a customer already has a cart in his session when he clicks on the affiliation link, it probably means that it’s the partner trying to cheat and rack in fees for his own purchases.
Minimun delay before paying the affiliate commission
Set the delay before an affiliate commision will be paid.
The order partner fee will only be taken into account in the total commission to be paid to the partner once that delay has been reached for the order.
Add partner to user account during registration
If that option is turned on, the partner id will be stored with the user account when the user account is created so that the future sales coming from that user account will go to the partner regardless of the “Validity period of a click for leads and sales”.
Affiliate program terms & conditions article
You can select here a Joomla article which contains your affiliate program terms and conditions.
If you do, a link will be displayed on the affiliate program screen on the front end leading the user to your article.
Add a ‘become partner’ checkbox on the registration form
With this option you can add a checkbox on the registration screens of HikaShop so that the users can easily join your affiliate program while registering on your website.
Default value of the partner checkbox
You can select here the default value of the “become a partner” checkbox that you can activate with the option above.
This option will only appear after you turn on the option above and save the settings.
Partner’s currency
The currency in which the partners will be paid in.
You can also configure it in each partner edition page
And based on the next option, your partners might even be able to choose it from the front end affiliate program’s interface.
Allow partners to select their currency
You can allow your partners to select the currency they want to be paid in. That can be useful if your store handles several currencies.
Display affiliates advanced statistics
You can allow your partners to visualize advanced statistics on their sales/leads/clicks by turning this option on.
No self affiliation
If that option is activated, partners won’t be able to earn commissions for their own purchases on your website.
SEF URL Options
Note that these options require the SEF system to be activated in your Joomla configuration.
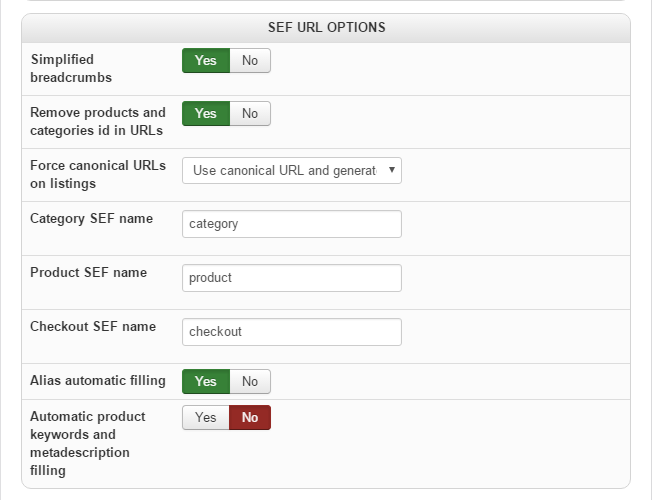
Simplified breadcrumbs
This option is for the breadcrumb displayed by the Joomla breadcrumb module on the product page.
The format of the breadcrumb on the product page is: {home} > {menu item} > { sub menu item} … > {category} > {sub category} … > {product}
When the option is activated, the {category} > {sub category} … > part of the breadcrumb is removed allowing for smaller product page URLs, potentially good for your SEF.
When the option is turned off, a parameter “category_pathway” is added to the URLs of the product page so that the system can properly display the {category} > {sub category} … > part of the breadcrumb. Note that if the “Force canonical URLs on listings” is activated, and that you have canonical URLs in your products, you won’t see any change when changing that option since it relies on the “category_pathway” parameter in the URLs.
Remove products and categories id in URLs
When that option is activated, the id of the products and categories in the SEF URLs generated will be removed.
Note that when you activate it, the previous URLs with the ids still work.
The downfall of that backward compatibility is that you can’t have a number at the beginning of the alias of your products/categories or the system will look for another product when clicking on the link. Note that if the “Force canonical URLs on listings” is activated, and that you have canonical URLs in your products, you won’t see any change when changing that option.
Force canonical URLs on listings
If you select “No, generate the URLs” in this option, the system will dynamically generate the SEF URLs based on the non-SEF URLs for each link.
Based on how you setup your menus/modules it can potentially lead to “duplicate URLs for the same content” issues resulting in a downgrade of your page rank.
The “USe canonical URL if specified” option will result in the system using the canonical URL that you can specify when you edit your products/categories if present.
If not present, it will generate the SEF URL based on the non-SEF URL.
Finally, if you choose the “Use canonical URL and generate it if missing” option, the system will use the canonical URL if present, if not, it will generate the SEF URL based on the non-SEF URL and then save that SEF URL as canonical URL of your product/category avoiding you the burden of filling all the canonical URLs manually.
Category SEF name
You can specify here what you want instead of the “category” part of the SEF URLs.
You can also have the field empty so that it removes completely the “category” part of the SEF URLs.
However, you can’t remove both “product” and “category” parts of HikaShop SEF URLs on the front end. Note that if the “Force canonical URLs on listings” is activated, and that you have canonical URLs in your products, you won’t see any change when changing that option.
Product SEF name
You can specify here what you want instead of the “product” parts of the SEF URLs.
You can also have the field empty so that it removes completely the “product” part of the SEF URLs.
However, you can’t remove both “product” and “category” parts of HikaShop SEF URLs on the front end. Note that if the “Force canonical URLs on listings” is activated, and that you have canonical URLs in your products, you won’t see any change when changing that option.
Checkout SEF name
You can specify here what you want instead of the “checkout” part of the SEF URLs on the checkout. Note that if the “Force canonical URLs on listings” is activated, and that you have canonical URLs in your products, you won’t see any change when changing that option.
Alias automatic filling
With the option activated, the alias of products and categories will be filled automatically based on the product name.
Automatic product keywords and metadescription filling
When activated, the keywords and metadescription of products will be generated automatically from the product description when the product is saved in the backend.
For the keywords, the system will sum the number of times each word occur in the description and will use the ones with the highest score.
For the metadescription, the system will strip all the HTML tags from the description and will cut the description text.
Number of generated keywords
The number of keywords to be generated automatically out of the product description. The option will only appear if the “Automatic product keywords and metadescription filling” setting is enabled.
Maximum size of the metadescription
The maximum size of the metadescription to be generated automatically out of the product description (in number of characters). The option will only appear if the “Automatic product keywords and metadescription filling” setting is enabled.
Keywords exclusion list
List here all the words that will be ignored in order to select the keywords. The option will only appear if the “Automatic product keywords and metadescription filling” setting is enabled.
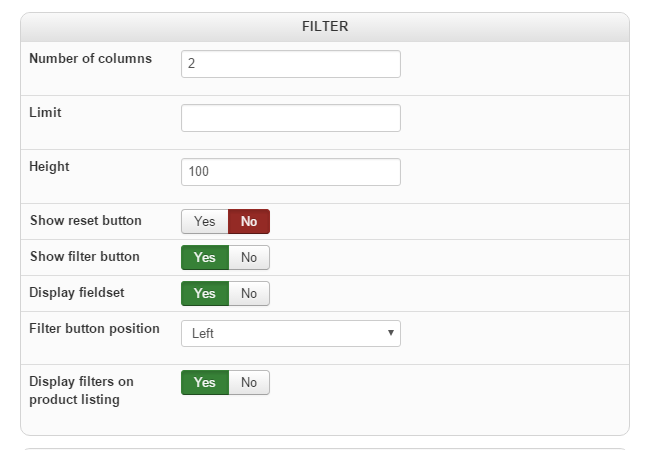
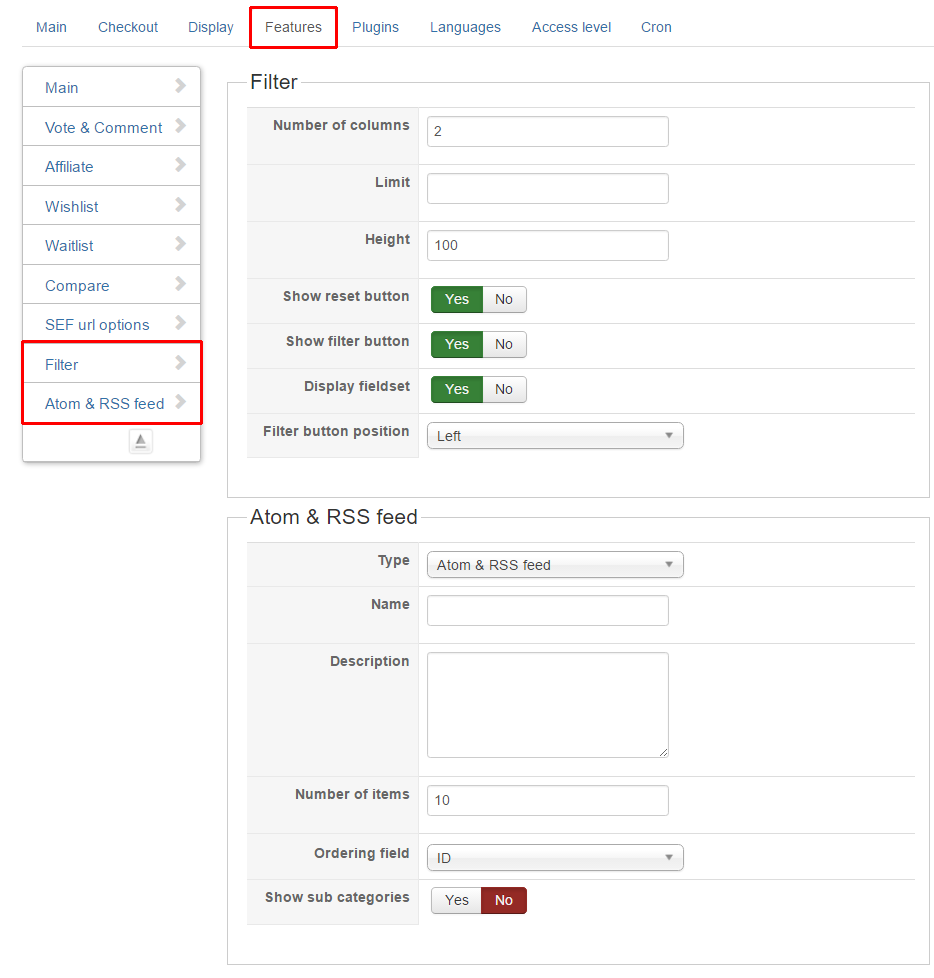
Filter
Note that filters can be configured via the menu Display->Filters.
They can either be displayed by a HikaShop Filter Module that you can configure via the Joomla modules manager, or at the top of your products listings, if the “Filters” display setting under the “Products options” tab of the menu item is activated.
The options below only apply to filters being displayed at the top of products listing menu items. Finally, note that these options are only available in the Business edition of HikaShop.
Number of columns
Here, you can set the number of columns for your filters.
If you want 4 filters by row, for more visibility, it’s possible.
Limit
With that setting you can restrict the number of filters.
Height
This defines the height of each row of filters.
Show reset button
When enabled, this option display a reset button which removes the values of all the previously set filters.
Show filter button
If you disable this option, the “Filter” button will not be visible.
In that case, you should make sure the option “Submit on click” is turned on for the different filters you created. Otherwise, the filters won’t do anything.
Display fieldset
Display or not the fieldset around the filters.
Filter button position
You can change the position of the filter button, you can place it on the left or right of the filters, or next to the last field with the option “Inside”.
Display filters on product listing
Enabling this option will display the filters on the product listing pages when the “Filters” display setting of the menu items is set to “Inherit”.
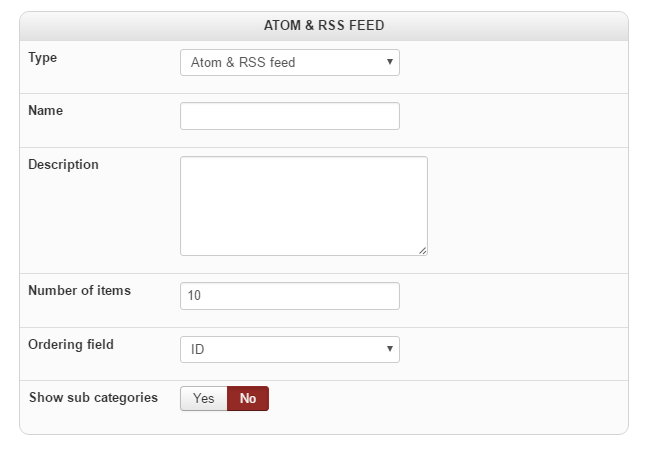
Atom & RSS Feed
Type
You can choose here whether or not RSS and Atom feeds of your products should be published on your products listings.
Name
You can enter an name for your feeds.
Description
You can also enter a description.
Number of items
You can select here how many of your products should be displayed in the feeds.
Ordering field
Select here the field which will be used by HikaShop for the ordering of the products in the feeds.
By default, it will display the latest products created in your store.
Show sub categories
You can allow the system to display the feeds based on the products in the current category or also include all the products of the sub categories of the current category.
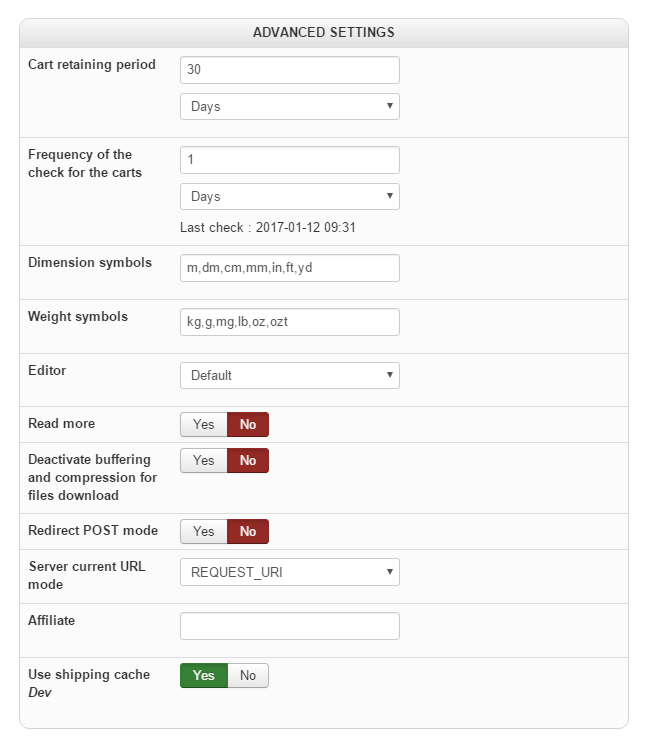
Advanced
Advanced Settings
Display view files
That setting is made for the development phase, when you need to customize the HikaShop views.
When set to ‘Front-end’, you’ll see the name of each view file on the frontend so that you can rapidely know which view file to edit in the menu Display > Views.
When set to ‘All’, you’ll also see them on the backend.
Cart retaining period
The period of time during which the cart will be kept in the database. After that, the cart data will be cleaned to avoid having too much data.
Frequency of the check for the carts
The frequency of the “cart retaining period” check. Additionally, the last check date will be displayed.
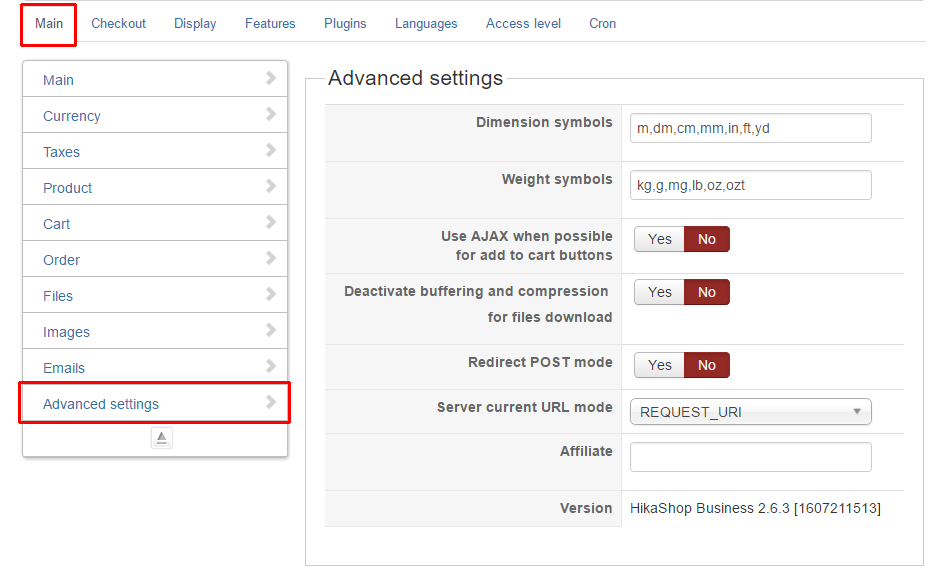
Dimension symbols
You can set here the possible dimension symbols in your store.
The only possible values are : m dm cm mm in ft yd.
Those values can be converted automatically between each other in the system.
So, for example, you can restrict a shipping method to orders with a volume lower than 1m3 and have your products dimensions in inches.
The conversion will be done automatically.
Note that the first unit of the list will be the default one used for new products.
Weight symbols
You can set here the possible weight symbols in your store. The only possible values are : g kg lb oz.
Those values can be converted automatically between each other in the system.
So, for example, you can restrict a shipping method to orders with a weight lower than 5kg and have your products weight in lb.
The conversion will be done automatically.
Note that the first unit of the list will be the default one used for new products.
Editor
You can select here the editor you want to use to edit all your HTML content in HikaShop (product description, order notifications, custom fields of the type “WYSIWYGquot;, etc)
Read more
The read more link can be displayed in the editor by turning this option on.
Unfortunately, on some browsers, this read more link might not work when combined with the multi language edition and is thus disabled by default.
Deactivate buffering and compression for files download
Activating this option can sometimes help when you have issues with the download of files in HikaShop.
Redirect POST mode
If that option is activated, the pagination and filters parameters will be passed in the URL of your products listings.
That will avoid warning messages with the “back” button of some browsers when using the pagination/filters and then going back, but the URLs will be less nice as they will contain these parameters instead of having them passed through the POST of requests.
Server current URL mode
This option can sometimes help when you have errors with HikaShop not directing you to the correct URL with some actions on the frontend due to the server configuration. In most cases, it should be left to REQUEST_URI.
Affiliate
Put your affiliate ID, a link will be created to HikaShop with your ID to sponsor other users.
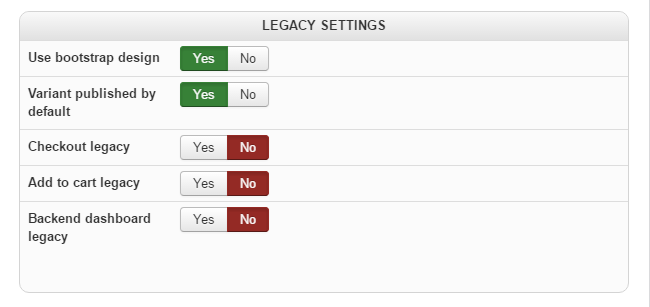
Legacy Settings
Use bootstrap design
That option is turned off by default.
When turned on, the views of HikaShop on the frontend will be responsive and use the bootstrap library for their styling.
It requires that your Joomla template supports bootstrap 2.
On Joomla 3.0, most templates should ; However, if you have display issues on your frontend (like for example the number of columns of your listings which is always 1 no matter what you enter in the “number of columns” option of your menus/modules), it means that your template does not support bootstrap and that you should turn off that option.
In such cases, you can potentially install a bootstrap compatibility joomla plugin in order to add the boostrap support on your frontend.
Finally, note that some templates might only partially support bootstrap (only the CSS and not the JS, or only some pieces of the CSS) like we found out with at least some YooTheme templates.
In that case, we would recommend to contact your template provider for help so that you get all the pieces of bootstrap in it if you want to have a responsive display for HikaShop interfaces. Since HikaShop 3.0.0, this option is not useful anymore as views are automatically responsive regardless of Bootstrap. However, if you’re updating HikaShop from an older version, this option might still be useful for old view overrides you might have.
Variants published by default
You can set here the publish state of variants generated by HikaShop when you add characteristics to your products. This option should normally always be turned on. And might be dropped in the future.
Checkout legacy
Use the legacy checkout system from before HikaShop 3.0.0
You might want to leave that option activated when you update your HikaShop from an old version and you have problems with the new checkout system. Otherwise, you should leave that option turned off.
Add to cart legacy
Use the legacy add to cart system from before HikaShop 3.0.0
You might want to leave that option activated when you update your HikaShop from an old version and you have problems with the new cart system. Otherwise, you should leave that option turned off.
Backend dashboard legacy
Use the legacy dashboard in the backend from before HikaShop 3.0.0.
If you wish to use the old widget system that you can configure via the Orders>Reports menu, you can activate that option. Otherwise, you’ll get a modern responsive display with more useful information by default.
Advanced checkout workflow edition
This option enable a dynamic view to edit the checkout workflow and could be turned off to display a raw version of the configuration data.
As this is not useful anymore and it should always be turned on, we’ve deprecated the option.
Auto select default shipping and payment methods
If the payment and shipping methods are not automatically selected, the user will have to select one of the shipping and payment methods to be able to proceed to the next step of the checkout.
That option is only when the checkout legacy mode is activated and the first shipping/payment method is automatically selected with the new checkout.
Auto submit shipping and payment methods selection
If you deactivate this option the user will have to click on next to validate its shipping/payment selection while if you activate it, the shipping/payment selection will be validated immediately when the user select another shipping/payment method.
That option is only when the checkout legacy mode is activated and the shipping/payment methods selection is automatically submitted through AJAX with the new checkout.
Business hours
That option enables you to only activate the checkout of HikaShop for a defined period of time throughout the day.
The “Shop closed hours” plugin can be configured via the System->Plugins menu’s “New” button in order to configure the hours ranges for which your shop is open allowing for much more flexibility than before. Note that this option is only taken into account for the legacy checkout and the Shop closed hours plugin is only taken into account for the new checkout system.
Show shipping “same address” checkbox
If turned on, the system will display by default only the billing address selection and a “same address for shipping” checkbox which will be checked by default.
The user will then have to uncheck it in order to be able to enter the shipping address.
If turned off, the system will directly display the shipping method interface next to the billing one.
Display the convert cart in wishlist button
Display a convert cart in wishlist button on the checkout to be able to convert the current cart into a wishlist.
That option has been deprecated and only works with the legacy checkout as it is not useful enough.
After a product is added to the cart
You can choose to always go to the checkout page, or to always stay on the same page.
Additionally, you can let the system choose whether to stay or go to the checkout based on the cart module being displayed or not: if displayed, you will stay on the same page but if the module is not displayed you will go to the checkout page.
Finally, you can choose to display a notification popup to the user which will stay for 3 seconds where the user can click on a button to access the checkout or close the popup immediately.
This option only works with the legacy add to cart system. The new system will ignore it. Instead, you can configure the Hikashop Add to Cart notification Plugin via the Joomla plugins manager in order to get anotification popup or box. The new system is lighter, cleaner, nicer, more flexible and better compatible with third party extensions and templates.
Use AJAX when possible for add to cart buttons
When that option is activated, AJAX will be used for add to cart buttons.
The new add to cart system always use AJAX and can fallback to normal submit if the javascript is disabled so this option isn’t necessary anymore with it.
Notice popup display time
You can configure here the amount of time that the notice popup will be displayed after a product is added to the cart (note that you need to set the option below to “stay and display notice popup”).
With the new add to cart system, you’ll find an “Auto-hide delay” setting in the Hikashop Add to Cart notification Plugin via the Joomla plugins manager in order to configure that.
Add to cart popup size
Enter her the size of the popup notice.
This setting it’s taken into account with the new add to cart system. The notifications box size can now be changed with CSS.
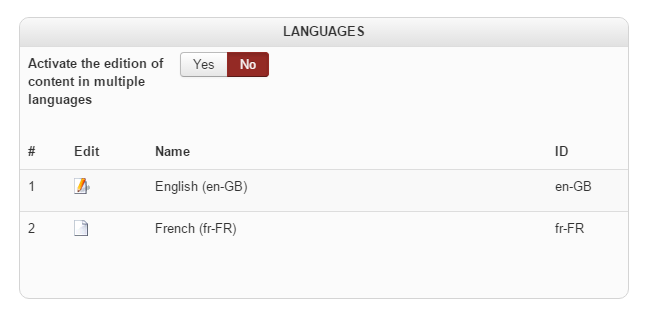
Languages
This listing displays the list of your website’s languages (Front-End). For each language, you can edit the HikaShop language file. Languages files are not included in the package.
You should click on the create button and the latest version of this language will be directly loaded from our website.
Then, you simply have to save the language to have it on your website.
For any reason, if your language file could not be automatically installed, you can manually download it on the HikaShop website.
If you translate some of the entries in the file, please don’t forget to share your translated language files so that we can include them in our next release.
Additionally two options will enable to activate the edition of content in multiple languages and define whether or not to publish the translations by default when using this edition mode.
Note that those options are only available with our commercial versions and that it requires Joomfish or Falang to be already installed.
If you use our free version, you can still translate your content via Joomfish or Falang as the content elements will be automatically added to Joomfish or Falang during install if JoomFish or Falang is detected.
If your multi lingual content is not displayed on the front end, please make sure that the JoomFish jfdatabase or the Falang driver system plugin is enabled in the joomla plugins manager.
Also, if you installed JoomFish or Falang after HikaShop or if the contentelements folder of JoomFish/Falang is not writable, you will have to copy the files manually from the folder administrator/components/com_hikashop/translations to administrator/components/com_joomfish/contentelements or administrator/components/com_falang/contentelements.
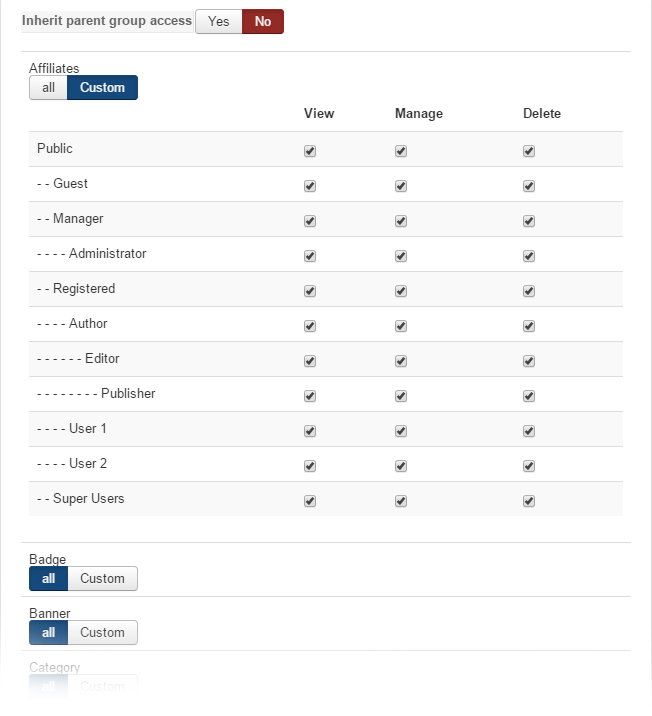
With this view, you can control who has access to which feature of the backend of HikaShop. You can restrict the features to one or several groups of users.
Inherit parent group access: You can select here whether the children user groups should inherit the access rights from the parent user groups or not. By default, that option is turned off.
This feature is only available in the Business edition.
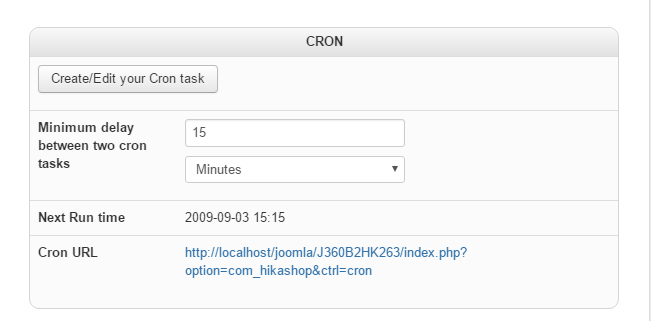
Cron
The Cron task is used by the wailist system, the currencies rates auto refresh plugin, the mass action triggers, the out of stock notification plugin, etc.
Basically, any process that requires to be run at a certain frequency.
So before using them, you need to make sure that your properly configured your cron task. Please follow our tutorial on that. This feature is only available in the Essential and the Business editions.
Minimum delay between two cron tasks
Minimum delay between two processes on HikaShop.
This parameter is only a security so that two cron tasks cannot run at the same time.
Next Run Time
Next time the Cron task is allowed to run.
It does not mean that the cron task will run HikaShop at this exact time. But it means HikaShop will accept a cron URL if it triggers HikaShop after this time.
Cron URL
Cron URL to trigger HikaShop. You should use this URL to create your cron task.
You can make sure it’s a working url by clicking on the link.
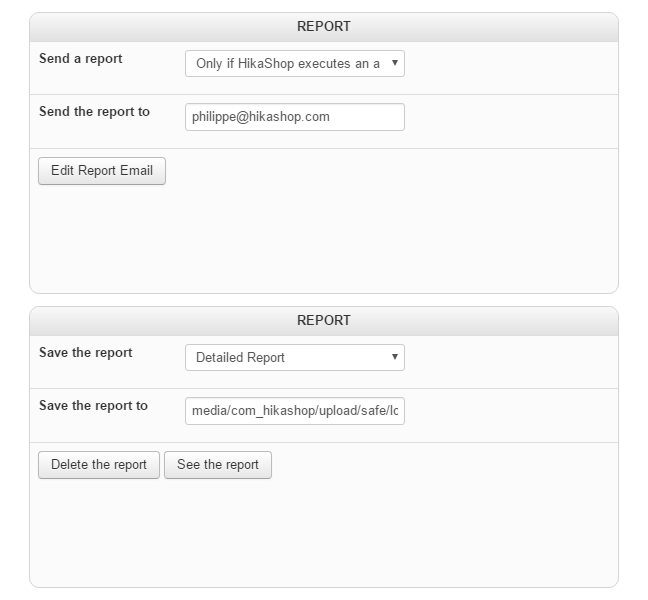
Send a report
When does HikaShop should send a report?
Send the report to
You can enter one or several e-mail addresses so that HikaShop will send the report to those users (separate each email address with a comma).
Save the report
Which report should HikaShop save in the log file?
Save the report to
Location of the log file.
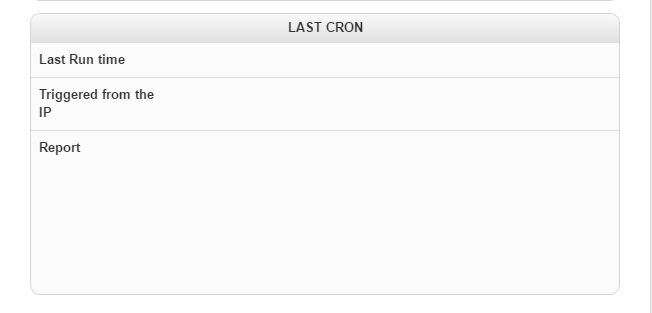
Last Run Time
Last time HikaShop executed actions via the cron url.
Triggered from the IP
HikaShop has been triggered by the following IP.
Report
Latest report generated by HikaShop.
demo.hikashop.com General Configuration
Here, you will be able to see hour demo website configuration, demo.hikashop.com
We're a Digital Team from EngineTemplate with 5 content experts. Our team has 5 years exp in open source Joomla and WordPress, we make daily blogs and build useful resources for everyone who is having issues with open source while using it.


 From: https://www.hikashop.com