Custom fields are created for additional details to be used in checkout processes that involves billing, payment, shipping etc.
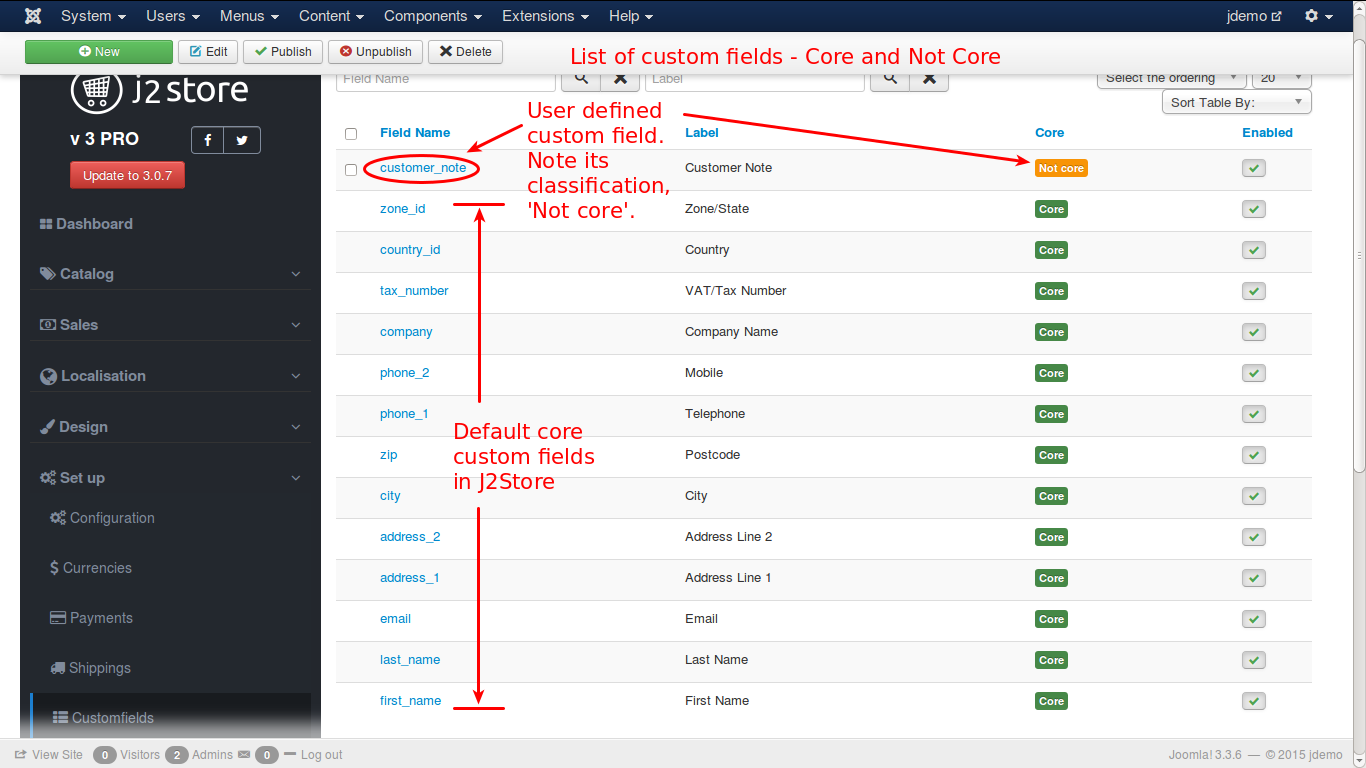
There are 2 types of custom fields: Core custom fields and Non-Core custom fields.
In J2store, custom fields by default are Core custom fields and custom fields that are created by users are Non-Core custom fields.
List of Core custom fields:
first_name
last_name
address_1
address_2
phone_1
phone_2
city
zip
country
company
email
tax number
zone_id
country_id
Apart from these core custom fields, you can create your own custom fields according to your requirements. For example: custom note for your reference,…
How to create a custom field?
Step 1:In the custom field list view, you click on the “New” button ( the green button on the upper left of the screen), it will show as the screenshot below:
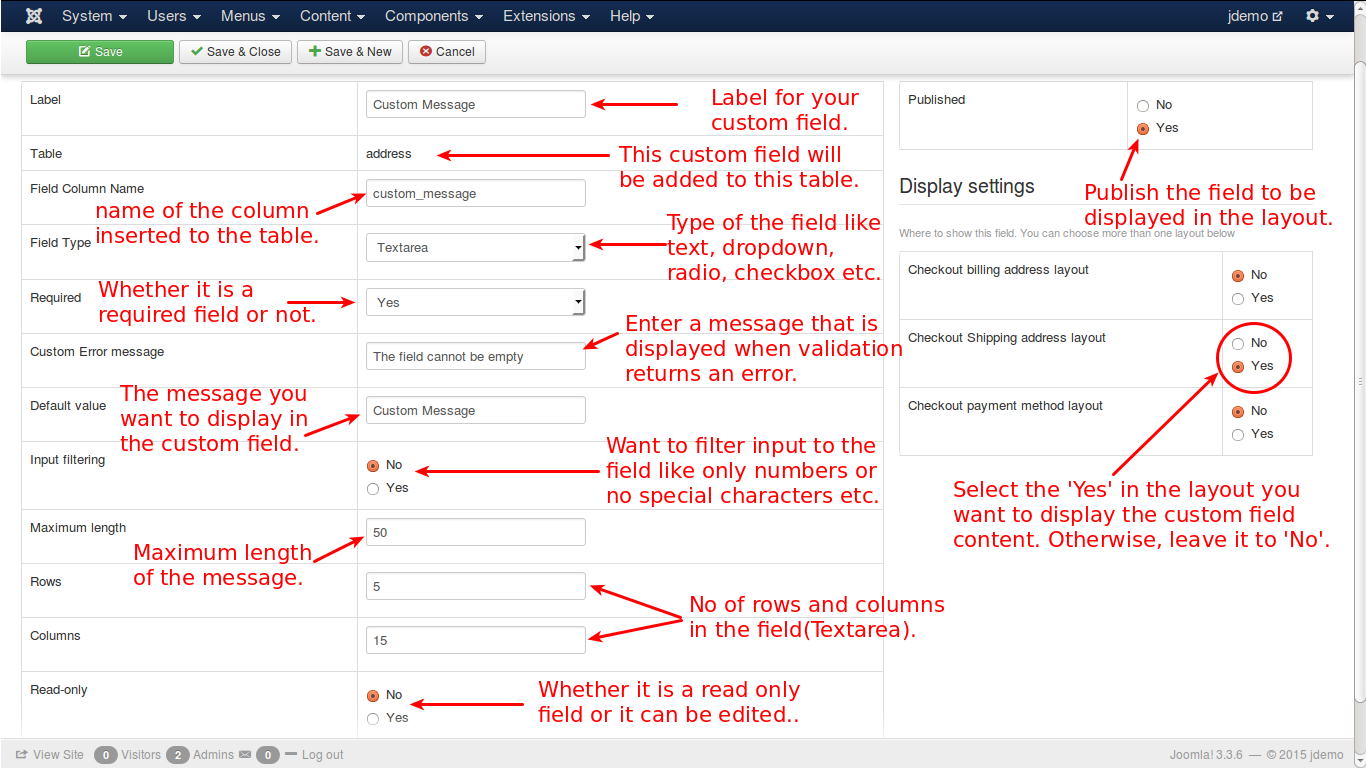
Step 2: Enter the following details:
Label – Name of the custom field that is displayed in the layout Table – Where the custom field is created – this is default Field Column Name – name of the column that is created. Field Type – The type of the field you are going to create, there are 12 types available to choose from:
Text
Email
Textarea
wysiwyg editor (what you see is what you get)
Radio
Checkbox
Single Dropdown
Zone/Country List
Date
Time
DateTime
Custom Text
Required – select ‘Yes’ or ‘No’ Custom Error Message – This message will be displayed to alert the user if it is required field and left empty on data entry. Default Value – What is given here will be the content displayed, if the user do not give any input to the field Input Filtering – select Yes and set the conditions if you want to filter out the input to this field. Maximum Length – The no of characters that are allowed to enter in the field Rows – No of rows that are allowed in the field Columns – No of columns that are allowed in the field Read-only – If you set it to ‘Yes’, it is only readable and the content cannot be changed.
Published: To display the field, it has to be published by setting this option to YES.
Display Settings
There are 3 layouts:
Checkout Billing Address Layout
Checkout Shipping Address Layout
Checkout Payment Method Layout
You can select all of them or any combination of layouts or only one layout to display the field.
Add the custom field in the checkout layout
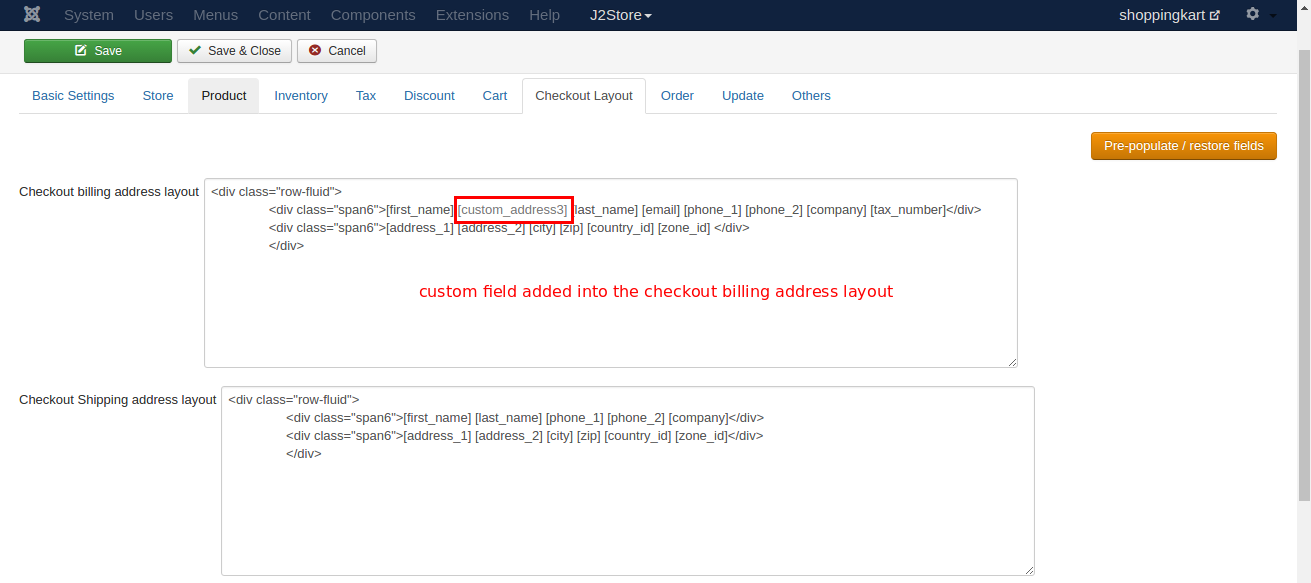
Go to J2store >> setup >> configuration >> checkout layout
You will see three layouts (billing address layout, shipping address layout, payment method layout). You can edit the billing and shipping layouts by re-ordering the fields or adding new custom fields.
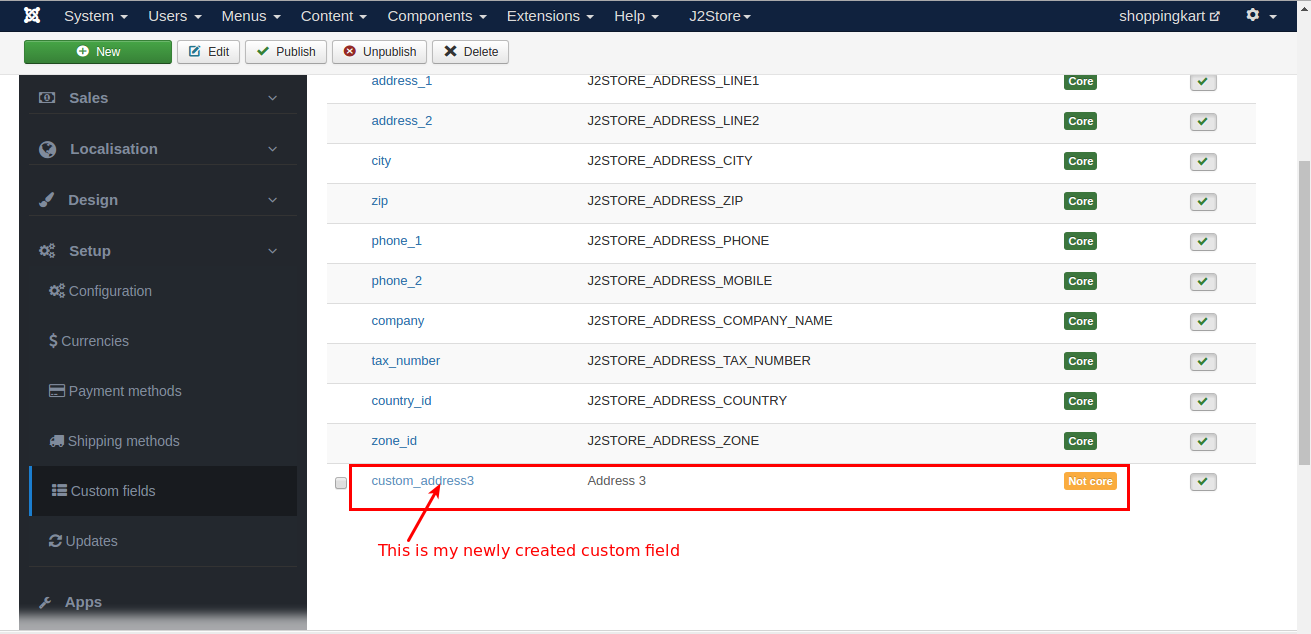
Ex: if you create the field called custom_address3 with the selection of billing address layout in custom field display settings and you want to display it in the checkout layout, then just add it in the billing layout section in the J2store configuration checkout layout tab.
Field name should be enclosed with square brackets (for example,[custom_address3])
Check the image below:
If you have any question about this post, don’t hesitate to leave a comment below. And don’t forget to share with your friends if you find it useful! Thanks!
We're a Digital Team from EngineTemplate with 5 content experts. Our team has 5 years exp in open source Joomla and WordPress, we make daily blogs and build useful resources for everyone who is having issues with open source while using it.