In this post, you will learn how to set up your shop with VirtueMart, enter some information visible across your shop and set some basic settings which affect the function of your shop.
The first thing you need to do is to go to Shop >> Shop to open the respective form.
I. Vendor
Vendor Information
Here you have to enter some data which will be visible across your shop.

Currency
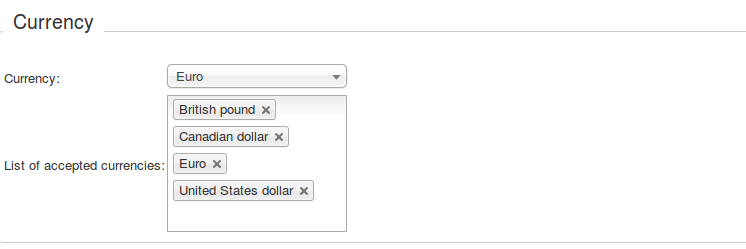
Your shop will have 1 main currency, you set your main curency in the currency field. In the front-end all the prices will be displayed in that currency.
You can accept payments in several currencies by set them in the “List of accepted currencies” field.
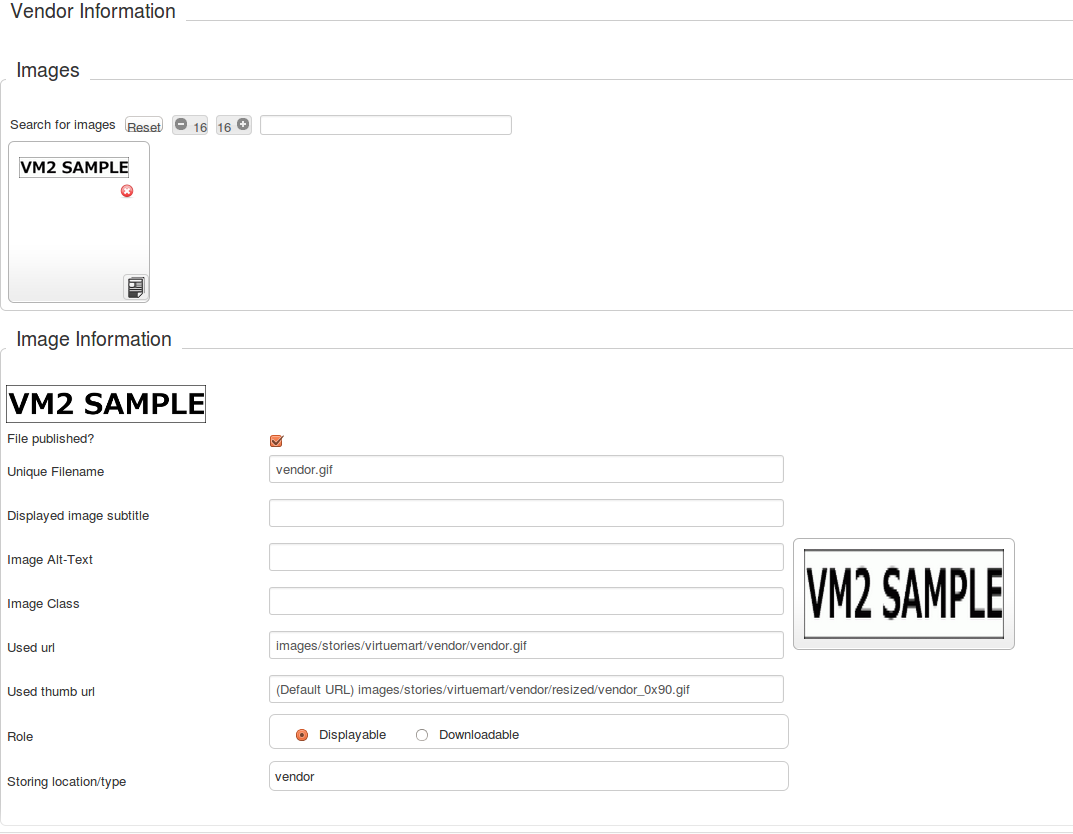
Vendor Infrormation
Supply your logo here. It will be visible in the Invoices and a description of your business.
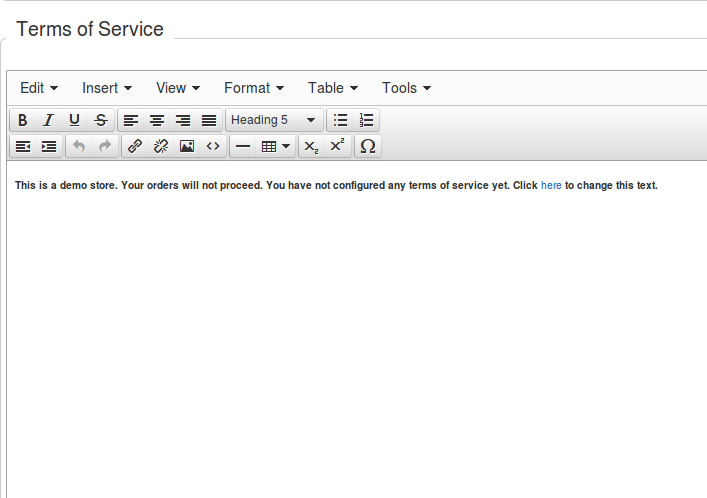
Terms of Service
Enter the terms of your shop. The user has to accept those terms in the checkout.
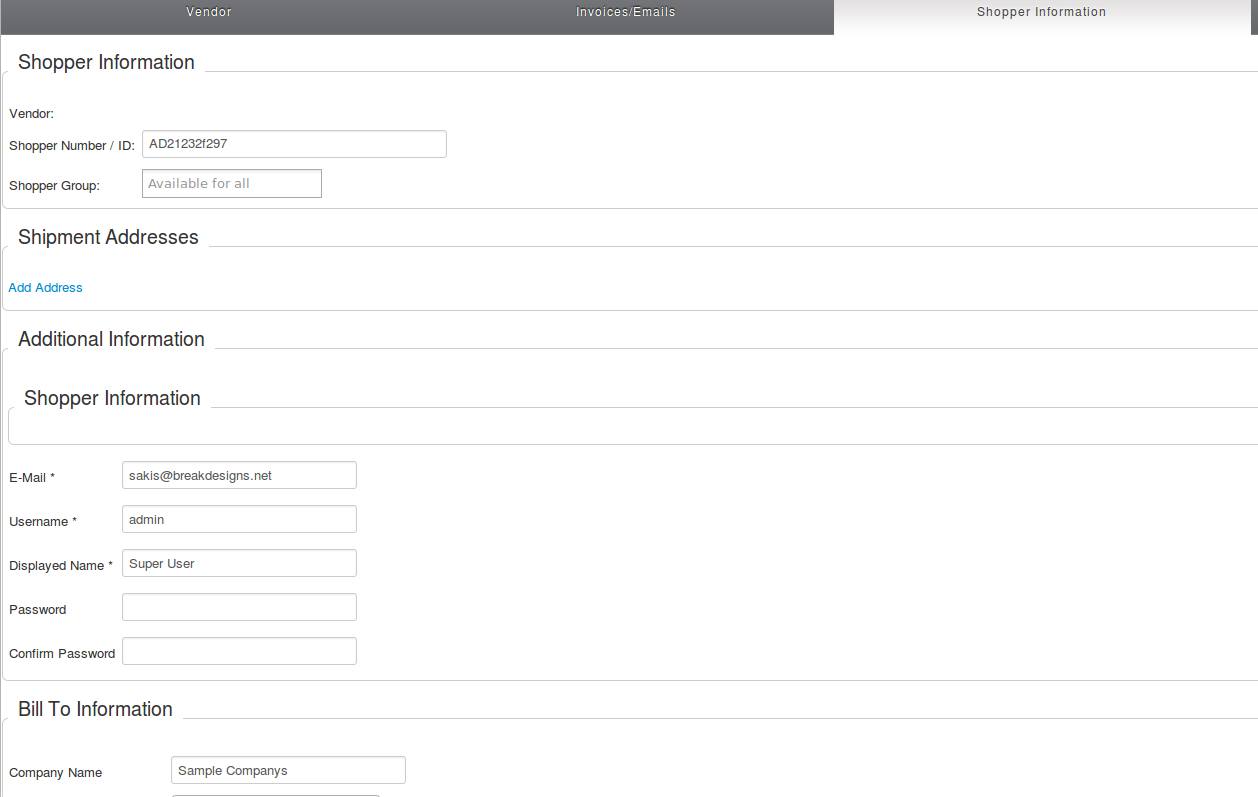
II. Shopper Information
In VirtueMart a vendor is connected with a shopper (a person who shops),and you have to create the profile of that shopper.
And the data which will be stored here will be used in the invoices of your shop and will be displayed in your shop’s profile.
Now we do some actions that concern our shop’s functionality and display in the front-end.
III. Create a menu item
Go to Menus, select your menu and click on the “New” button, go to Virtuemart >> Front Page.
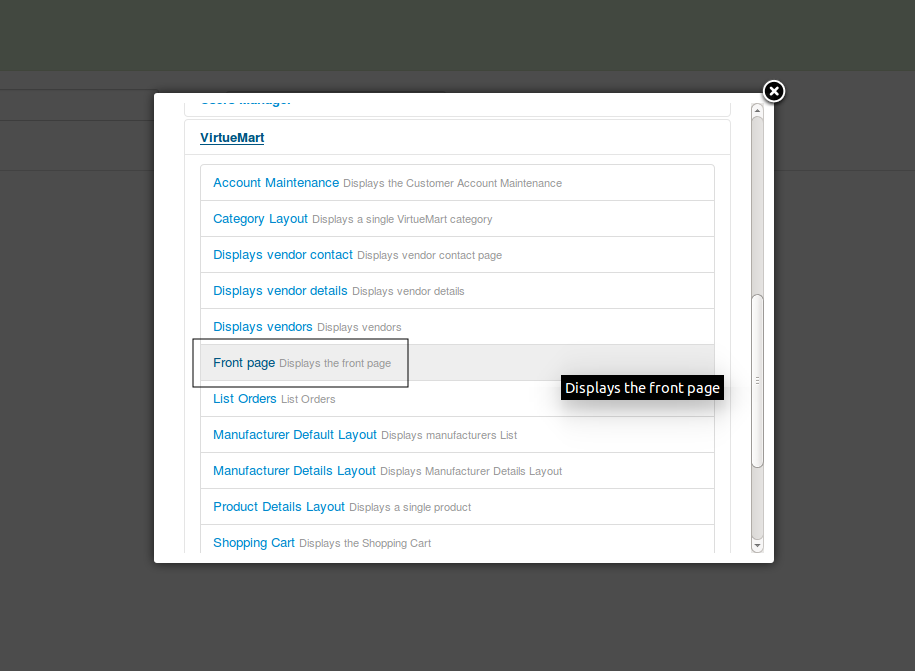
The alias set in that menu item will be used also in other pages of your shop. So you should set a short and descriptive alias.
As menu item, can be used also other menu items related with Virtuemart. VM will pickup the corresponding menu item to generate the urls of your shop, in each page.
IV. Display Configuration
Go to Configuration >> Configuration >> Templates and configure the display of most of the pages of Virtuemart.
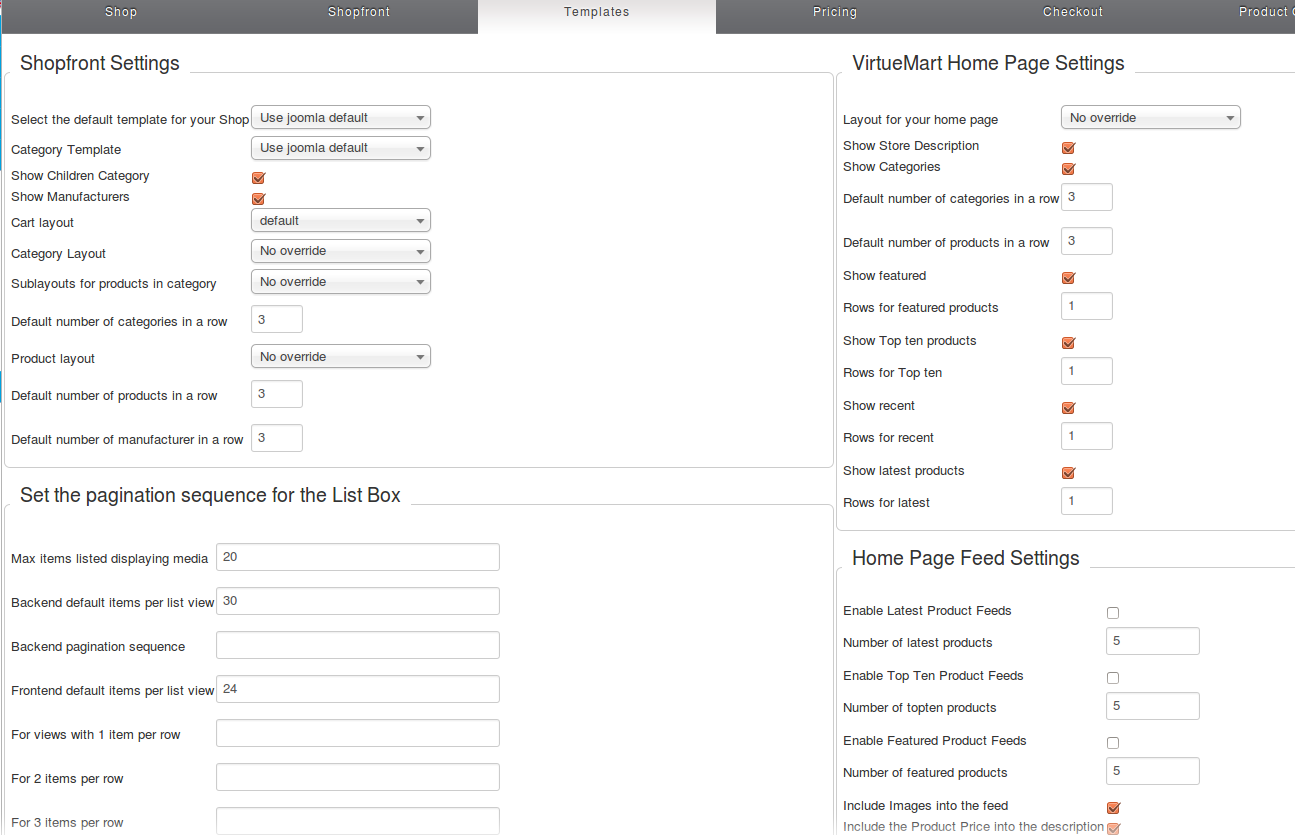
Shopfront Settings:
- Show Children Category : Activating that will display the sub-categories of a category at the top of that category’s page.
- Default number of products in a row: The number of products per row in the category pages
Frontend default items per list view: Frontend default items per list view >> Defines the number of the products displayed in the page.
VirtueMart Home Page Settings : How your shop’s front-page. Here you can set the elements of that page (Featured products, Categories, Top ten).
V. Set up the products ordering
To set up the products ordering, you go to Configuration > Configuration > Product Order Settings.
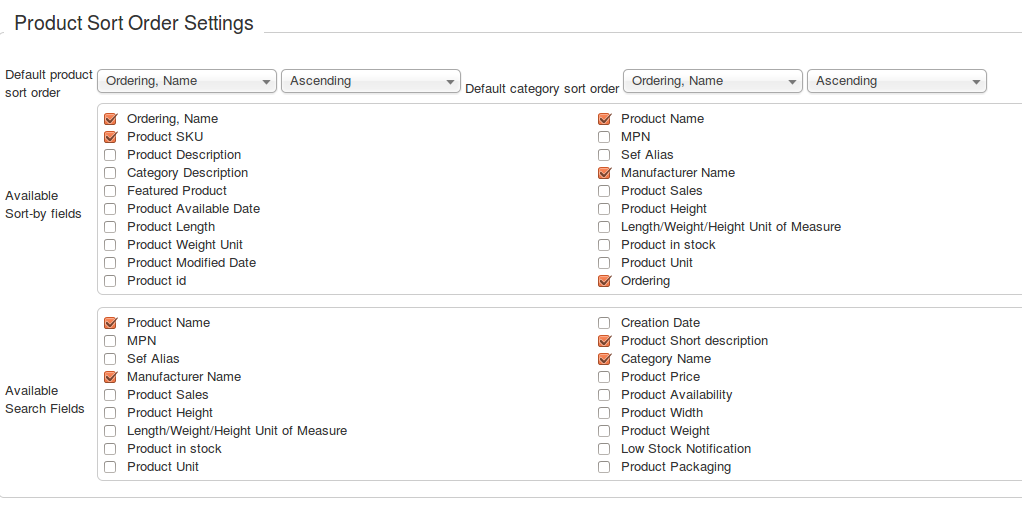
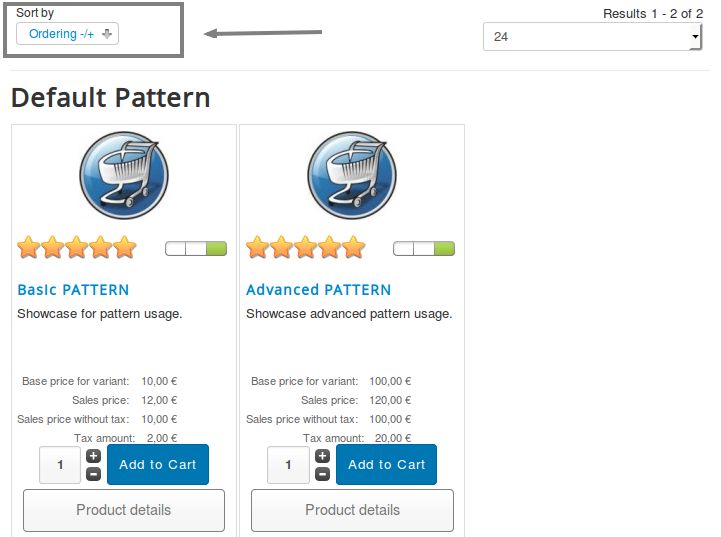
Default product sort order: Defines how the products will be sorted by default.
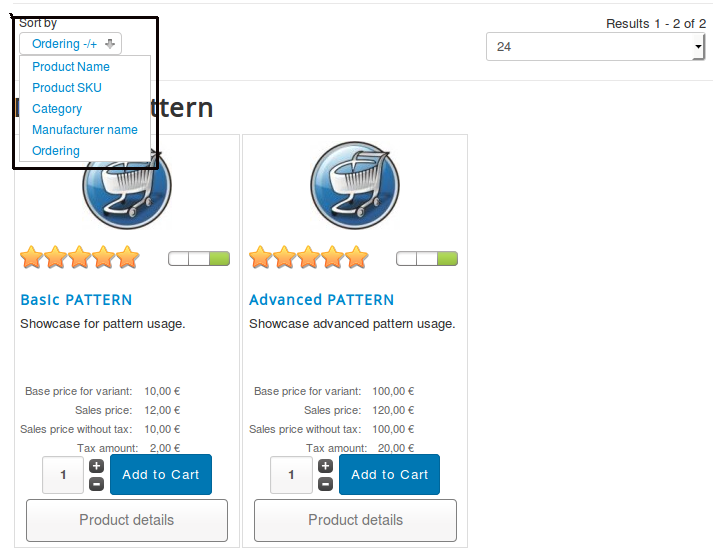
Available Sort-by field: These fields/options will be presented as alternatives to the user.
VI. Set the shop’s modules
Virtuemart comes with a set of modules that cover the basic needs of a shop.
VirtueMart Category: Displays a list of the published Categories. Selecting a category loads a page with the products of that category.
VirtueMart Manufacturers: Displays a list of the published Manufacturers. Selecting a Manufacturer loads a page with details about that manufacturer.
VirtueMart Products: Displays a set of products as suggestion to the user. These products can be the “featured products”, the “Best Sellers”, the “Latest Added” ,….
Virtuemart Shopping cart: Displays the products, added to the cart
VirtueMart Search Product: Displays an input for searching into the shop (the fields where the search is performed are defined in Configuration > Configuration > Product Order Settings)
VirtueMart Currency Selector: Allows the user to change the currency of the shop.
If you have any question about this post, don’t hesitate to leave a comment below. And don’t forget to share with your friends if you find it useful! Thanks!

