Are you trying to determine the best way to control access to certain pieces of content within your website? If so, then this blog post is for you! Learn why it’s important to hide blocks from specific users in the content editor and how it can benefit your website.
Introduction
If you’re a content editor, you may have asked yourself why you need to hide certain blocks from specific users. The answer is simple: it’s a great way to improve the user experience for your website visitors. By hiding blocks that are unnecessary or irrelevant for certain users, you can create a more streamlined, focused experience for them. Plus, it can also help improve the overall look and feel of your website.
In this blog post, we’ll explore why you might want to hide blocks from specific users and the benefits of being able to do so.
Why Would You Want to Hide Blocks from Everyone?
Hiding blocks from everyone might also be useful for editors who are creating new content and don’t want it to be seen by the public yet. This can ensure that the content is ready and accurate before it is published. With the PublishPress Blocks plugin, you can easily manage who can view each block with the Hide Block control.
You can also use the ‘Lockdown’ condition to hide blocks from everyone while you are preparing your content. This plugin also allows you to show or hide blocks based on user state and customize messages that appear when a block is not selected. With the right tools, it’s easy to keep your content editor organized and secure.
How to Hide Blocks from Specific Users in WordPress Editor?
Currently, there is a wide range of useful plugins that allow you to hide blocks based on user roles. However, in today’s tutorial, we will guide you to complete this task by using the PublishPress Blocks plugin. This is one of the best Gutenberg WordPress Accordion Plugins plugins that will give you the ability to control who can use each block including accordions, galleries, sliders, tabs and much more.
Now, in order to use this tool, you need to install and activate the plugin. The process of installing this plugin will be demonstrated by the following guideline.
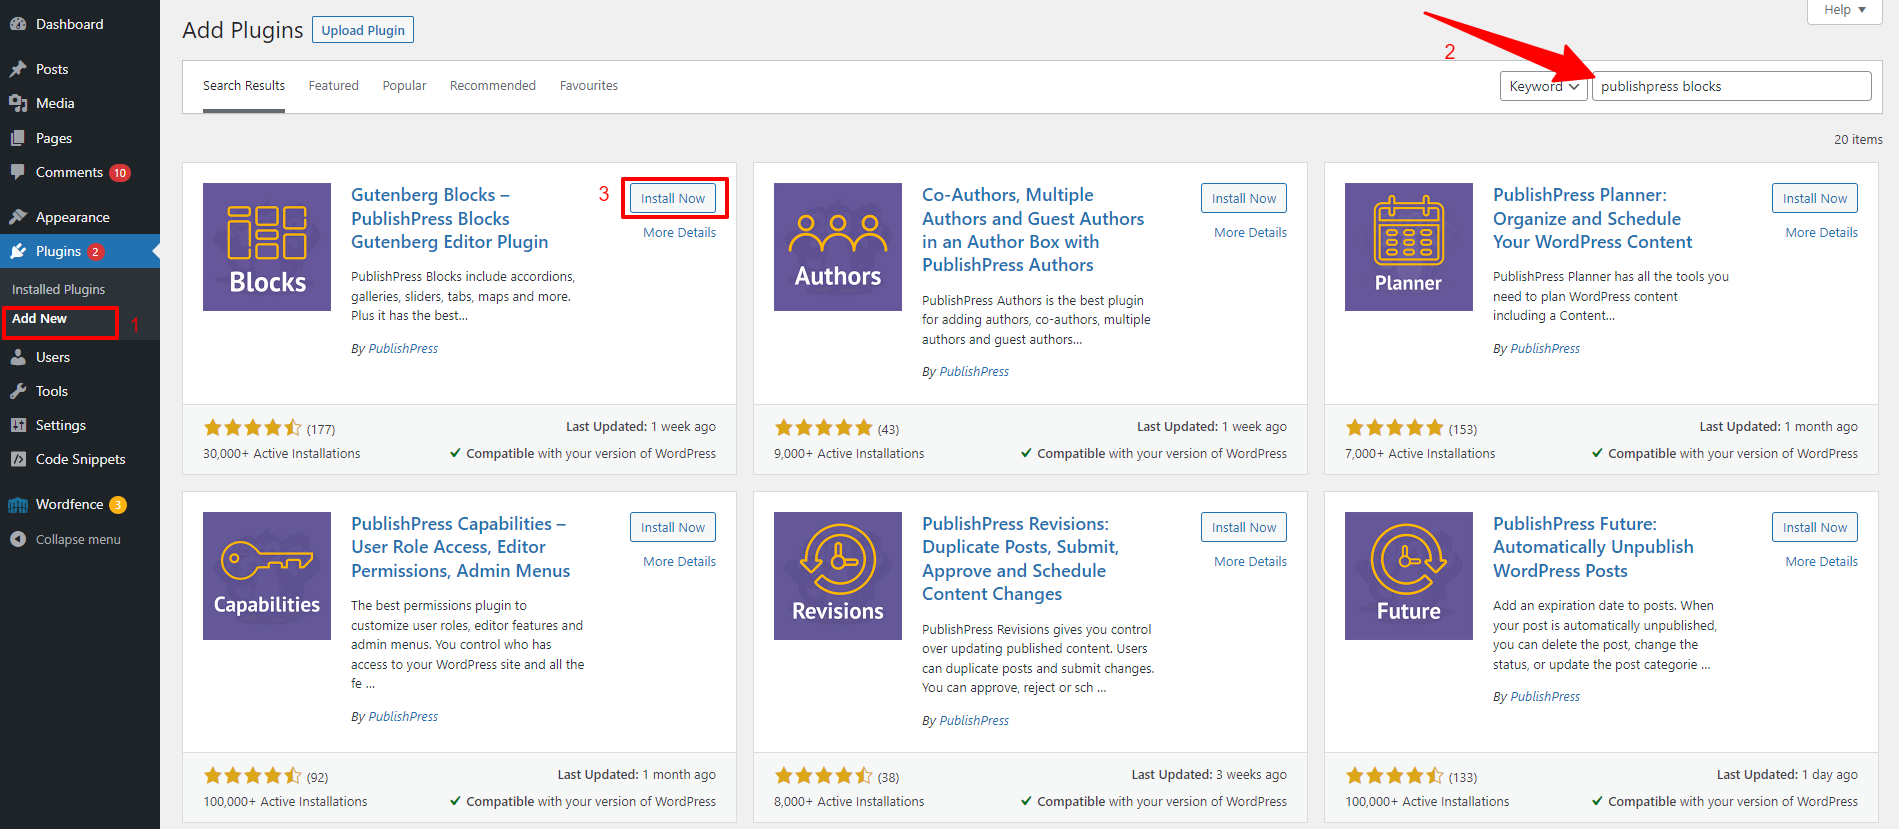
Go to Plugins > Add New from your WordPress dashboard
Then, you can use the search bar to find the plugin
Next, click on the “Install Now” and “Activate” buttons to use it
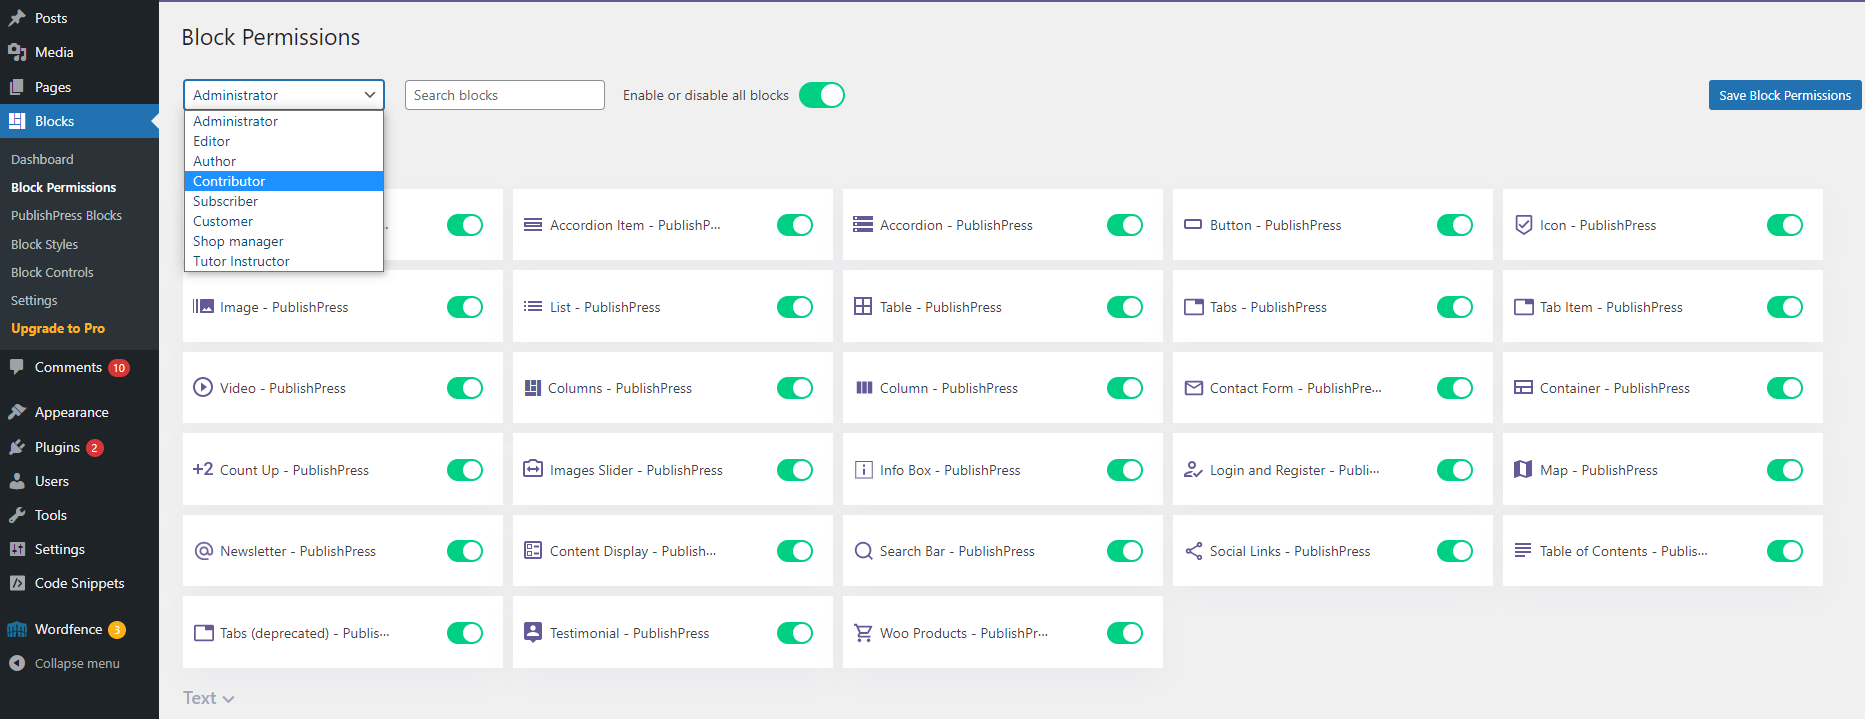
After the plugin is activated, you can navigate to Blocks > Block Permissions page from your admin panel.
On the Block permissions page, you can choose a user profile from the dropdown menu at the top of the page.
Now, you can disable any Gutenberg blocks for specific user roles by clicking the toggle to disable it.
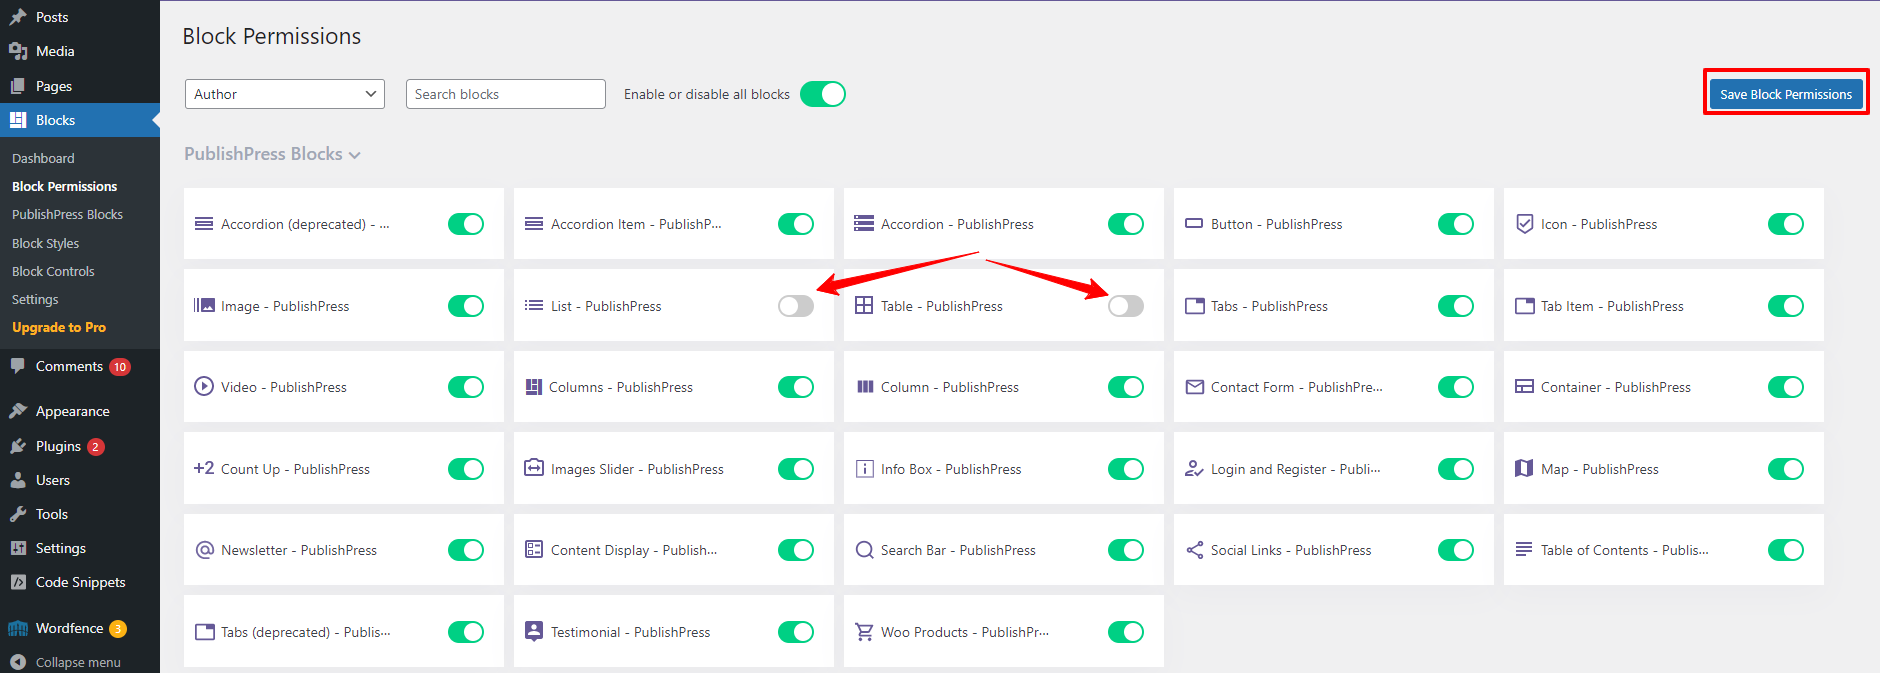
For example, in the screenshot below, we will disable the “List” and ” Table” blocks for the Author role so that they can not use these blocks.
Once you disabled all blocks you want specific roles not to access, then don’t forget to click on the “Save Block Access” button at the top right of the page.
Similarly, you can apply this process to hide blocks for other user roles.
Conclusion
The use of PublishPress Blocks offers a variety of benefits to content editors. By allowing them to hide blocks from specific users, they are able to create a more tailored and secure experience for their visitors. With PublishPress Blocks, content editors can be sure that the content they are creating is secure, engaging, and tailored for their visitors.
Hopefully, this blog is useful for your website. By the way, you can visit our website to discover a wide range of beautiful free WordPress Themes that will help you build an eye-catching website without effort.
We're a Digital Team from EngineTemplate with 5 content experts. Our team has 5 years exp in open source Joomla and WordPress, we make daily blogs and build useful resources for everyone who is having issues with open source while using it.