If you don’t have professional coding knowledge as well as website design skills, using pre-made templates of Elementor is a great idea for your website. For this reason, in today’s blog, we will show you the way to use the Elementor template library. Now, let’s check it out.
Why should use Elementor Template Library?
It is unquestionable that Elementor is considered a high-quality and powerful page builder among plenty of ones in the market. Because this page builder not only helps you build any type of website without touching any line of code but also provides you with a library of beautiful pre-made templates. All templates of Elementor are suitable for various topics such as E-commerce, Law firms, business, personal blog, etc. Additionally, each pre-built template gives you the freedom to design your own web page with plenty of customization options.
In addition, you can easily import it with a single click and change it to suit your personal website requirements. Further, the layout and structure of the template are easily understandable and clear to the user. Elementor gives you full control of all sections on a template. Thanks to that, you can lessen your effort in the process of creating a new page.
How to use Elementor Template Library?
Now, you can follow our step-by-step guide below to use Elementor template library.
Add an Elementor template to your page
To add an Elementor template to your page, first of all, you need to choose your existing page or create a new one where you want to add an Elementor page.
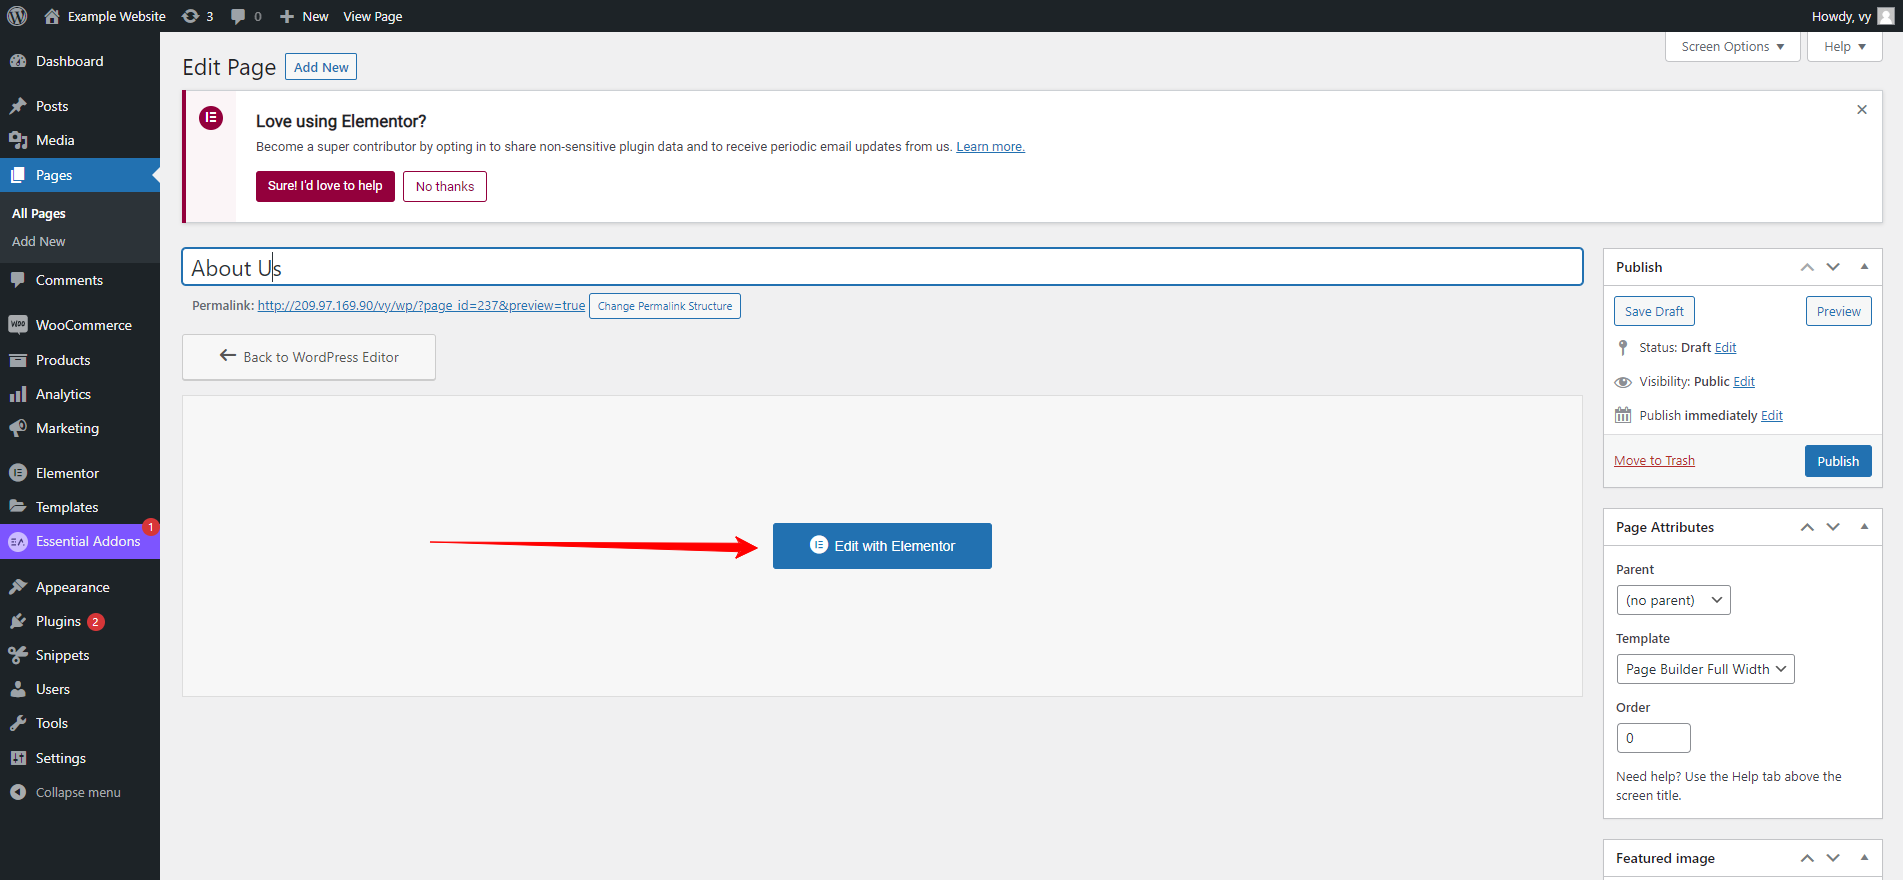
For example, we are going to create a new page called “About us”, then we need to navigate to Pages > Add News and enter the title for your page. After that, simply click on the “Edit with Elementor” button below the title ( if you are using the Classic editor) to launch the page builder.
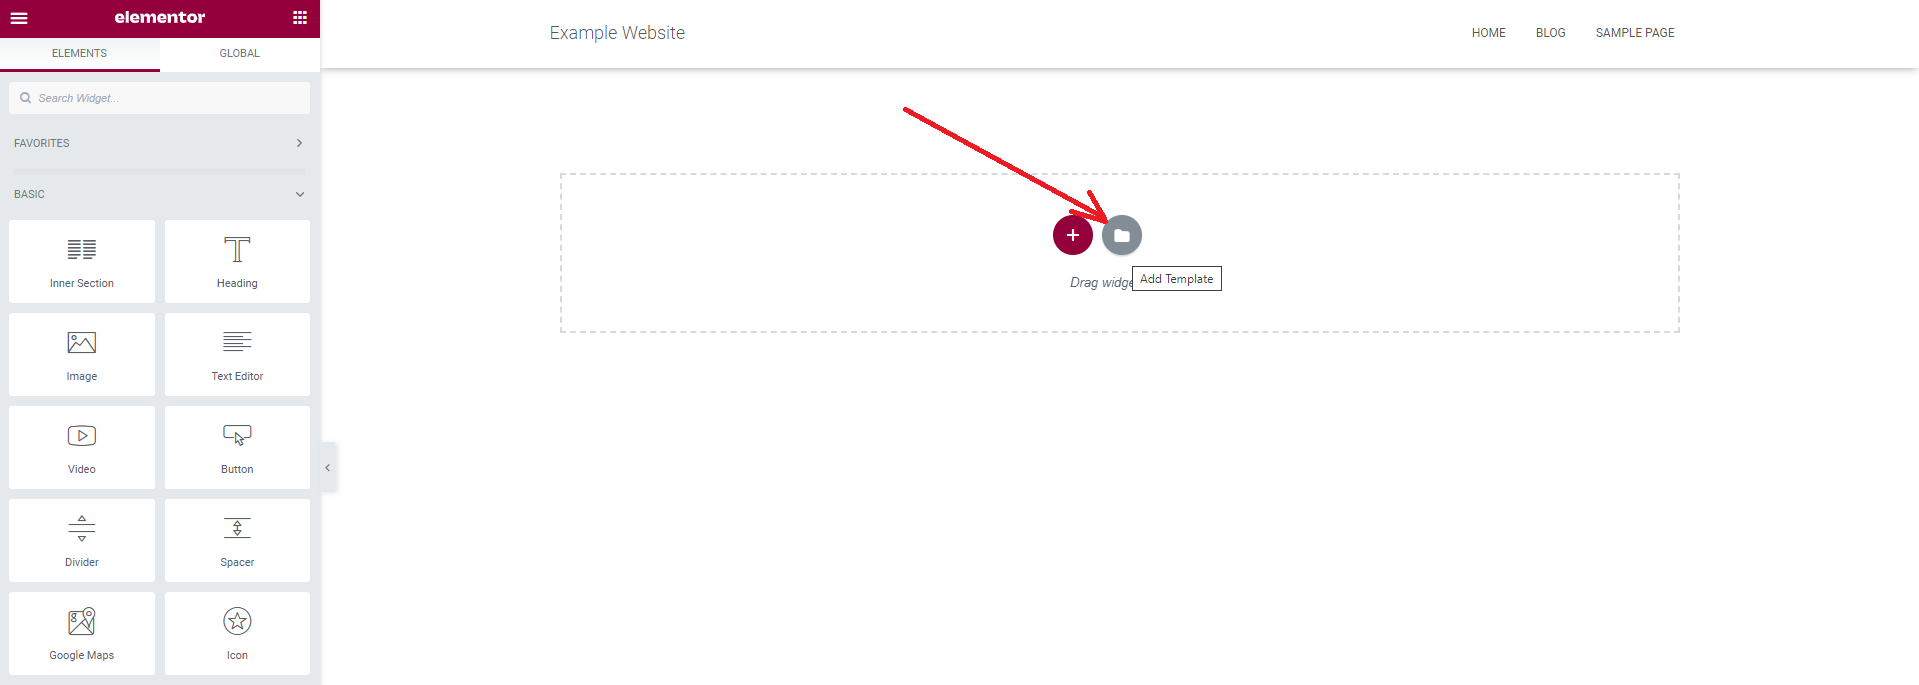
In the Elementor page builder, you need to pay attention to the box in the middle of the screen. This box will display 2 main icons: the first one is to add a new section and another is to add a new template. Now, you need to click on the second icon with a gray folder that will allow you to add a template.
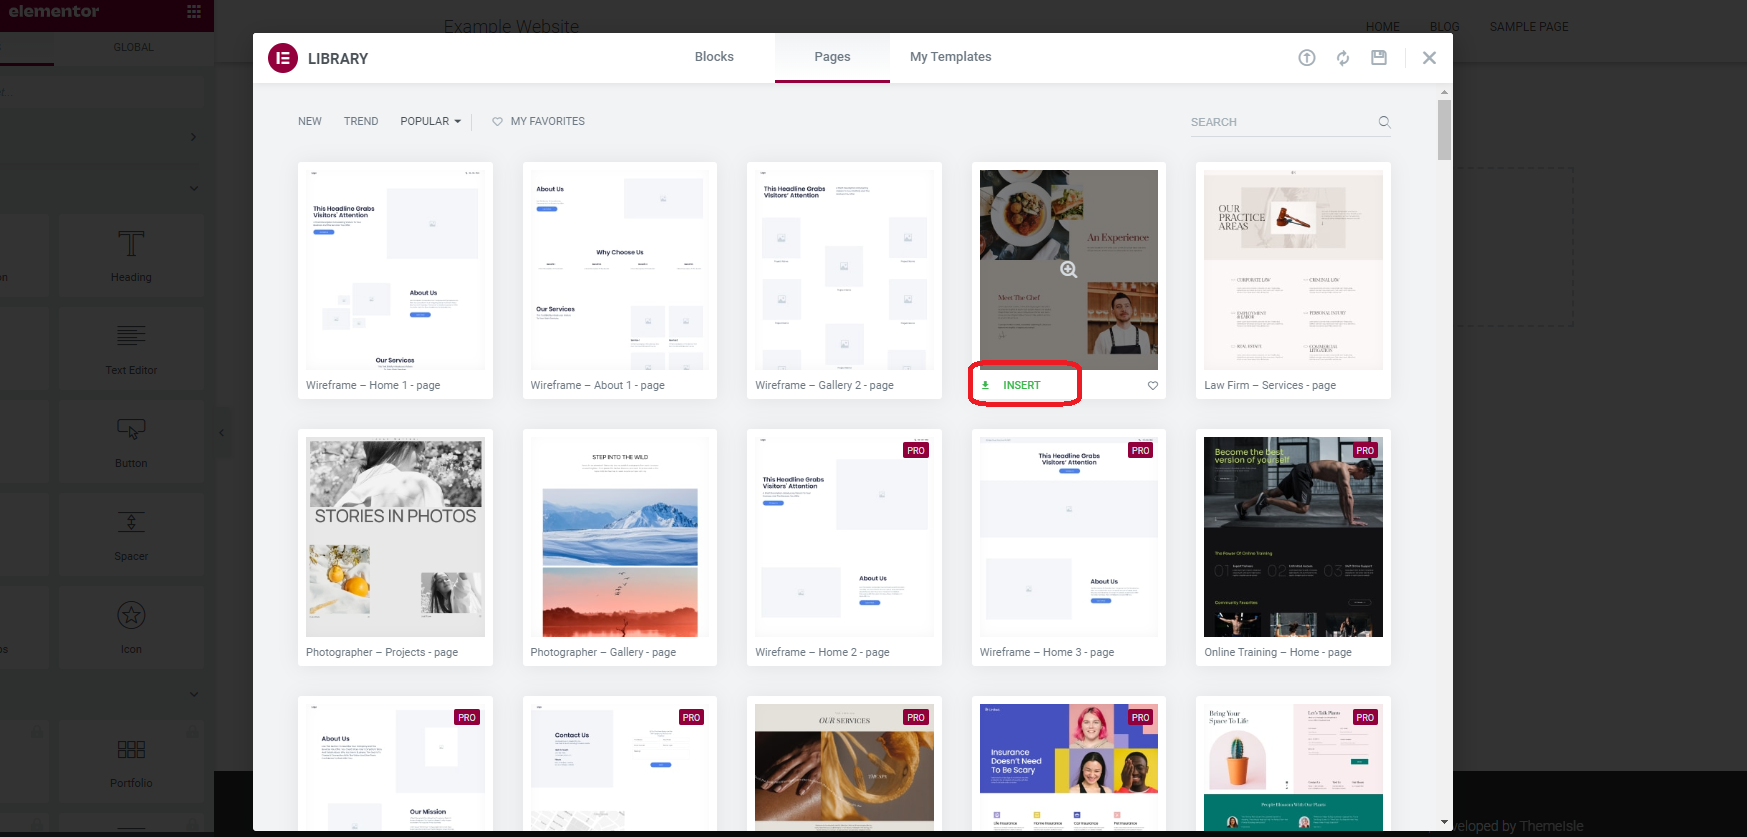
Immediately, this will open the Elementor Template Library in a popup window where you can search for a lot of beautiful templates as you desire. However, there are some free templates for you to choose from. Most advanced and stunning templates are only available for the Pro and Expert version of Elementor.
Now you can click on each template to see the full template. If you have found your favorite template from the Elementor template library, simply click on the Insert text to import the full template to your page.
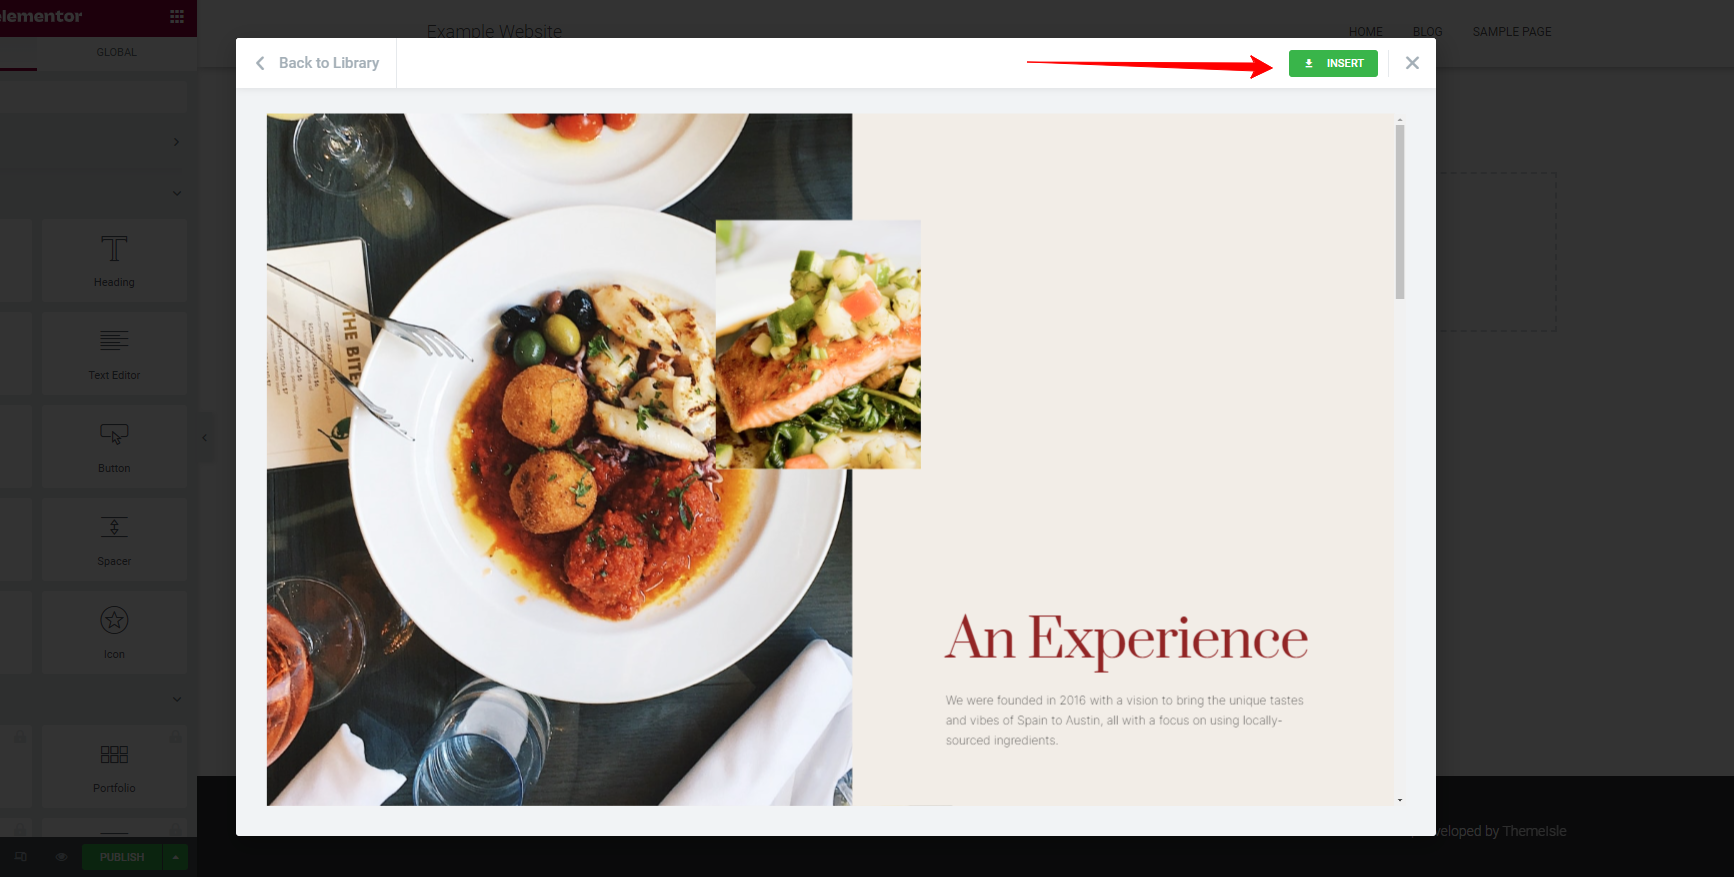
Alternatively, you can take a closer look and click on the green “Insert” button on the top right corner of the popup window.
After that, you will be asked to sign up for a free personal account with Elementor. Once your new Elementor account was connected to your website, which means that the process of importing the template has finished and the new Elementor template will be displayed on your page.
Now, you can customize it to achieve a beautiful page. Let’s see our guidelines regarding aspects that you need to customize for a new template in the next step.
Customize an imported template
Now, you can click on the element you would like to customize to suit your requirements. All options will be displayed on the left sidebar of the screen.
- Change the layout
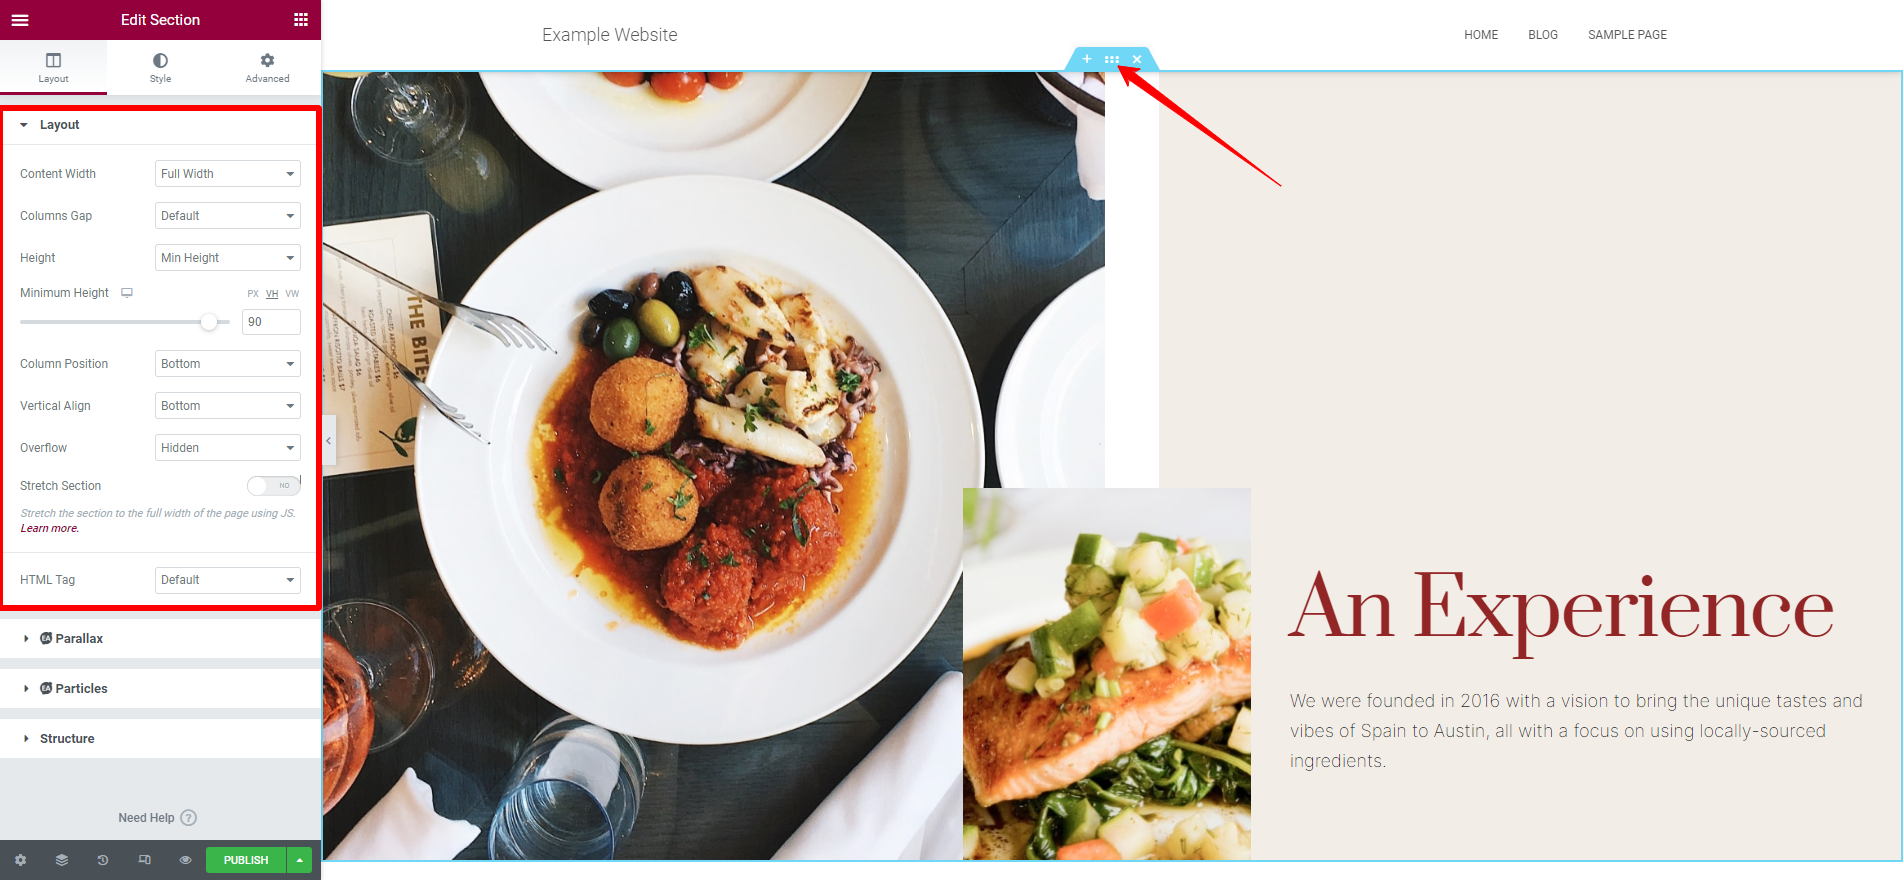
You simply click on the Dot-matrix icons on the section you want to edit. From here, you can change the content width layout, change the column gap, adjust the minimum height of the column, choose the column position, and much more.
- Edit colors
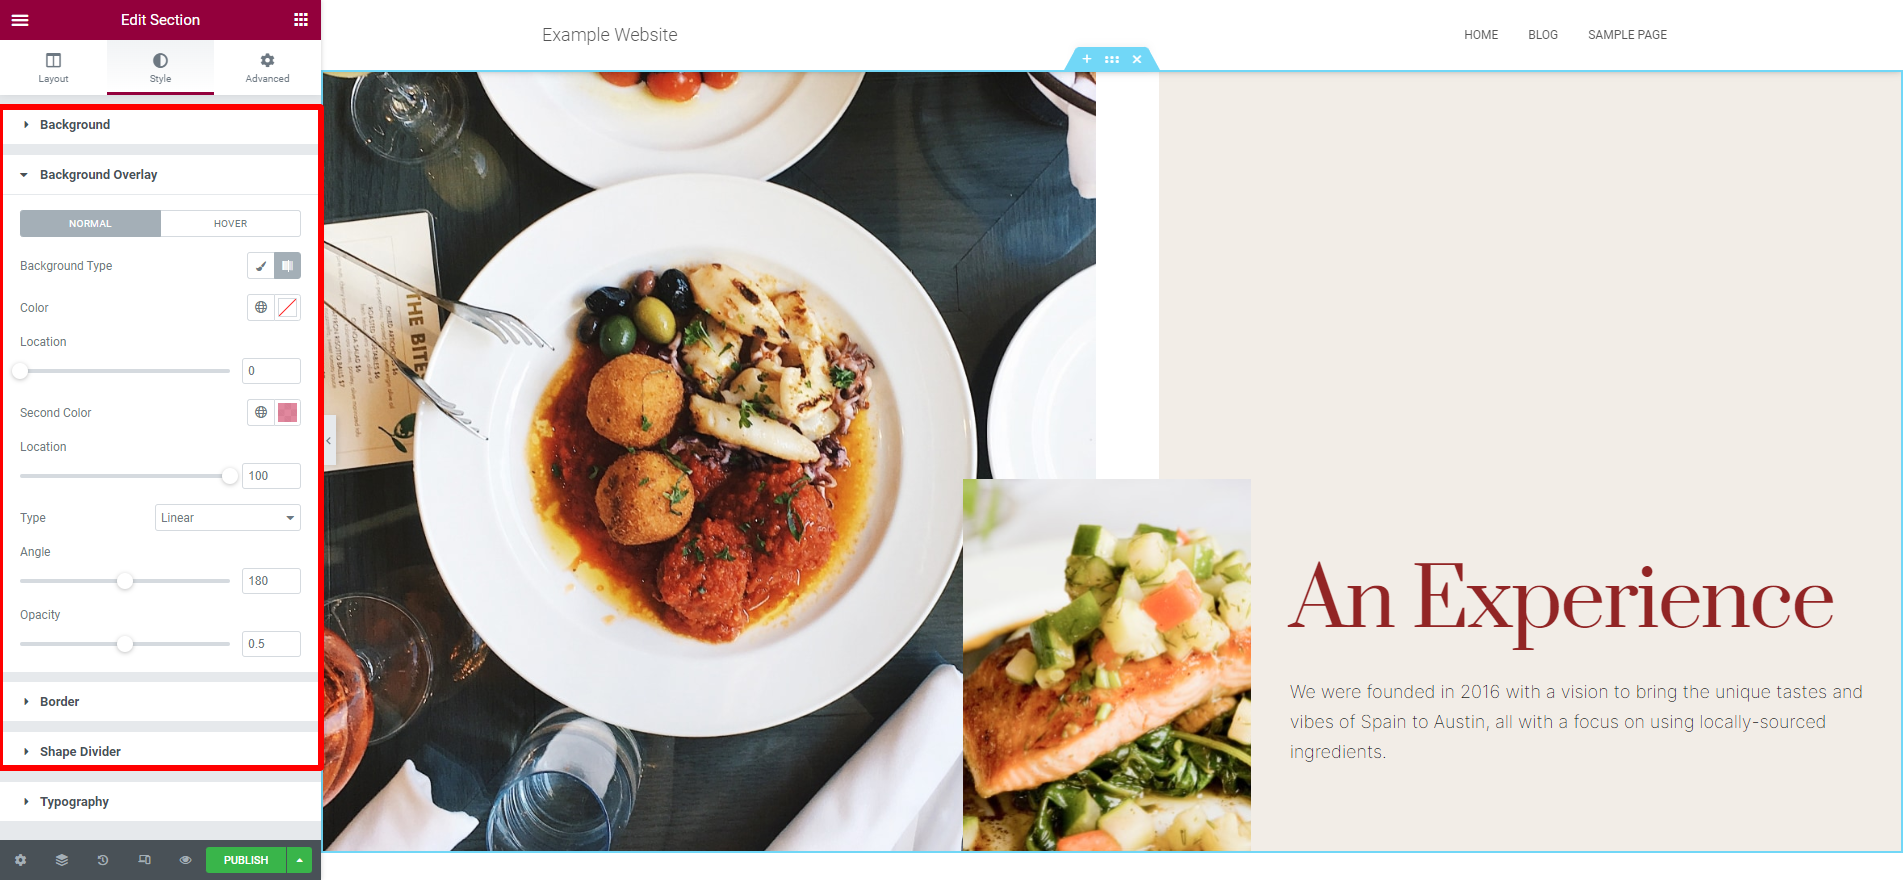
If the current color of the new template is not fit your theme. You can still change the background color, and text color, text shadow, and add a border by choosing the section you want to edit and then pressing the Style tab from the left column.
- Replace content
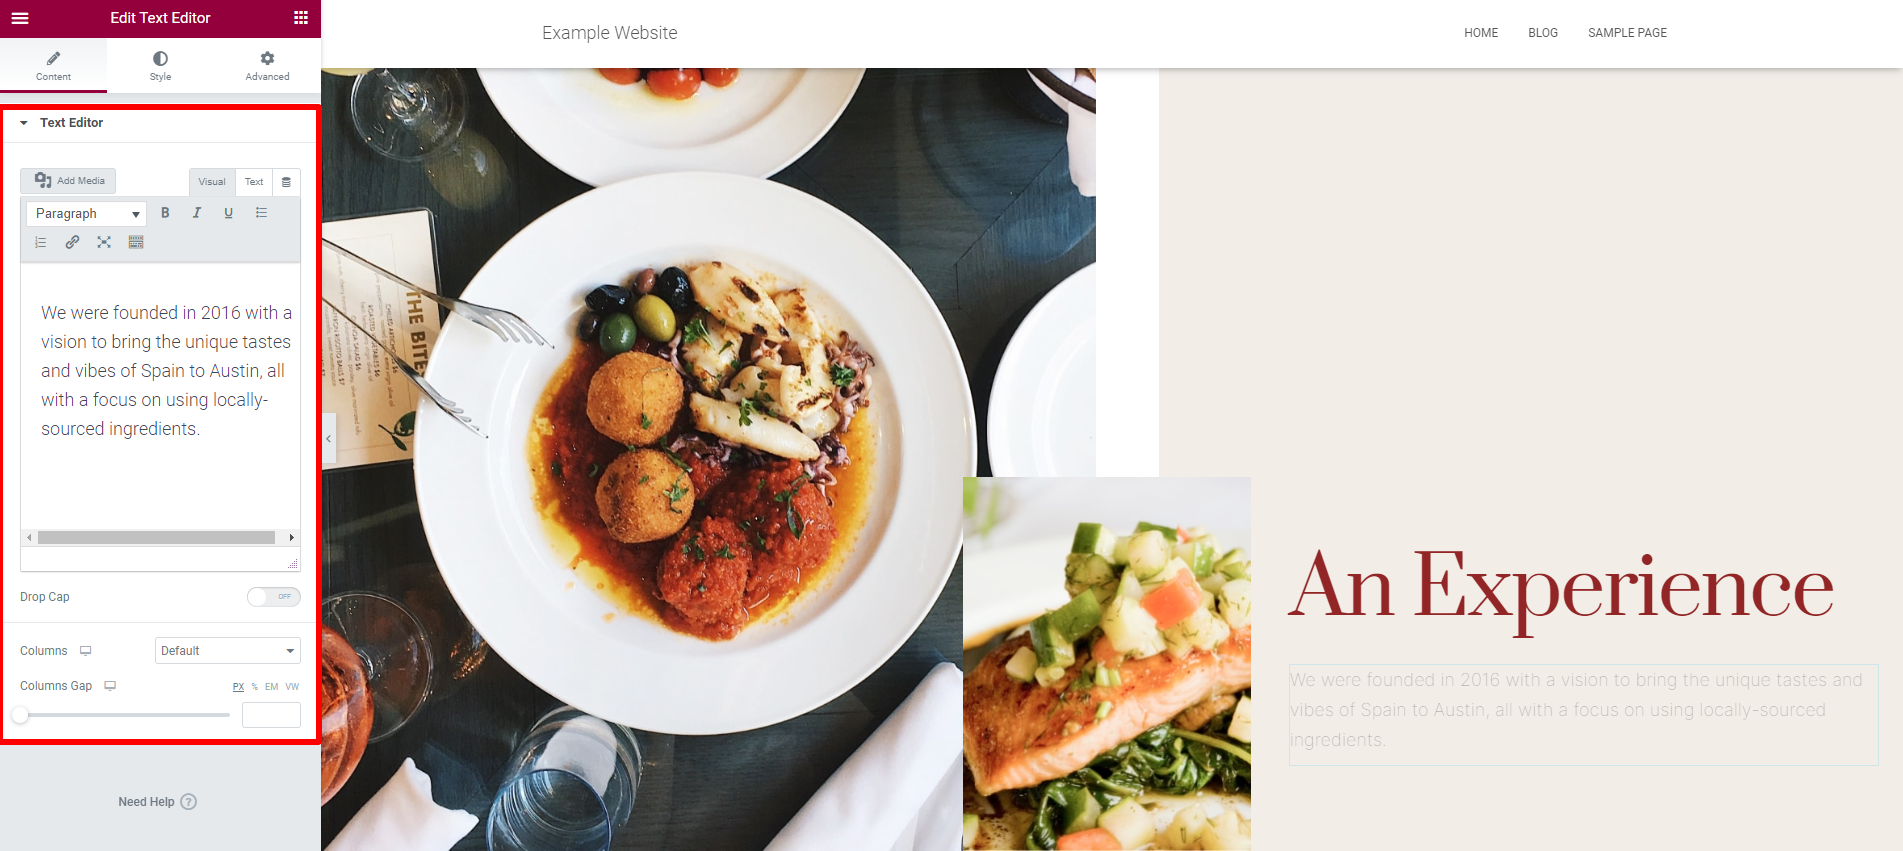
To edit the text content of any section, you just need to click on any text where you want to edit. Then, you need to provide your own text in the text editor. In addition, you can enable Drop Cap, choose the number of columns for your text, and adjust the column gap.
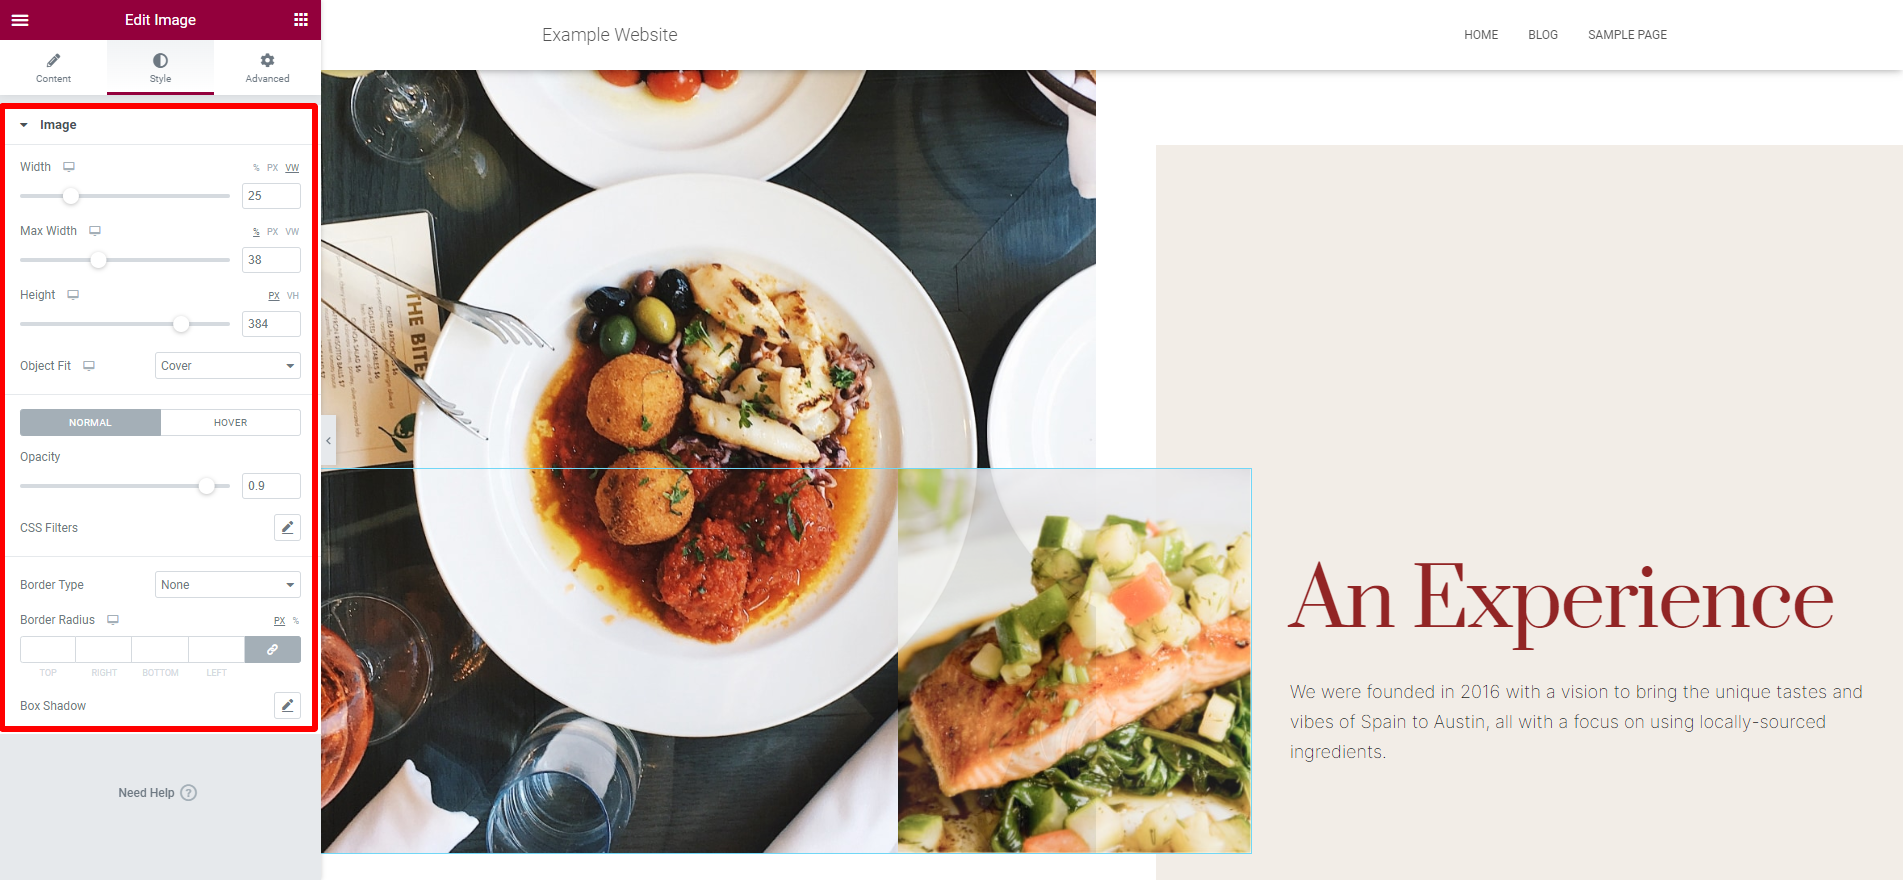
Similarly, you can do the same process to edit images. Simply click on the image you want to replace and then click on Choose image button to upload a new image or choose from your media library.
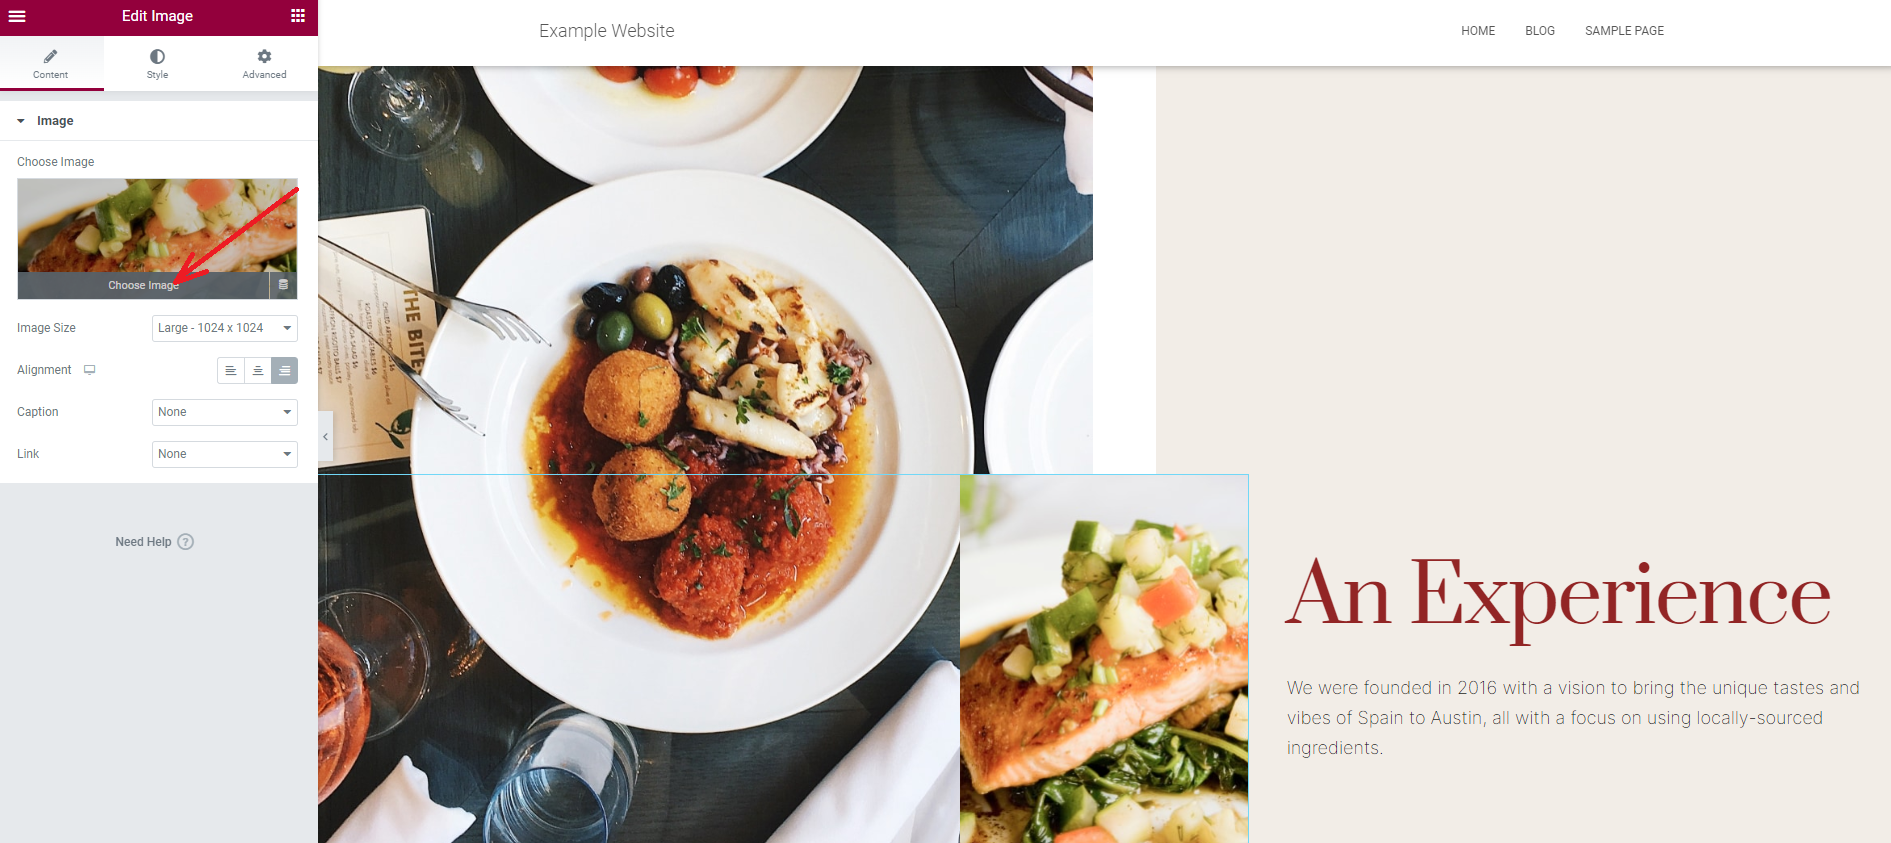
You can also change the width, height, and opacity of your image, or even add a border to it by customizing options under the Style tab.
- Add new content
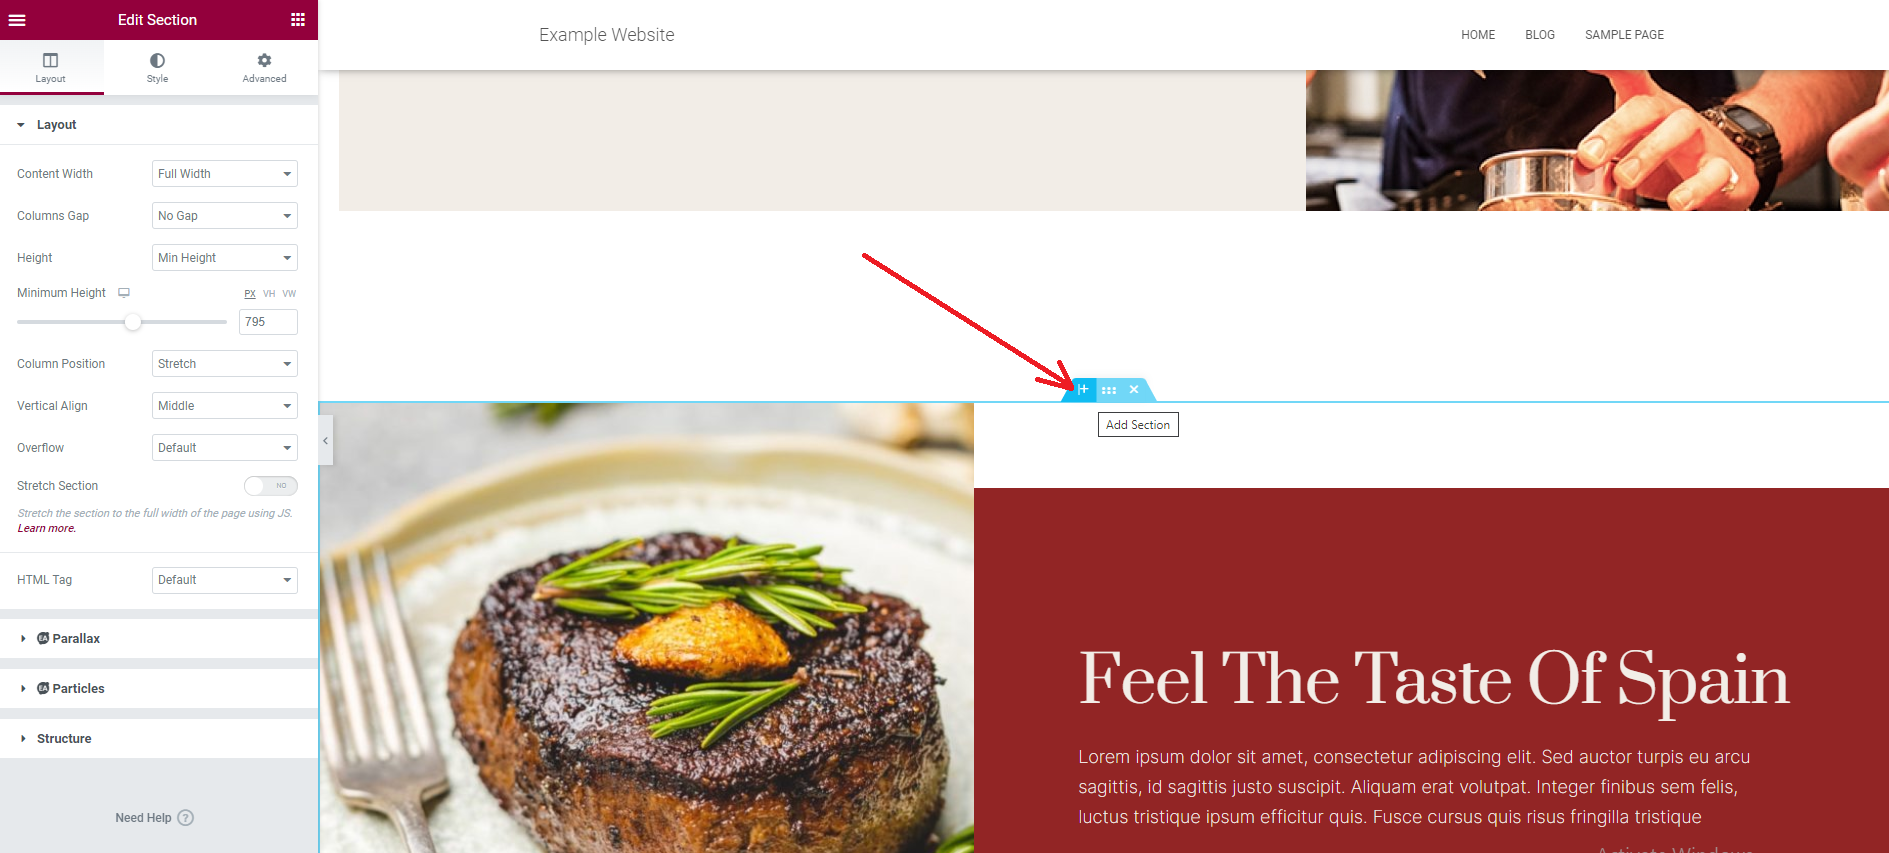
In addition, Elementor also allows you to add content to your template by clicking on the Plus(+) icon where you want to add your new content.
After that, select the column that you want to display and click on the “+” icon to add blocks to your content.
Once you are pleased with the new appearance of your page, now you can publish your page by clicking on the Publish button on the lower-left portion of the screen.
Moreover, if you click on the arrow icon next to Publish button, it will show more two options for you to choose from. The first option allows you to save it as a draft and another allows you to save this page as a template. 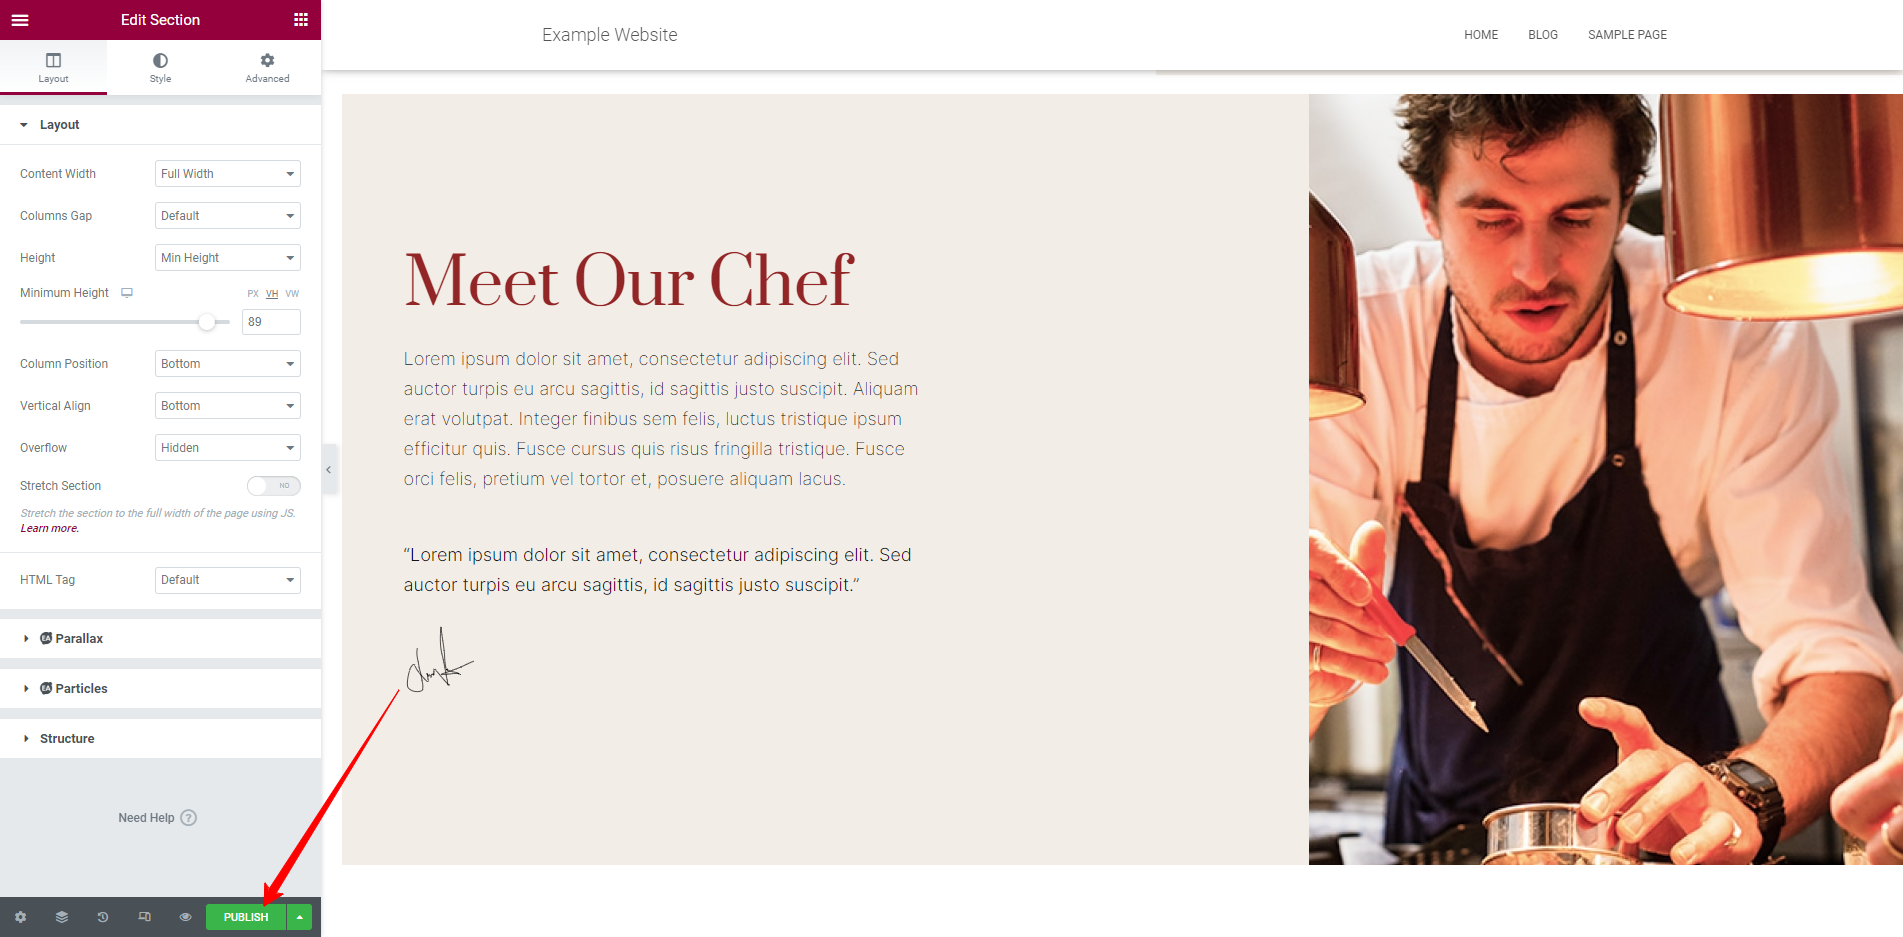
The bottom line
Hopefully, our blog can help you effortlessly create your own attractive template. If our blog is valuable for your website, don’t forget to share it with your friends. Moreover, we would like to know your thoughts about this blog. If you have any queries, let us know by leaving a comment below.
Further, you can refer to a list of free Elementor Addons that will help you extend the functionality of Elementor easily.
By the way, do you have an intention to create a beautiful website page? Luckily, our website specializes in providing tons of gorgeous, free Elementor WordPress Themes. So, why don’t you discover them right now?


