Do you want to add alt tags to images in WordPress to improve your image SEO? If yes, don’t miss our blog. In today’s tutorial, we will share with you 3 ways to help you add alt tags to your images in WordPress. This will assist your website to rank higher as well as get more visitors from Google. Now, give it a look.
What is an image alt tag?
The alt tag is defined as an alt description or alt text. These attributes allow you to add a description of your image or video if it is not showcased on the screen. Thanks to that, it is easy for search engine spiders to get this information to understand the context and purpose of your provided images.
What is the role of the image alt tag in WordPress?
As we mentioned above, using alt tags to images in WordPress is a great method to assist search engine spiders to recognize your provided images easier, so they can better categorize your content and display them on search engine results.
Additionally, screen readers that are used for blind or visually impaired users easily use the textual description of your image to provide information about each image to users. Hence, it can boost both SEO and accessibility for your website.
Generally, adding alt text brings you various benefits, so there is no reason why you should not add alt tags to images in your WordPress.
Moreover, to create beautiful images that make your content more attractive, it is necessary to use the support of the online image editing free tool. This helps you easily edit your images with plenty of stunning text effects, animations, and much more.
Below, we will provide you with the 3 easiest methods to help you easily add an image alt tag. Let’s check them out.
How to add an alt tag to images in WordPress
Method 1: Add alt tags to an image in your post/page
Now, in order to add alt tags to images in WordPress directly in your post/page, you need to track the following steps.
Step 1: Simply open any post/page that contains images
Step 2: Select the image you would like to add an alt tag and then click on the Edit button on the toolbar.
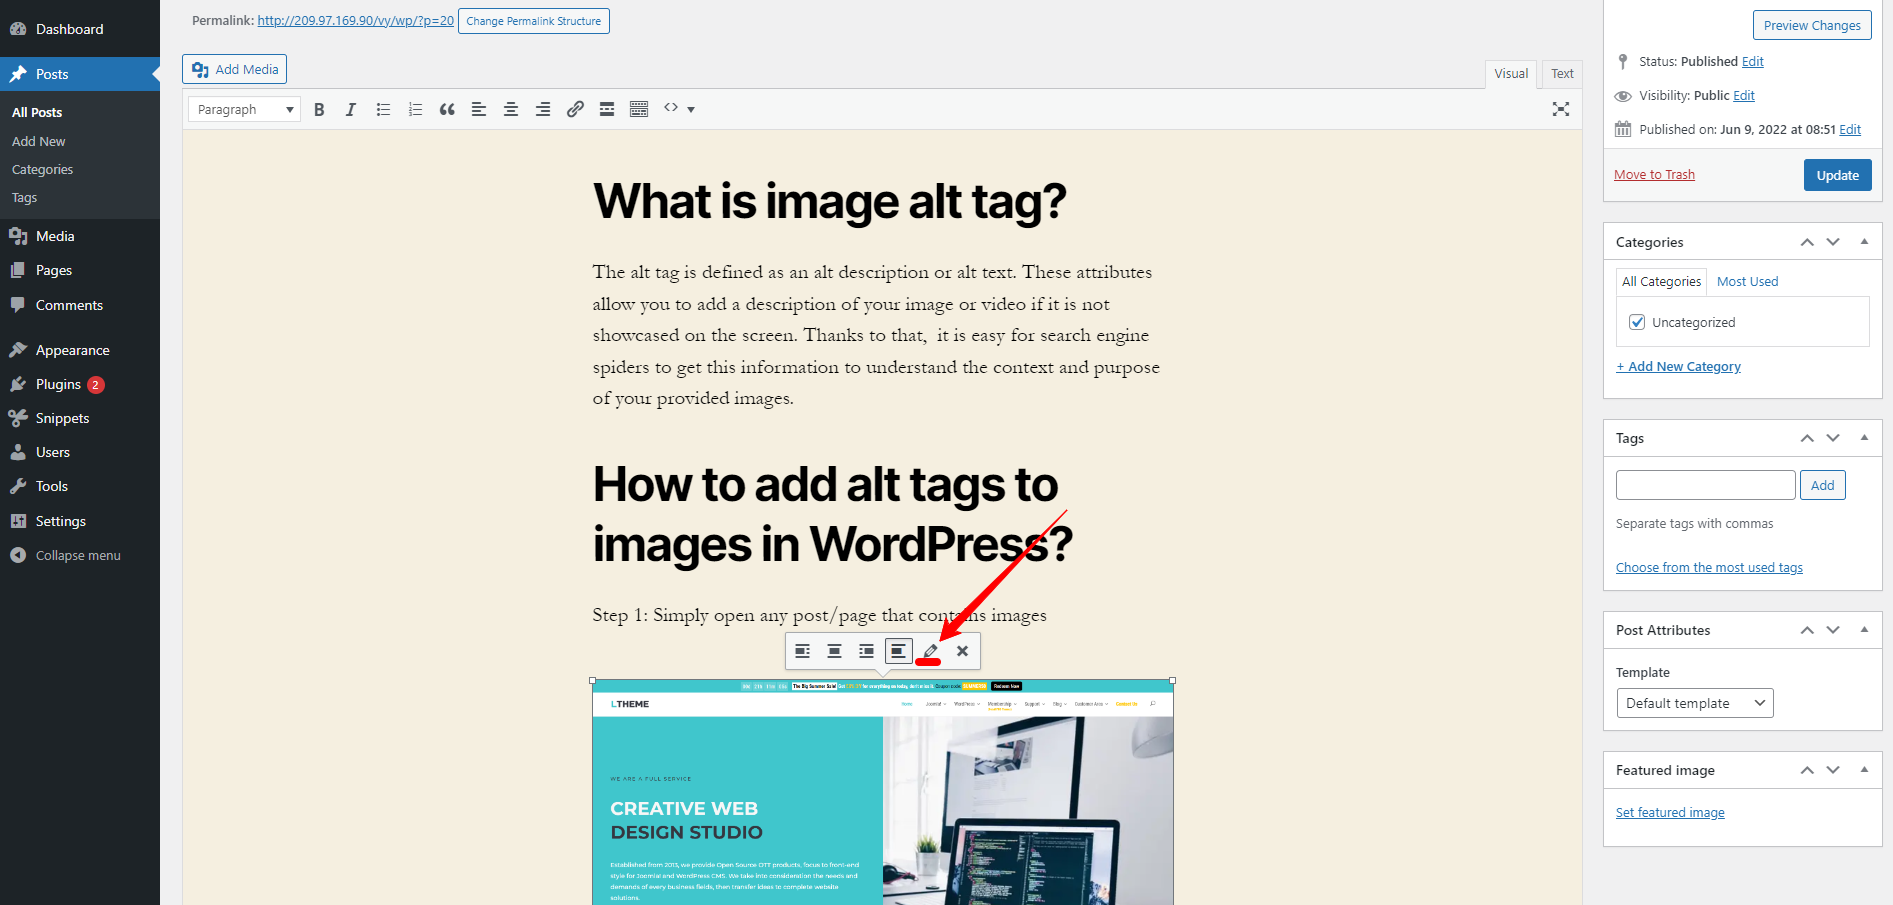
Step 3: After that, it immediately displays the image details window where you can add an alt tag, caption, change image sizes, and add links to.
Let’s provide the alt text for your image in the given space.
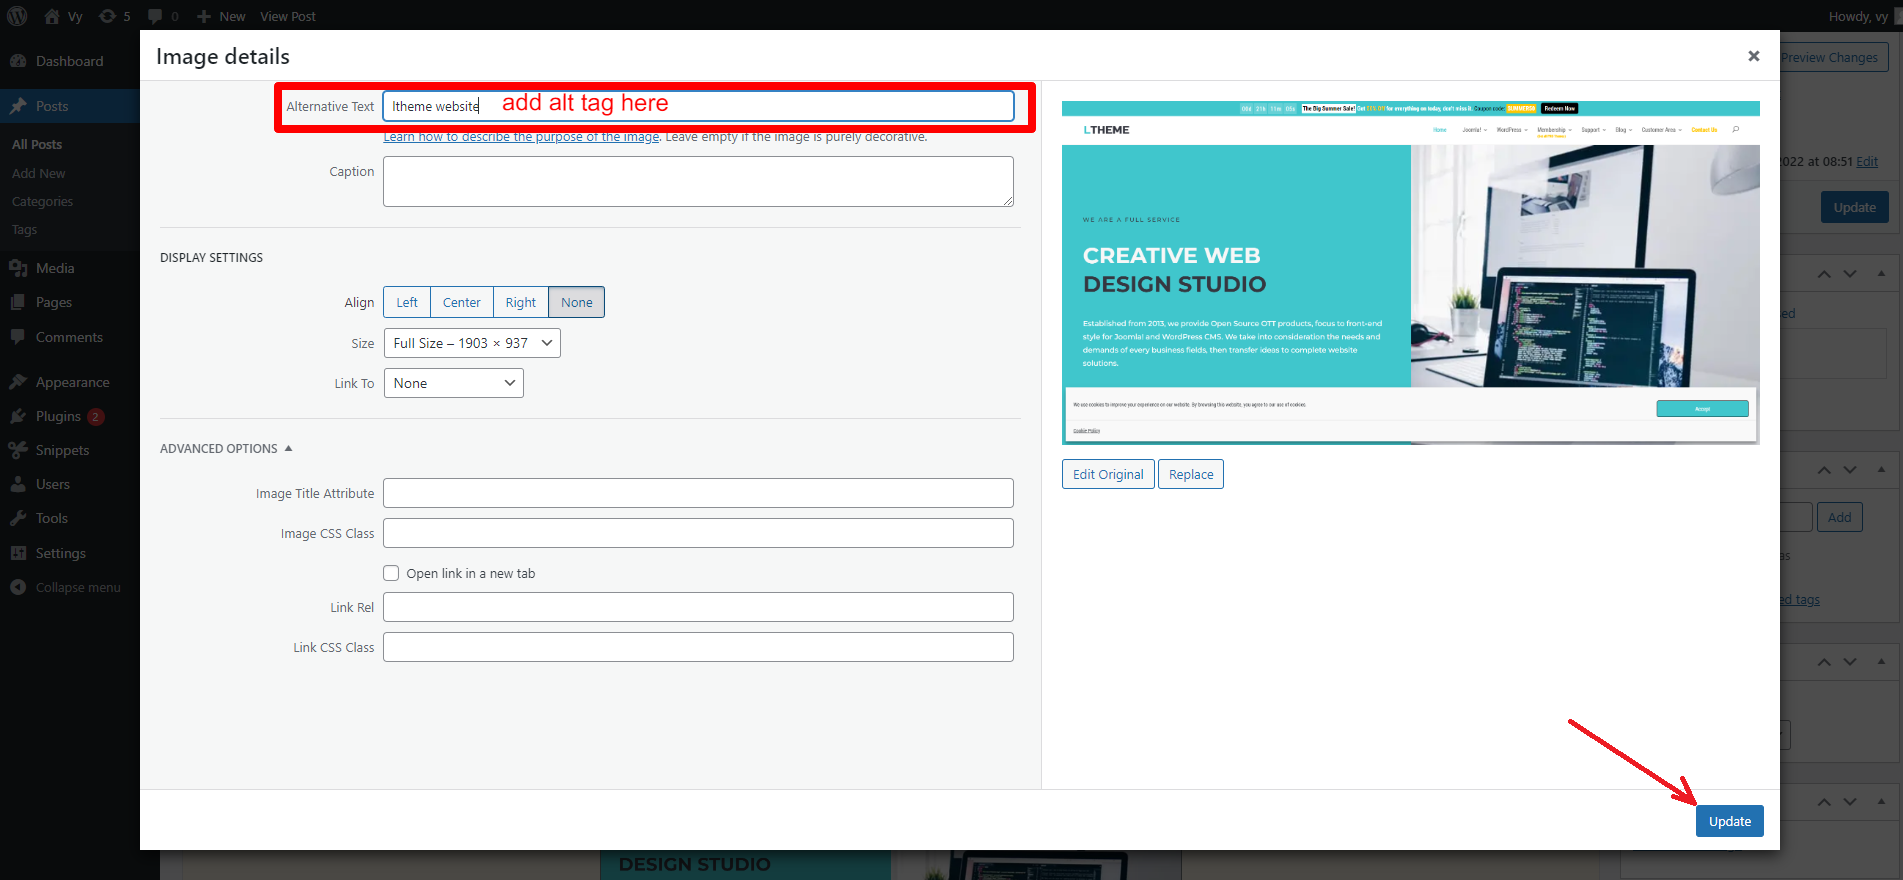
Step 4: Click on the Update button to apply the new alt text
Similarly, you can implement these steps with other images in your post/page.
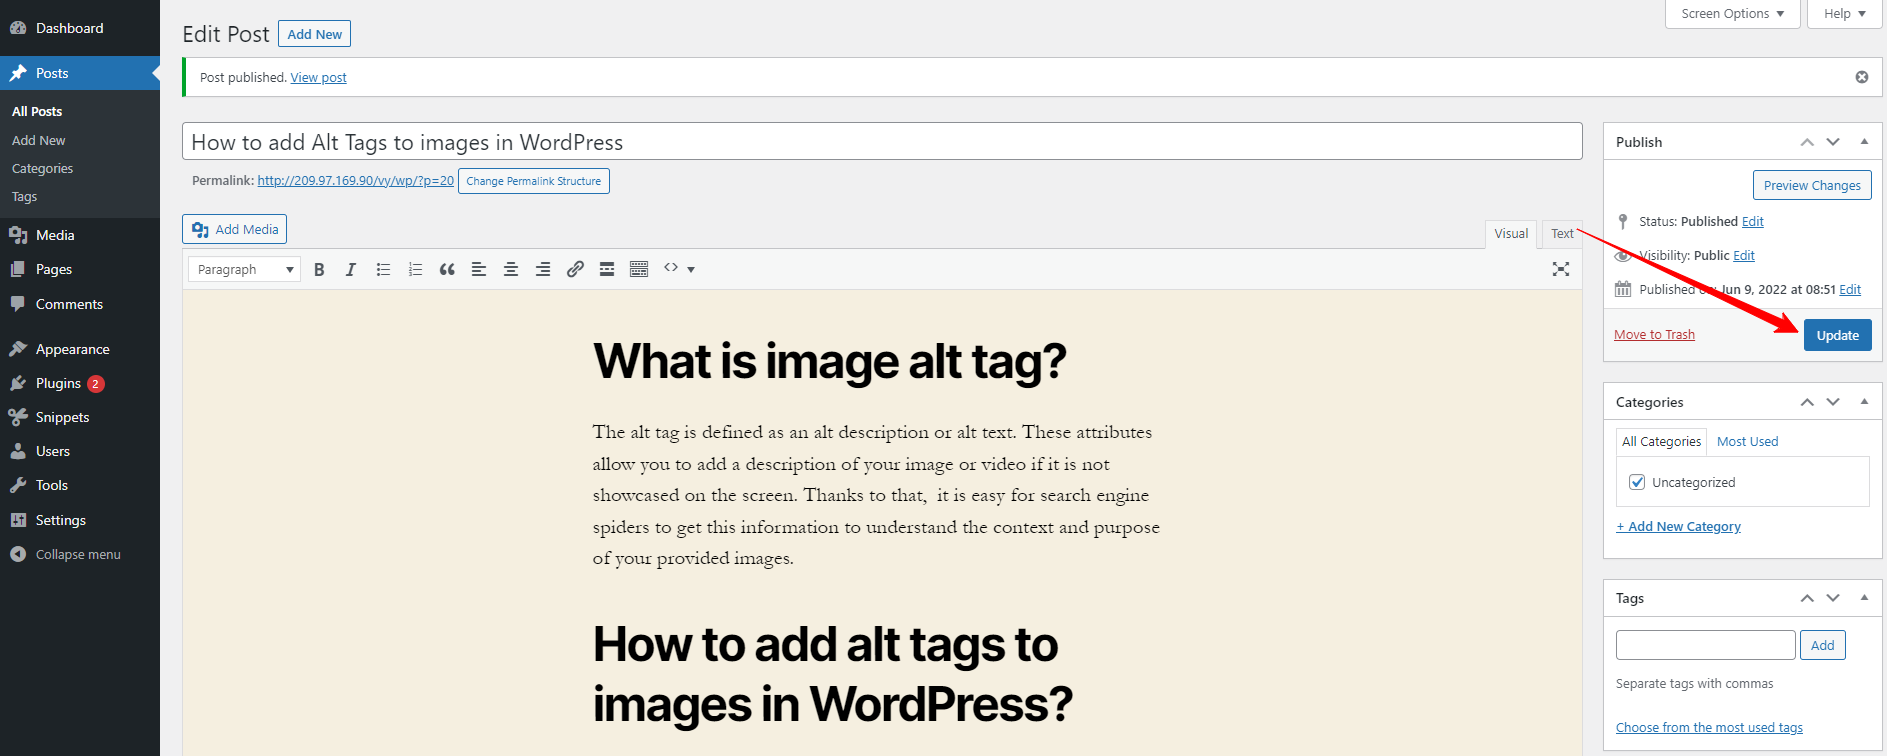
Step 5: Don’t forget to click on the Update button to save your changes.
Method 2: Add alt tags to images in WordPress’s media library
This is an alternative method that allows you to add alt tags to images in WordPress without opening any page/post. In addition, this way helps you save much time by implementing the work just once.
To do that, first of all, you need to go to Media > Library from your WordPress Dashboard.
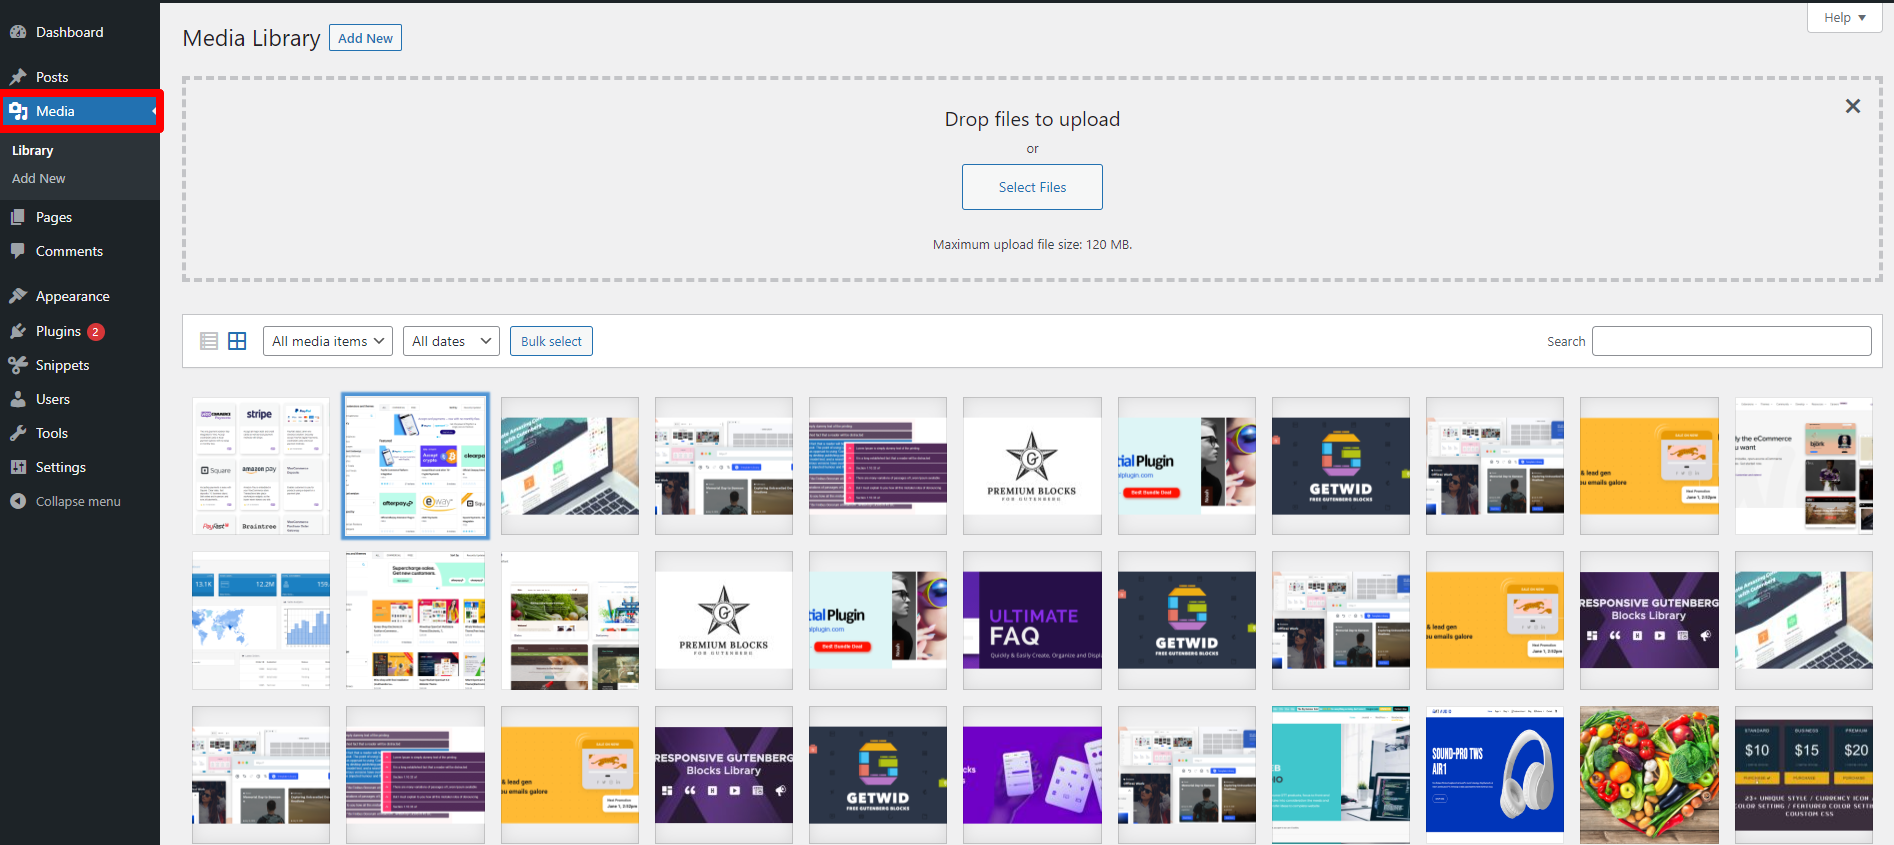
Next, you can choose any image from your media library or click on the Select Files button to upload a new one.
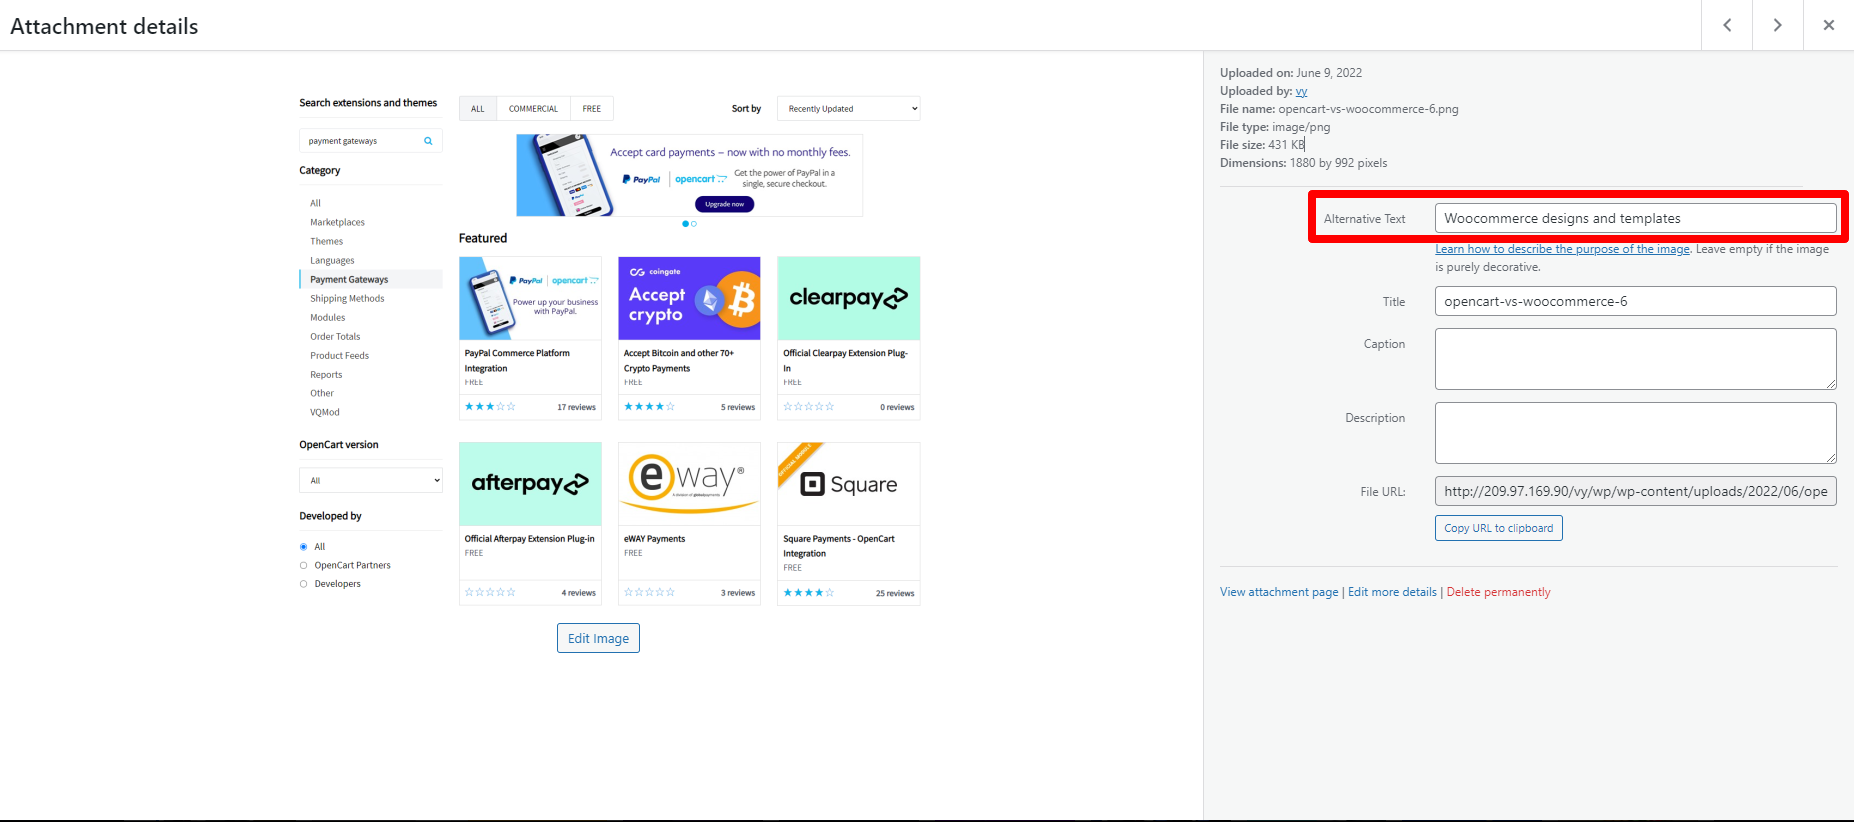
Then, it will display a window popup where you can fill out some descriptive text on the alt text box on the right-hand side. This alt text will describe what your image presents.
What’s more, there are additional fields that allow you to add an image description and caption. This will help give more details than alt tags, so your users will learn more about the message you want to convey via your image.
Once you have provided the alt text to the image, let’s click on the close icon to save your changes.
Likewise, you can apply this method to other images.
You should notice that this method will not change the new alt text for any case that you have already inserted that image into posts or pages before. In contrast, if now you add the image to any post/page, the new alt tag will be included.
Method 3: Add alt tags to the image in the page code
If you are using the Classic WordPress editor, this method allows you to add alt tags to the image by overwriting the alt tag in the HTML code for each image.
Initially, you need to open your blog post or page and find the image that you want to add the alt tags. Then click on it to select the image.
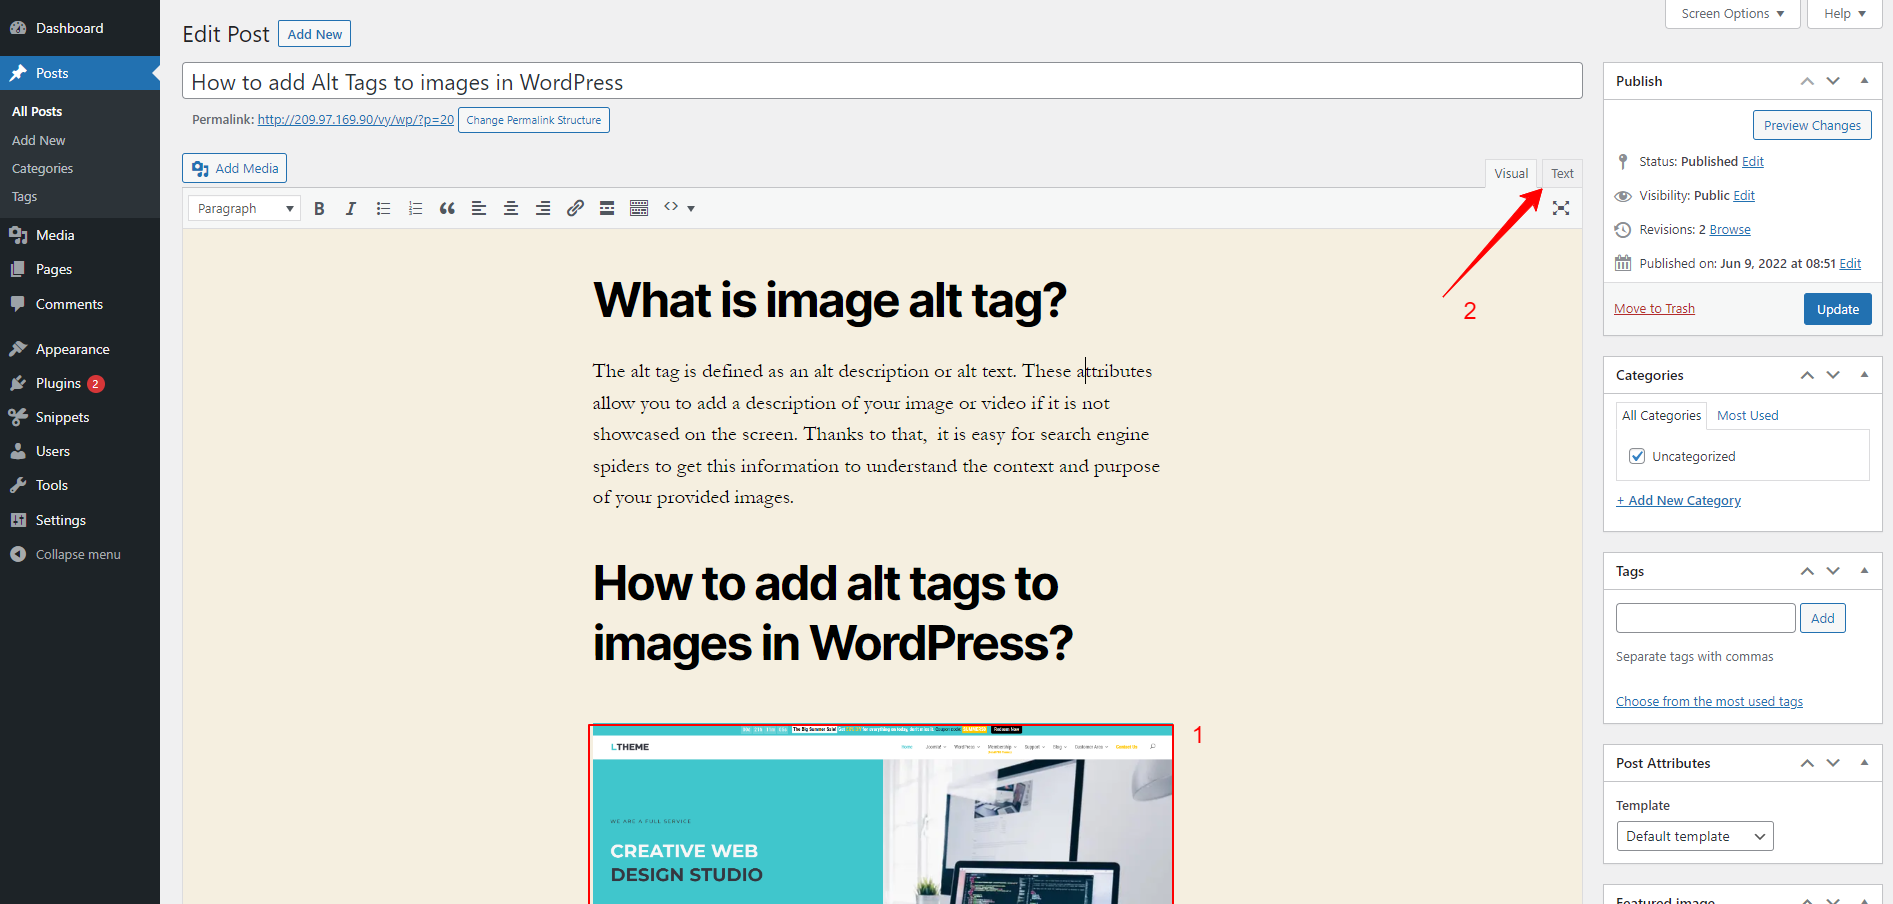
Now, switch to the “Text editor” by clicking on the Text tab in the top-right corner of the WordPress editor.
In the Text Editor, you will notice that the line of code displaying your selected image is being highlighted.
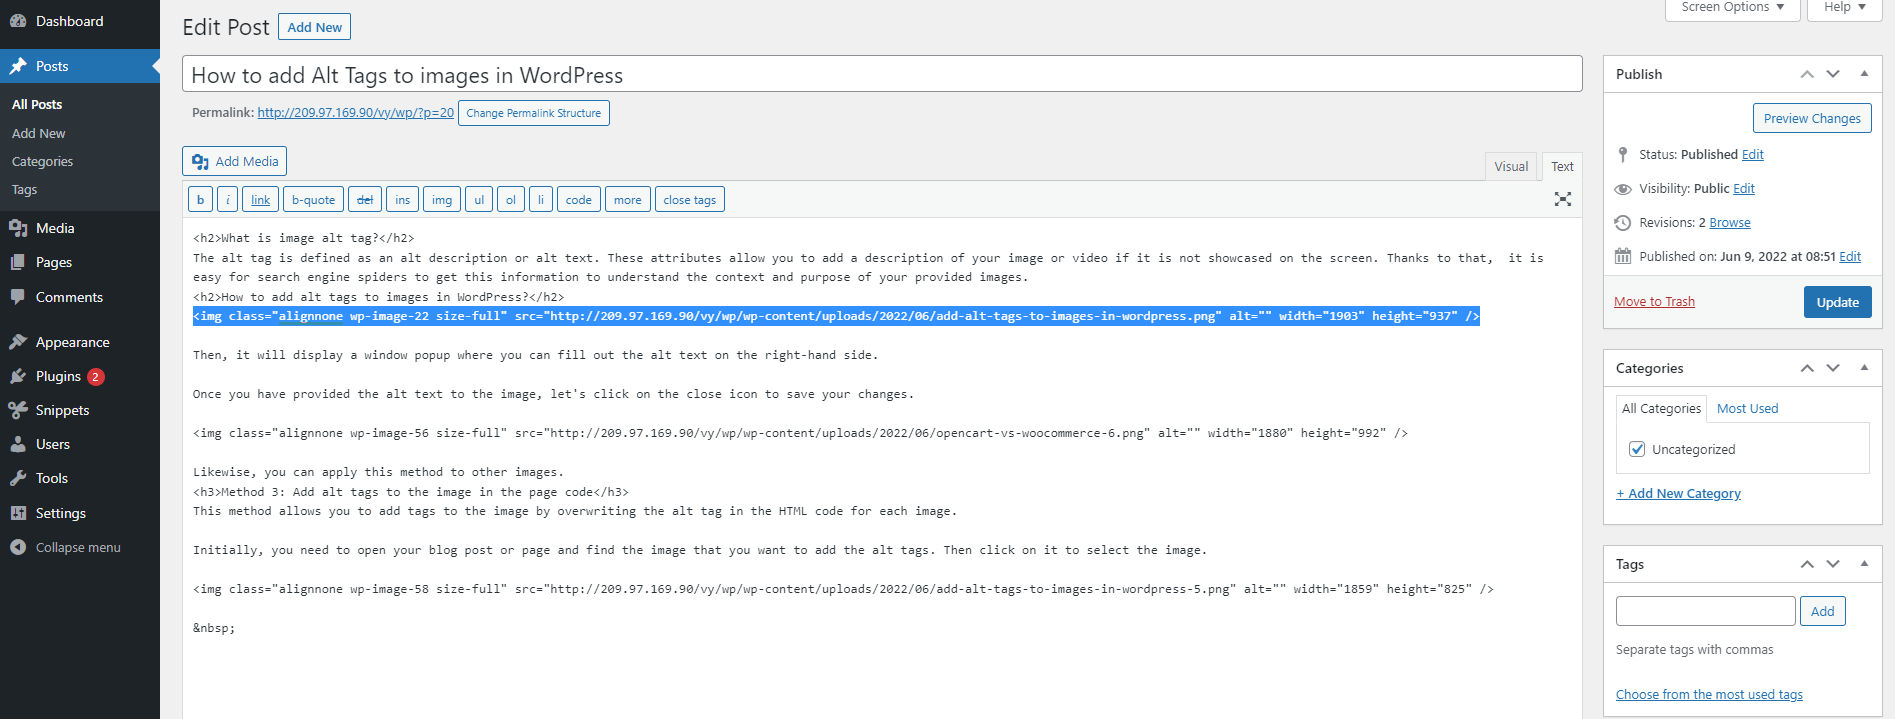
Now, you need to add the values of the attribute alt= ” the alt text to your image here” in the line of code starting with the HTML “<img” tag.
Finally, don’t forget to click on the “Update” button to save your changes.
The bottom line
To sum up, providing alt tags with images in WordPress will help your site get a higher ranking on search engines. Hopefully, our blog gave you some useful methods to assist you to add alt tags to images in WordPress. If you have any questions, don’t hesitate to leave a comment below. We will give you support as soon as possible.
Further, do you want to make your site more eye-catching? If yes, don’t miss a list of stunning free WordPress themes on our site.


