In this post we will guide you how to set content plugin, to control the display in the cart section, to show or hide the images, enabling zoom effects, etc.
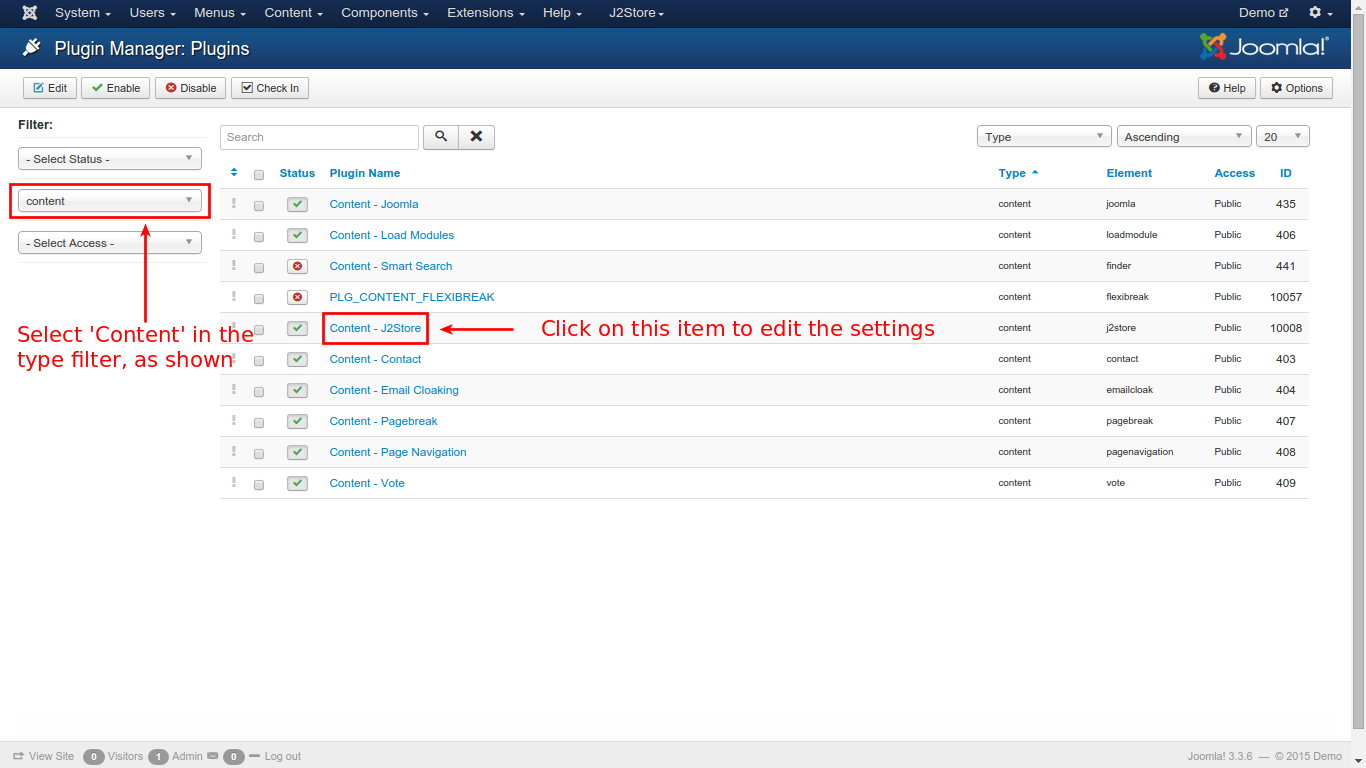
Step 1: Go to Extensions >> Plugin Manager. It will display the resulting window.
Step 2: From the Select Type filter on the left pane, you select Content, then click on Content – J2Store from the list. See the screenshot below:
Step 3: Next, select the Category View tab to set the values as the following screenshot:
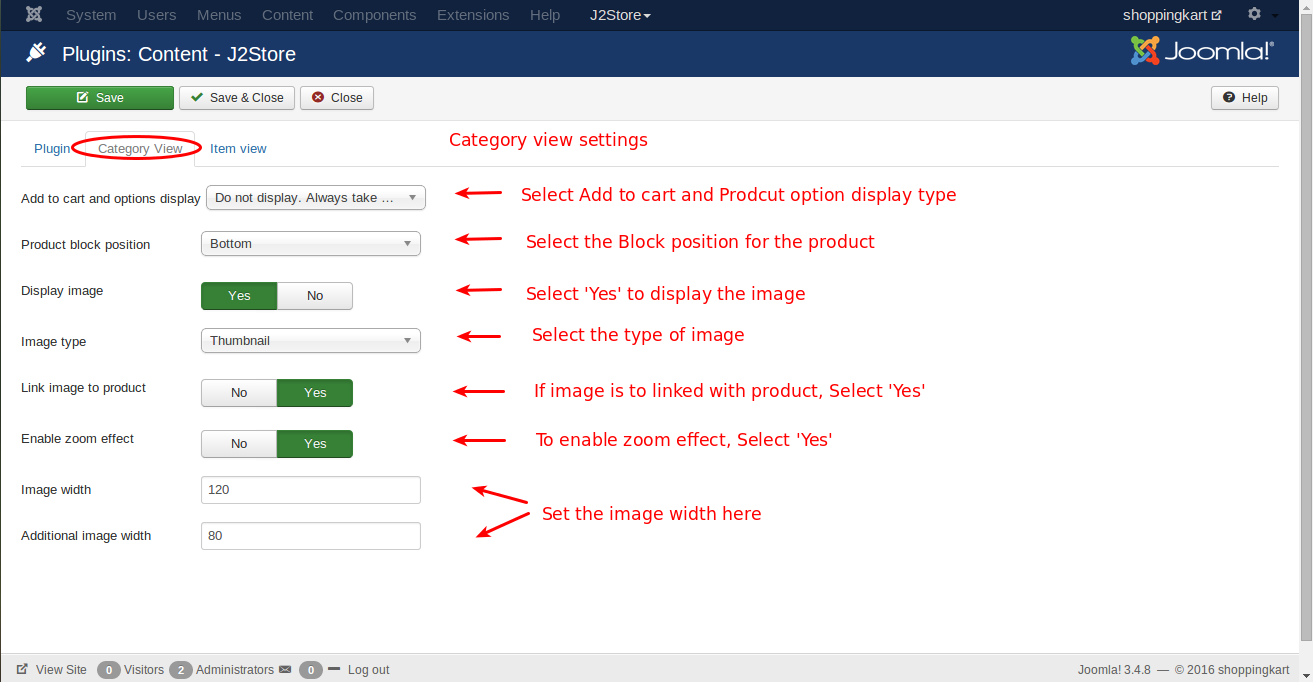
Step 4: Just follow these steps:
- Add to cart and options display – From the available three options, select Display the options and cart, Display Choose options button only if product has options. If there are no options, display the cart or Do not display. Always take customer to detail view.
- Product block position – Select Top or Bottom
- Display image – if you want to display the image, select Yes
- Image type – Select from the three options : Thumbnail, Main, Both Main and additional images
- Link image to product – Choose Yes if the image is to be linked with the product
- Enable zoom effect – Select Yes to enable zoom effect
- Image width & Additional image width – Set the width of the image in pixels
Step 5: Save the settings and go to Item View tab to set the values, see the screenshot below:
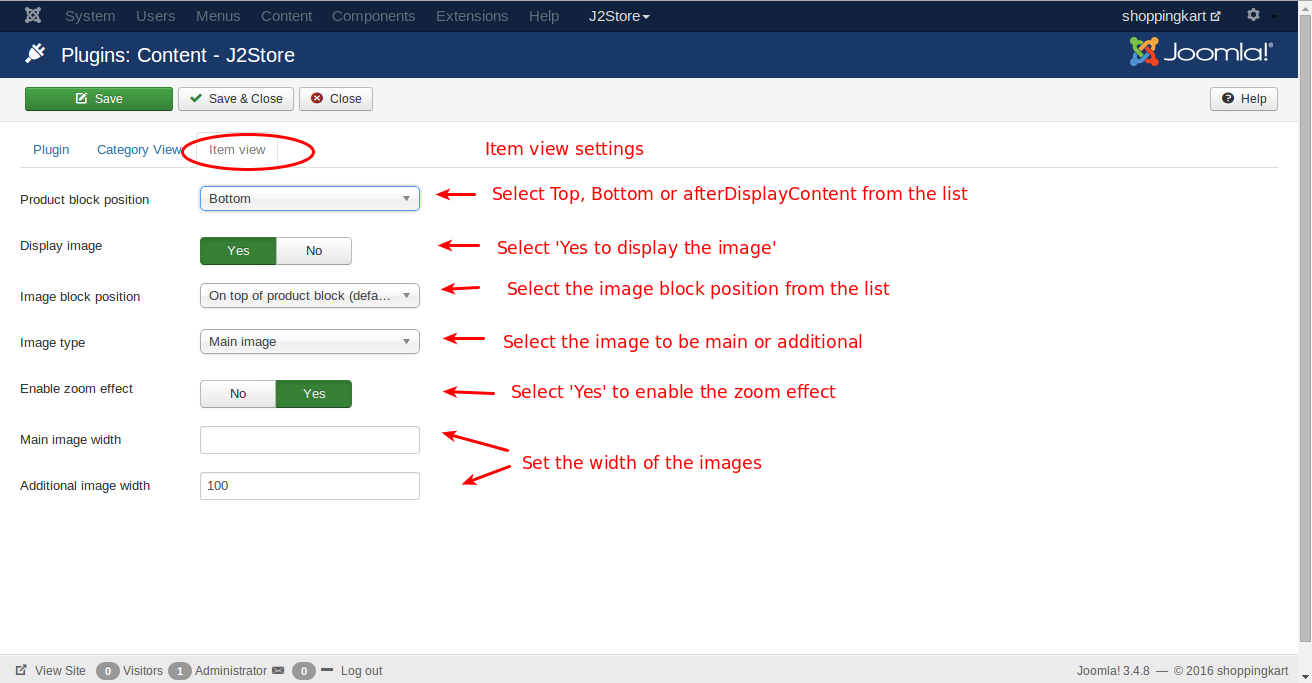
Step 6: Follow the steps for the settings to be made:
- Product block position – Select Top, Bottom or afterDisplayContent.
- Display image – select Yes if you want to display the image.
- Image block position – There are 3 options. Select one accordingly or leave the default selection:
– On top of product block (default)
– Attach to Before Content plugin event
– Attach to After Content plugin event - Image type – Select Main or Both main and additional images
- Enable zoom effect – select Yes to enable zoom effect
- Main image width & Additional image width – Set the image width in pixels
Step 7: Save.
You’re done. Now, it’s ready to be used in your store.
If you have any question about this post, don’t hesitate to leave a comment below. And don’t forget to share with your friends if you find it useful! Thanks!

